Create Word report
Available in all Qalyptus Cloud subscriptions.
Overview
After creating an Word report in Qalyptus, the next step is to design the report template using Word.
You can open the report template in either Word Desktop (installed version) or Word for the Web (browser-based version).
When you open the template:
- The Qalyptus Cloud Word add-in automatically opens in the task pane on the right.
- If it is your first time, a confirmation message will appear to install the add-in. For future use, the add-in will open automatically without confirmation.
This add-in is used to insert Qlik Sense objects and variables into your Word report template.
Open the Report Template
- Go to the Reports list in Qalyptus Cloud.
- Find your Word report and click Open In.
- Choose Word Desktop or Word for the Web.
- The report template will download and open with the Qalyptus Cloud add-in on the right side of the Word window.
Using the Qalyptus Cloud Add-in
The add-in provides several tabs to help you design your report:
- Apps: Lists all your synchronized Qlik Sense applications (with name and space).
- Variables: Lists all variables from the selected app.
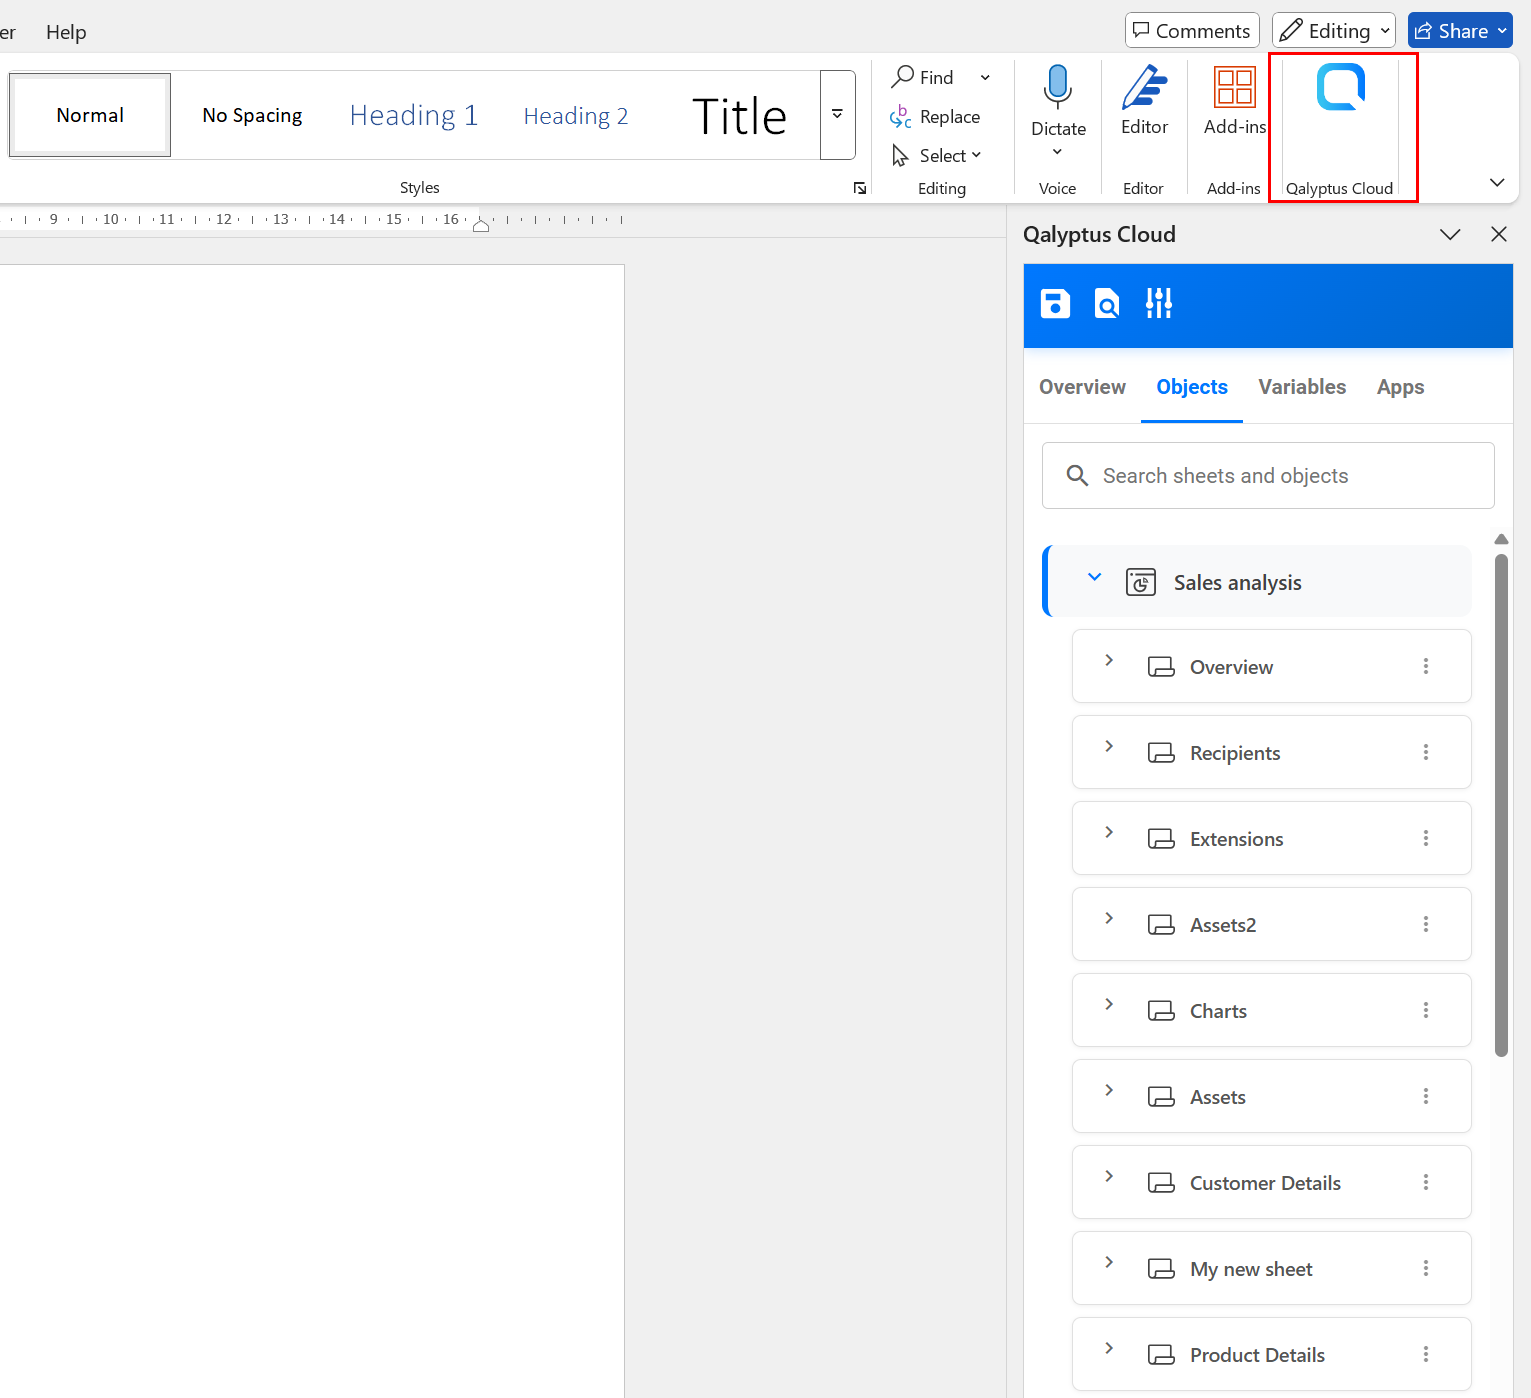
- Objects: Lists all sheets, objects, and master items from the selected app.
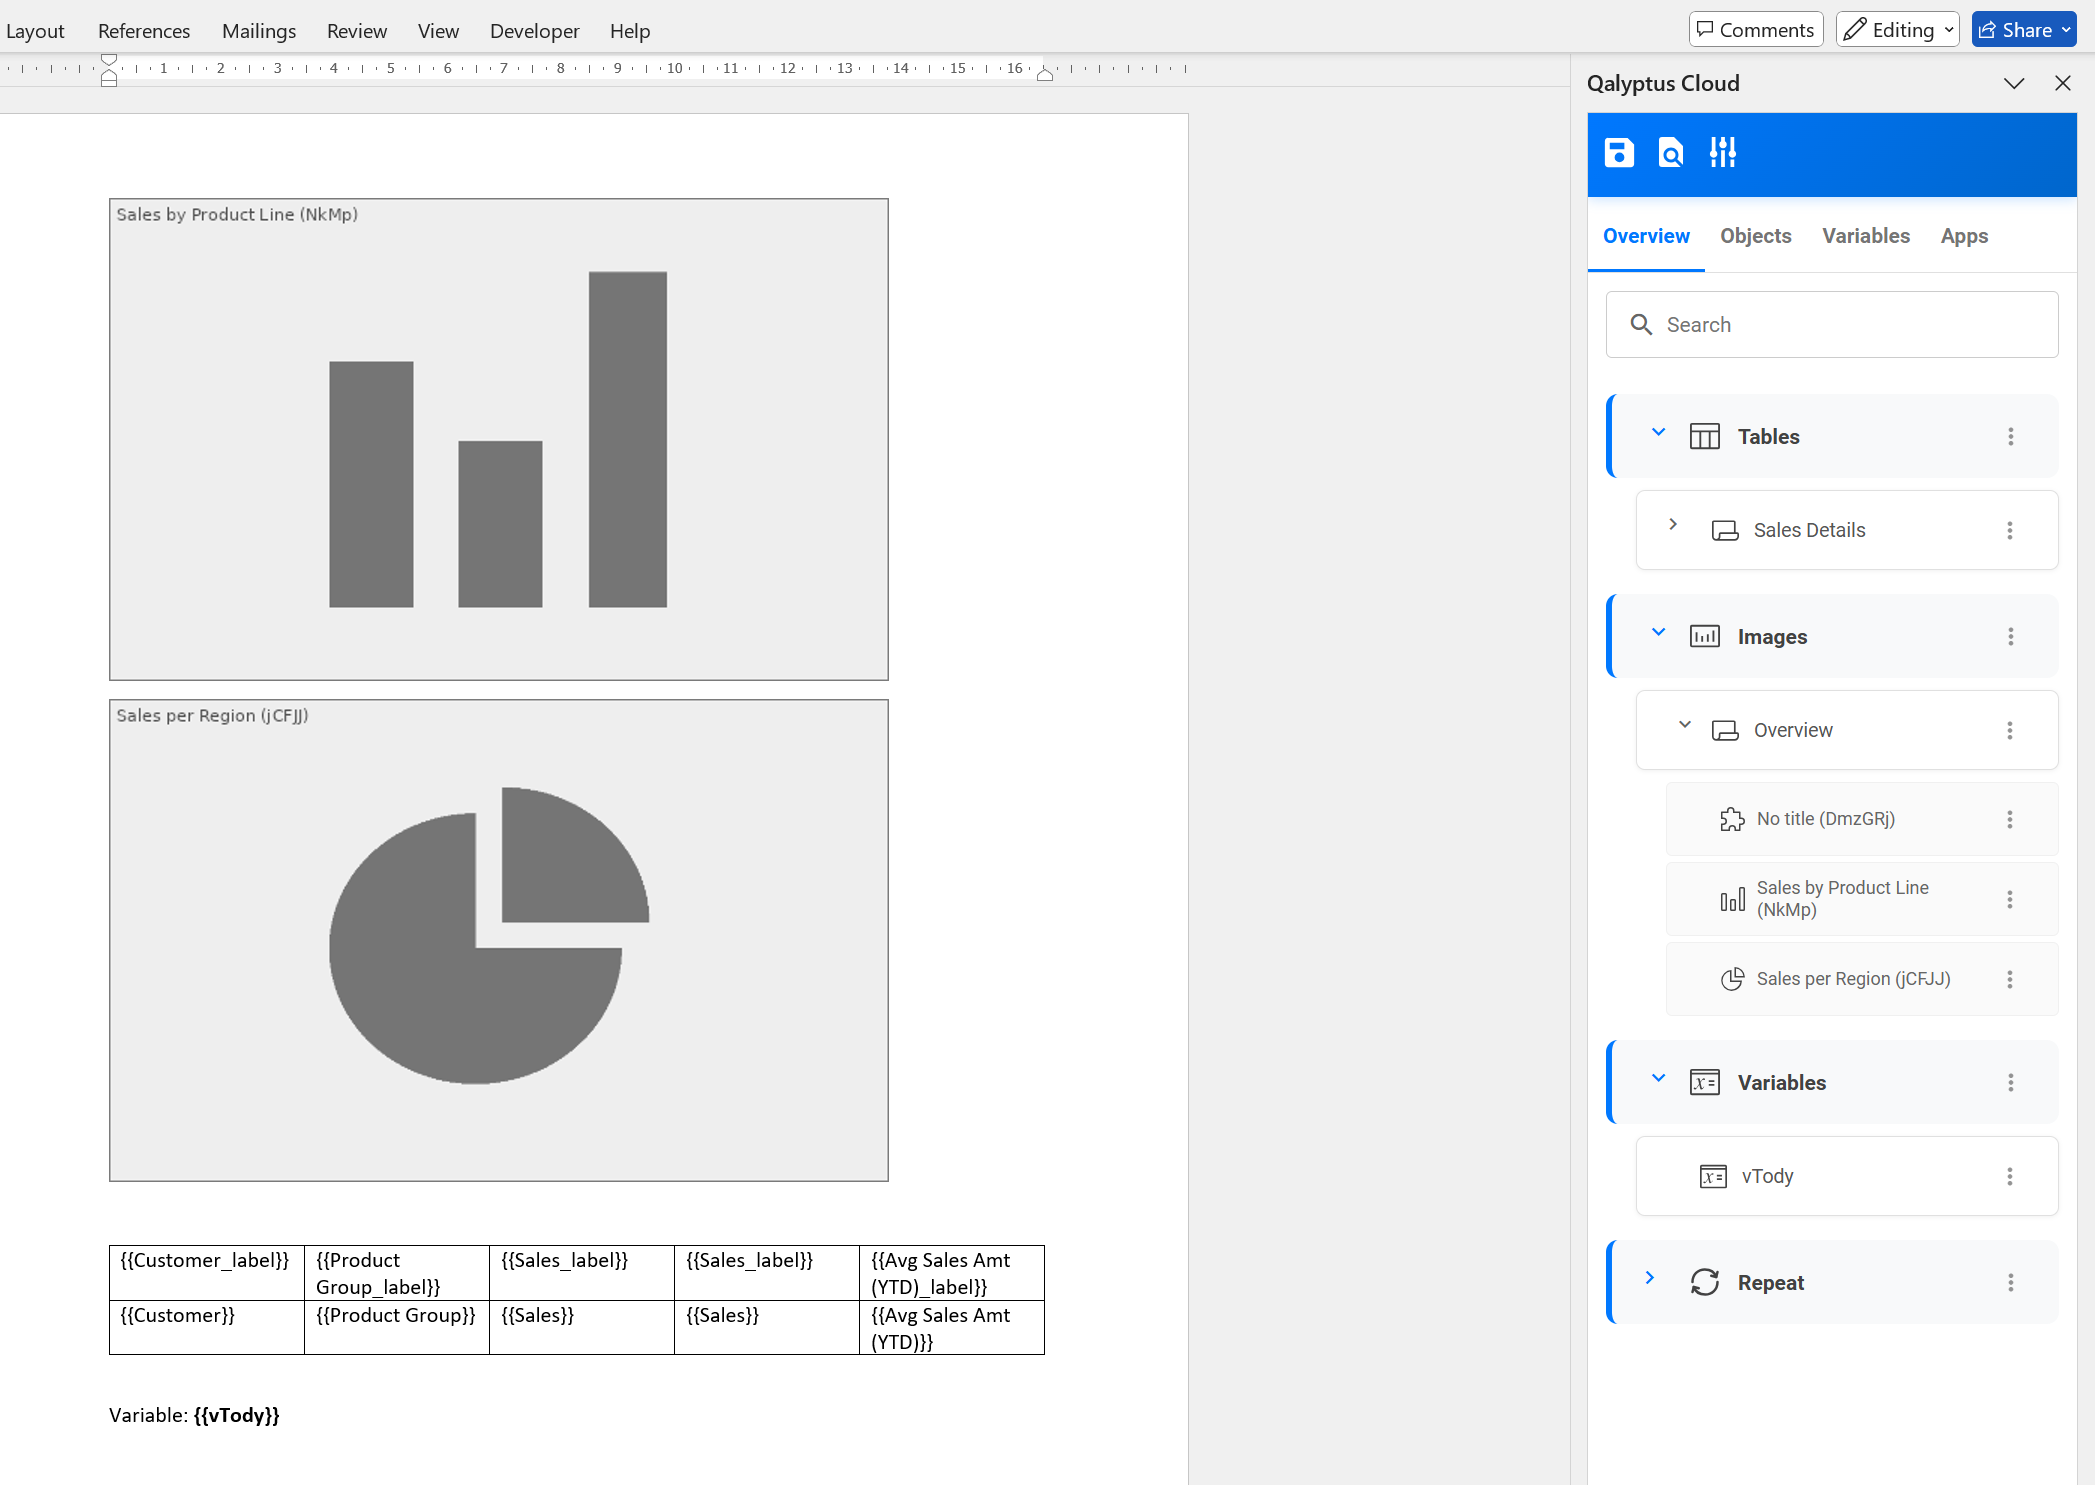
- Overview: Shows the objects and variables you have added to the report template.
Select Qlik Sense Apps
- Go to the Apps tab.
- In the drop-down list, select the app to use. Apps are displayed with their name and space. You can also use the search field to quickly find an app.
- After adding an app, make sure its metadata is up to date.
- Click the three-dot menu next to the app and select App details to check the last refreshed date.
- If needed, click the three-dot menu again and select Refresh metadata to update it.
- You can add one or multiple apps to build your report template.
Add Objects to the Template
- In the Objects tab, find the object you want to add (table, chart, or sheet). You can use the search field to quickly find an object, or browse the tree structure of sheets and objects.
- Click the three-dot menu next to the object.
- Choose to add it as:
- Table
- Image
The selected objects will be added to the Overview tab.
Qalyptus displays Qlik Sense objects with their title and a type icon.
If an object does not have a title in Qlik Sense, Qalyptus will show the type icon and assign it the name "No title".
We recommend adding a title to all your Qlik Sense objects.
If you do not want the titles to appear on the Qlik Sense sheet, you can hide them there, Qalyptus will still display them in the template editor.
Add Variables to the Template
- Go to the Variables.
- Scroll through the list or use the search field to quickly find a variable.
- Click the plus button to use the Variable.
- The variable will be added to the Overview tab.
The selected variables will be added to the Overview tab.
Insert Objects and Variables into Word
- In the Overview tab, find the object or variable you want to insert.
- Select the place in Word file where you want to insert the object or variable.
- Click the three-dot menu and choose Insert.
- For tables, you have two options:
- Insert: Inserts the full table as-is (default formatting).
- Insert Columns: Inserts columns individually, allowing you to customize formatting (bold headers, gridlines, colors, etc.).
- For variables: select Insert to place them in the file.
- For sheets: you can insert them as images.
- For tables, you have two options:
- To insert the object title, select Insert title.
Format Objects in Word
After inserting objects, you can:
- Move or resize charts and images.
- Adjust table formatting (headers, borders, background colors, etc.).
- Apply Word features such as conditional formatting, formulas, and charts.
Please learn more about formating in the secrion Formating and Customiszation.
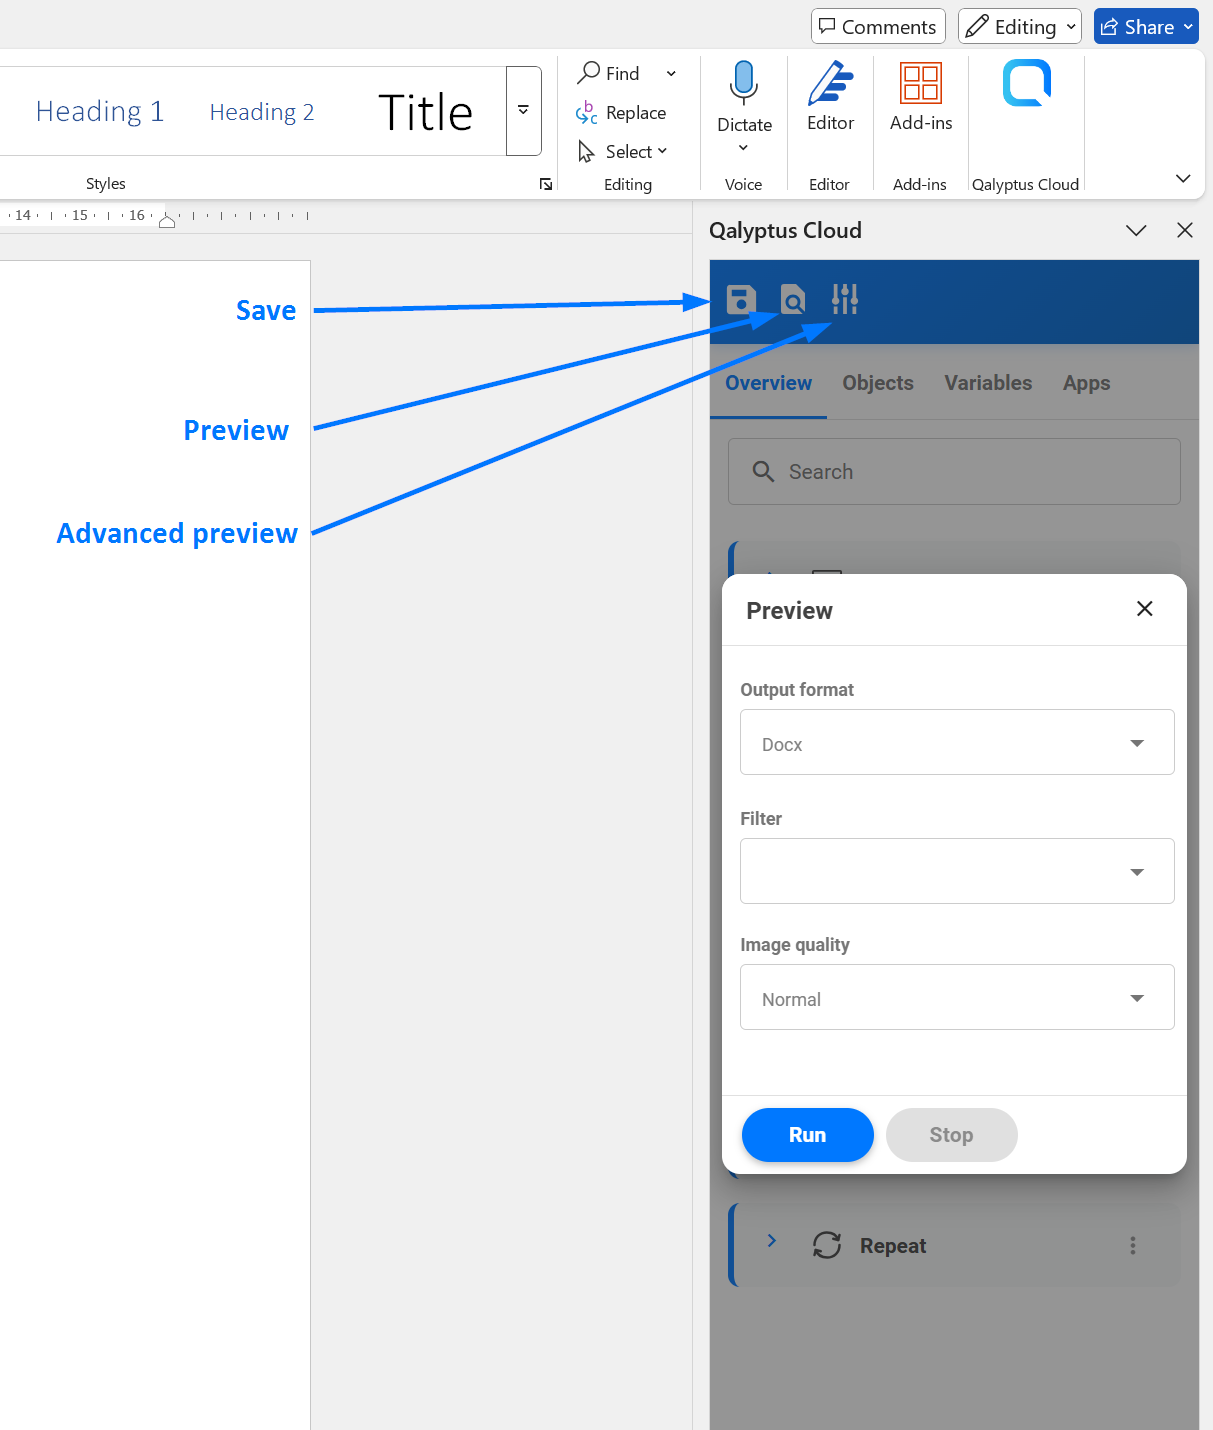
Preview the Report
At any time, you can preview your report to see how it looks after adding Qlik Sense objects to the template.
1- Default preview
Click the Preview button to generate the report with default settings.
- Output format: .xlsx
- No filters applied.
- Image quality: Optimized.
- You can stop and restart the generation process at any time.
- Advanced Preview
Click the the Advanced preview button to customize the settings.
- Choose the output format.
- Apply a filter at the report level. Filters at the object level will still apply after the report-level filter.
- Set the image quality for all report objects.
- Click Run to start the report generation.
- Stop and restart the generation process as needed.
The quality setting in Preview applies only to objects with their image quality property set to Inherited. If an object has a specific image quality setting, that will take precedence.
Third-party objects (extensions) and sheets exported as images will always use Standard image quality. It is not possible to select another option for these items.
When you run a preview, the report is first saved in your Qalyptus Cloud account.
Qalyptus then starts the report generation process:
- After a few seconds, the Stop button becomes available, allowing you to cancel the process if needed.
- If the preview completes successfully, the report file is automatically downloaded. You can open it to verify that the result matches your expectations.
- If the process ends with errors, a log file is downloaded instead. You can review its content to identify the cause of the issue.
While running a preview, you can monitor the status under Qalyptus Cloud > Status > On-demand requests.
- If the process completes successfully, the entry is automatically removed.
- If it ends with errors, the entry remains, and you can download the log file at any time.
Save Template
A template consists of the Word file and the Qlik Sense objects selected from your app.
- Changes made to object settings are saved automatically.
- The Word file itself is saved automatically when you Preview the report.
- If you are not running a preview, click the Save button at the top of the add-in to store the template in your Qalyptus Cloud account.
After saving, you can safely close or delete the local copy of the template file (for Word Desktop) from your machine. You can retrieve the template at any time from Qalyptus Cloud by reopening it.
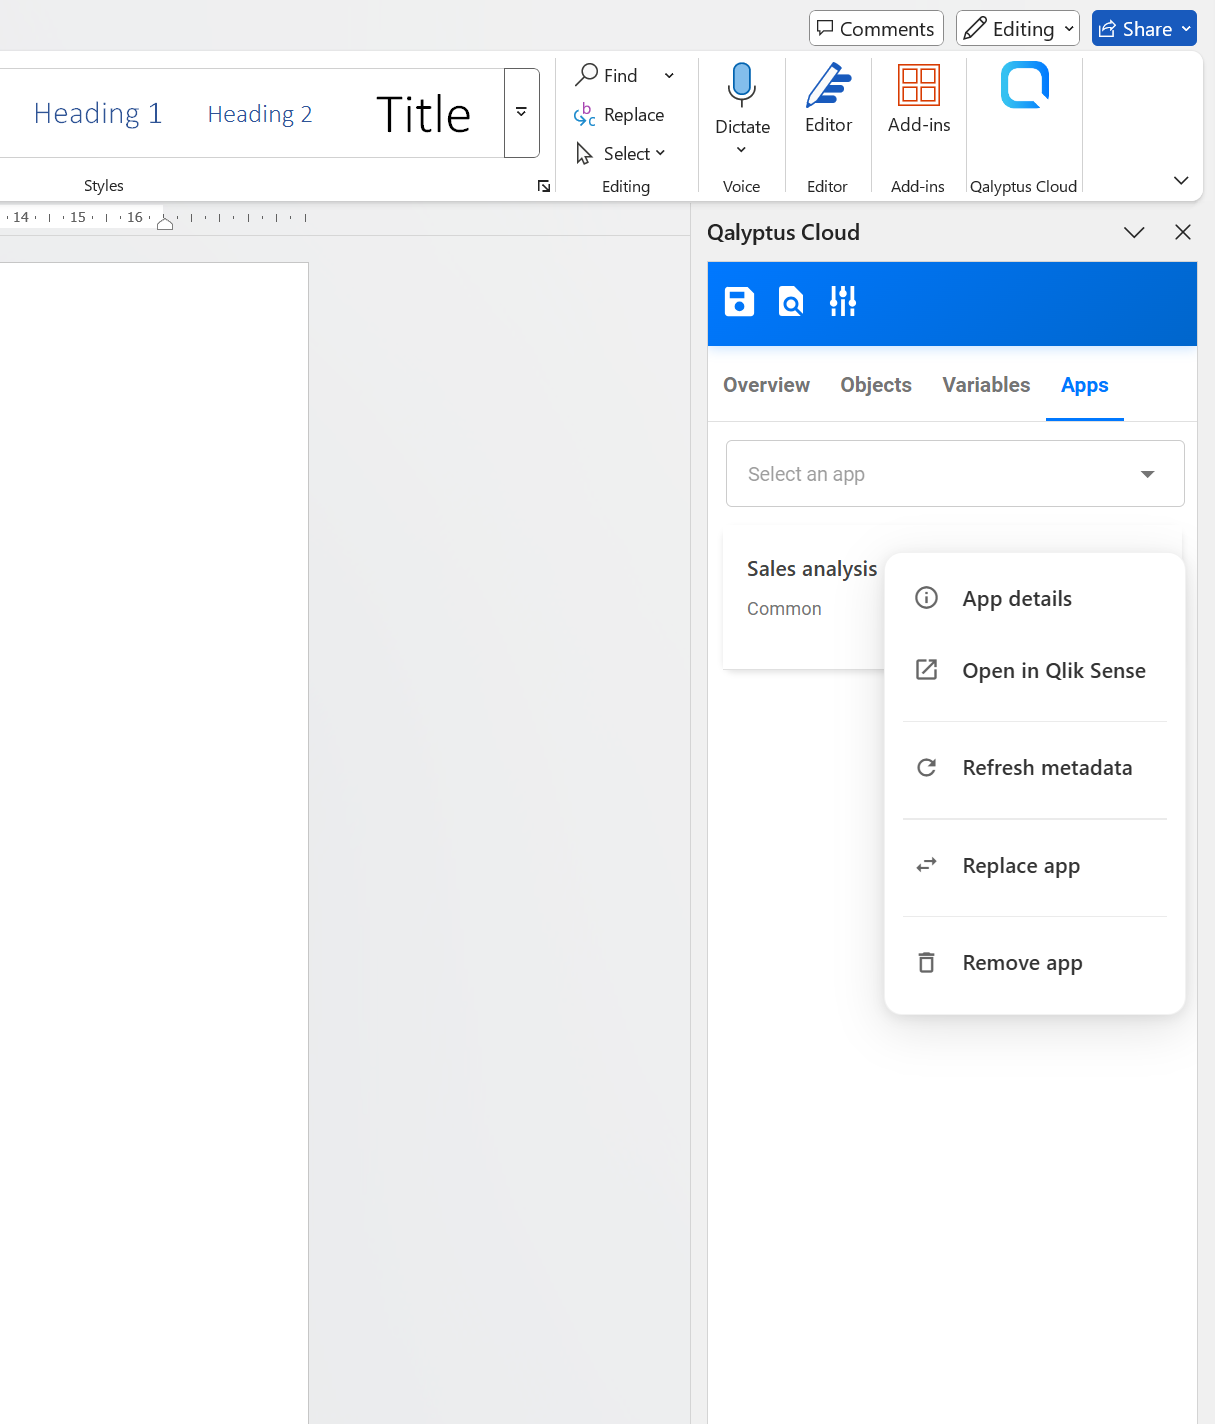
Manage Qlik Sense Apps
The report is created using the objects and variables of one or more Qlik Sense apps.
The Apps tab allows you to manage the applications used in your report template.
- You can select one or multiple apps to design the report template.
- Apps may come from a user’s personal account or from a published space.
- Click the three-dot menu next to an app to access the following options:
App Options
- App details: View details such as the app name, space, app ID, description, and the last metadata refresh date and time.
- Open in Qlik Sense: Open the app directly in Qlik Sense.
- Refresh metadata: Update the app metadata to include the latest objects, fields, and variables from Qlik Sense.
- Replace app: Replace the current app with another app that contains the same objects (based on their IDs).
- The target app must have its metadata refreshed at least once.
- We recommend refreshing the target app metadata before replacement to ensure all objects match.
- Remove app: Remove the app from the template. This action also deletes all associated objects in the Preview tab and cannot be undone.
When replacing an app, it is essential that the objects used in the Overview tab exist in both apps.
- For sheets and objects, Qalyptus checks the object ID. The IDs must match in both apps.
- For variables and fields, Qalyptus checks the name. The names must match exactly.
If a sheet or object is missing in the target app, simply creating a new one with the same name will not work because the IDs will be different.
In this case, we recommend removing the object from the Overview tab, replacing the app, and then re-adding the object from the new app. Make sure the object matches correctly with the template file.
For variables and fields, you can create the missing elements in the target app with the same name. Afterward, refresh the target app’s metadata before replacing the app.
Authentication and Session Expiration
The template file contains the authentication information of the user who opened it.
This authentication session will expire after a certain period of time.
If you continue working with the same file for a long time, or reopen it after several hours or days, you may see an error message indicating that you are not authenticated.
In this case:
- Close the file.
- Return to Qalyptus Cloud.
- Open the template again from the report to start a new authenticated session.
Related Links
- Distribute reports – Learn the different methods available to distribute reports.
- Choose output formats – Generate and distribute reports in multiple output formats.
- Protect report files – Add password protection to distributed report files.
- Filter reports – Apply filters to reports to limit or refine data.
- Generate reports by condition – Configure reports to run only when a specific condition is met.