Requirements
Overview
Qalyptus Cloud is a 100% hosted solution by Qalyptus and does not require software installation.
Below are minimal requirements to work correctly with Qalyptus Cloud.
OS
- Windows 11 or greater
- Mac OS X 10.7 or greater
Browser
- All modern browsers: Chrome, Firefox, Safari, Edge, etc.
- Internet Explorer is not supported
SMTP server
To send reports by email, Qalyptus will use your SMTP server. You should configure an SMTP server on Qalyptus Cloud.
Qalyptus Cloud supports all SMTP servers accessible via the Internet.
For security reasons, port 25 is not supported. We encourage you to use an authenticated SMTP relay service with port 587.
Microsoft Office
Qalyptus Cloud allows you to design reports with four options: HTML, Excel, Word, and PowerPoint. To design Excel, Word, and PowerPoint reports, Qalyptus uses an Office add-in that works with the following Office versions:
- Microsoft 365 desktop.
- Microsoft 365 for the web.
- Office 2021.
- Office 2019 (except volume license).
Qalyptus Office add-in is necessary to design reports; it is hosted in the Microsoft Addins Store and installed automatically after opening a report template. When using Microsoft 365 desktop or Office, the add-in must be added to your Microsoft 365 or Office instance. If your organization allows the installation of Office add-ins from the store, you don't have to do anything on your part.
Otherwise, you can:
- Use Microsoft 365 for the web to design the report (fully integrated into Qalyptus).
- Or Deploy the Qalyptus add-in in the Microsoft 365 admin center.
- Or Deploy the Qalyptus add-in Locally in Office Desktop options.
Deploy Qalyptus add-in
Centralized deployment in the Microsoft 365 admin center
This method allows you to deploy Qalyptus Cloud add-in securely to your organization's desired users and groups. Before you begin:
1- See Determine if Centralized Deployment of add-ins works for your organization.
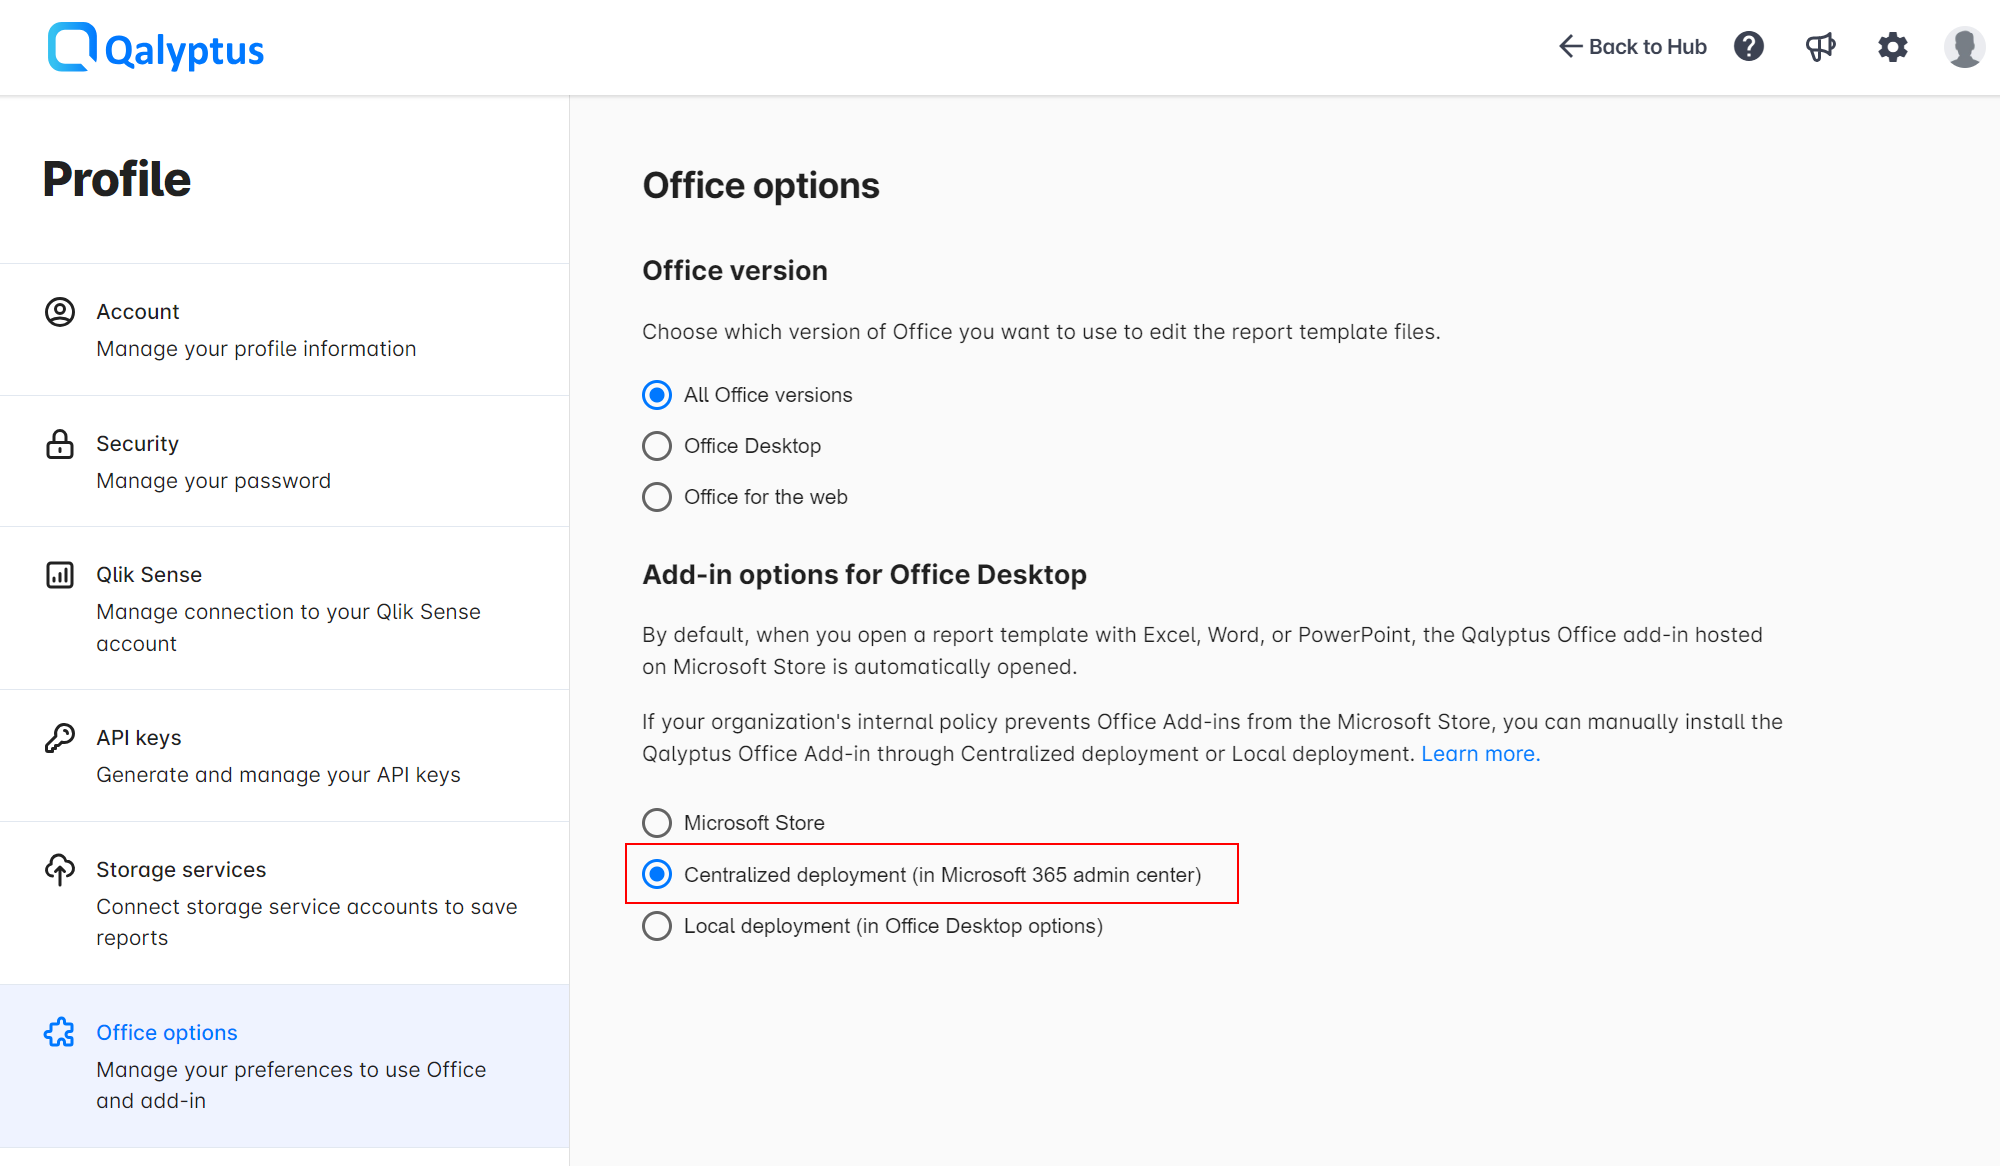
2- The user must choose the option Centralized deployment (in Microsoft 365 admin center) in Profile > Office options > Add-in options for Office Desktop.
The deployment requires intervention from a Microsoft 365 administrator in your organization.
To deploy the Qalyptus add-in using the Microsoft 365 admin center, do the following:
- Navigate to Microsoft Admin Center (admin.microsoft.com).
- In the admin center, go to the Settings > Integrated apps > Add-ins page.
- If you cannot see the Integrated app, go to the following page: admin.microsoft.com/#/Settings/AddIns
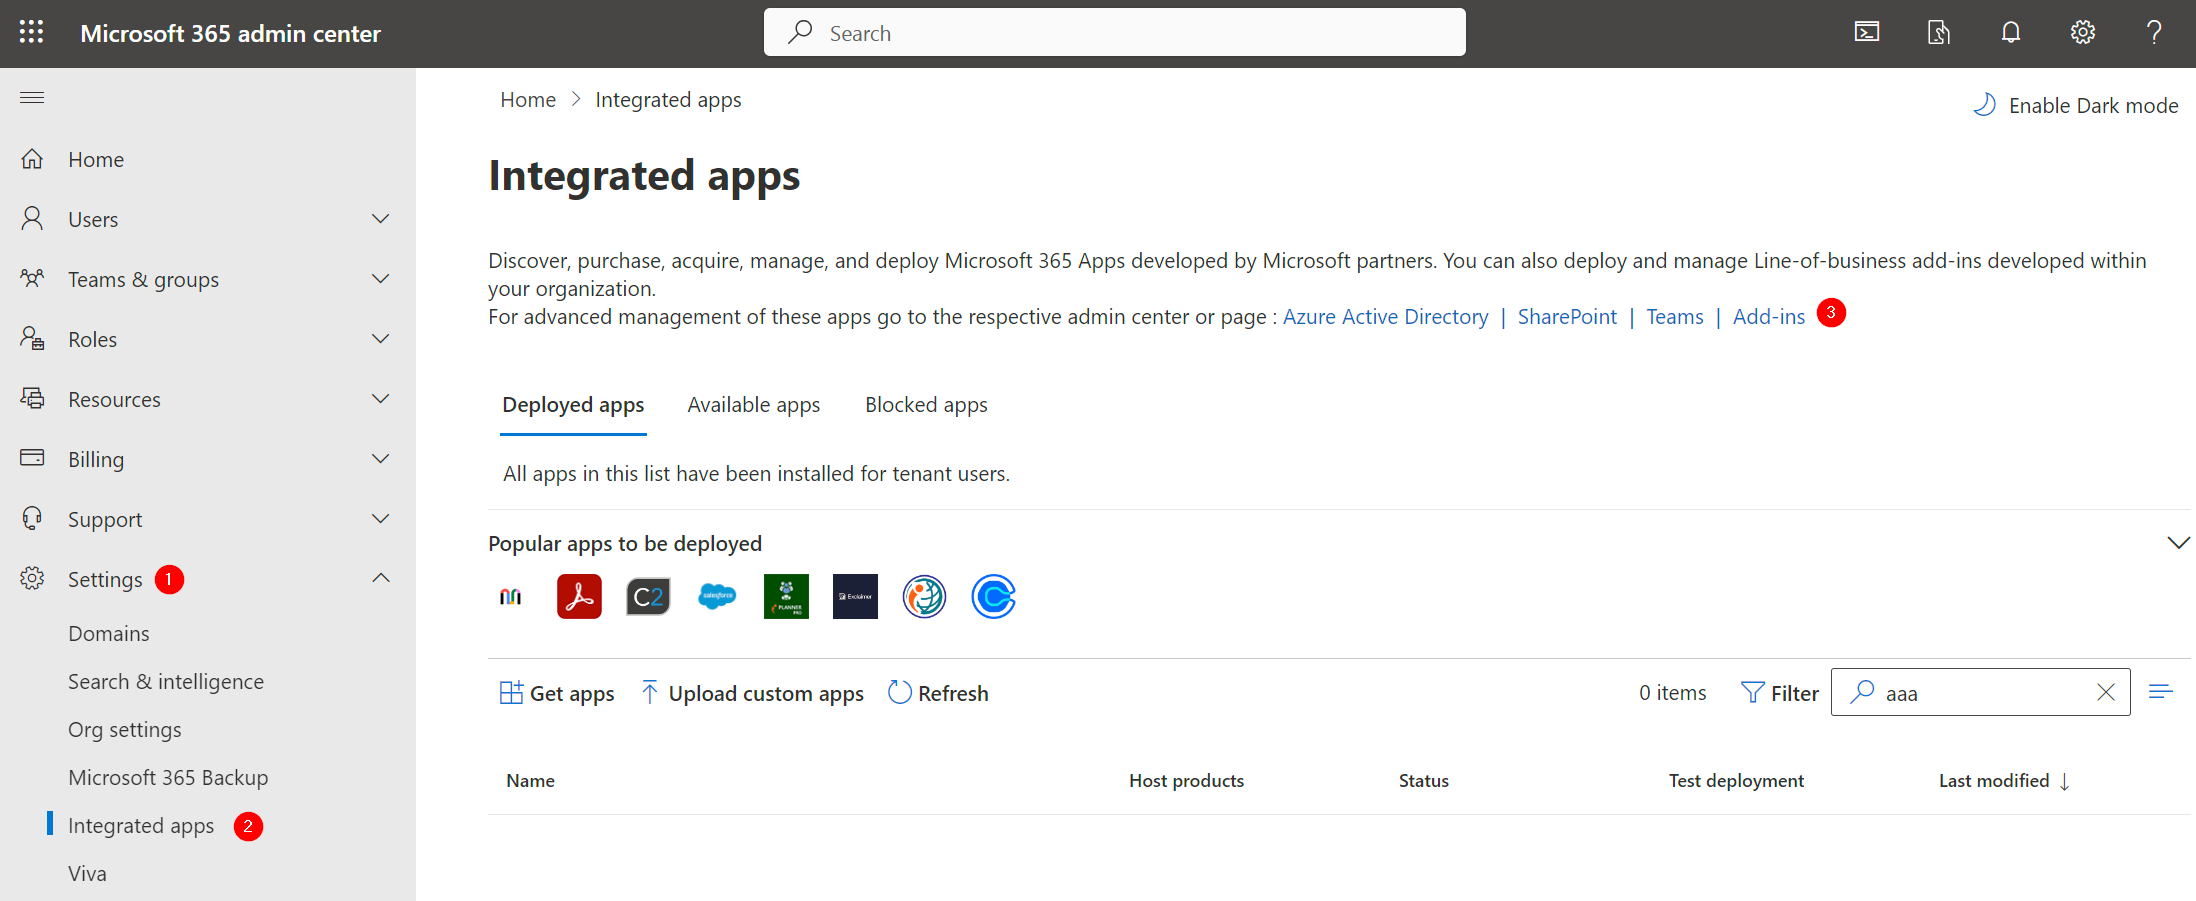
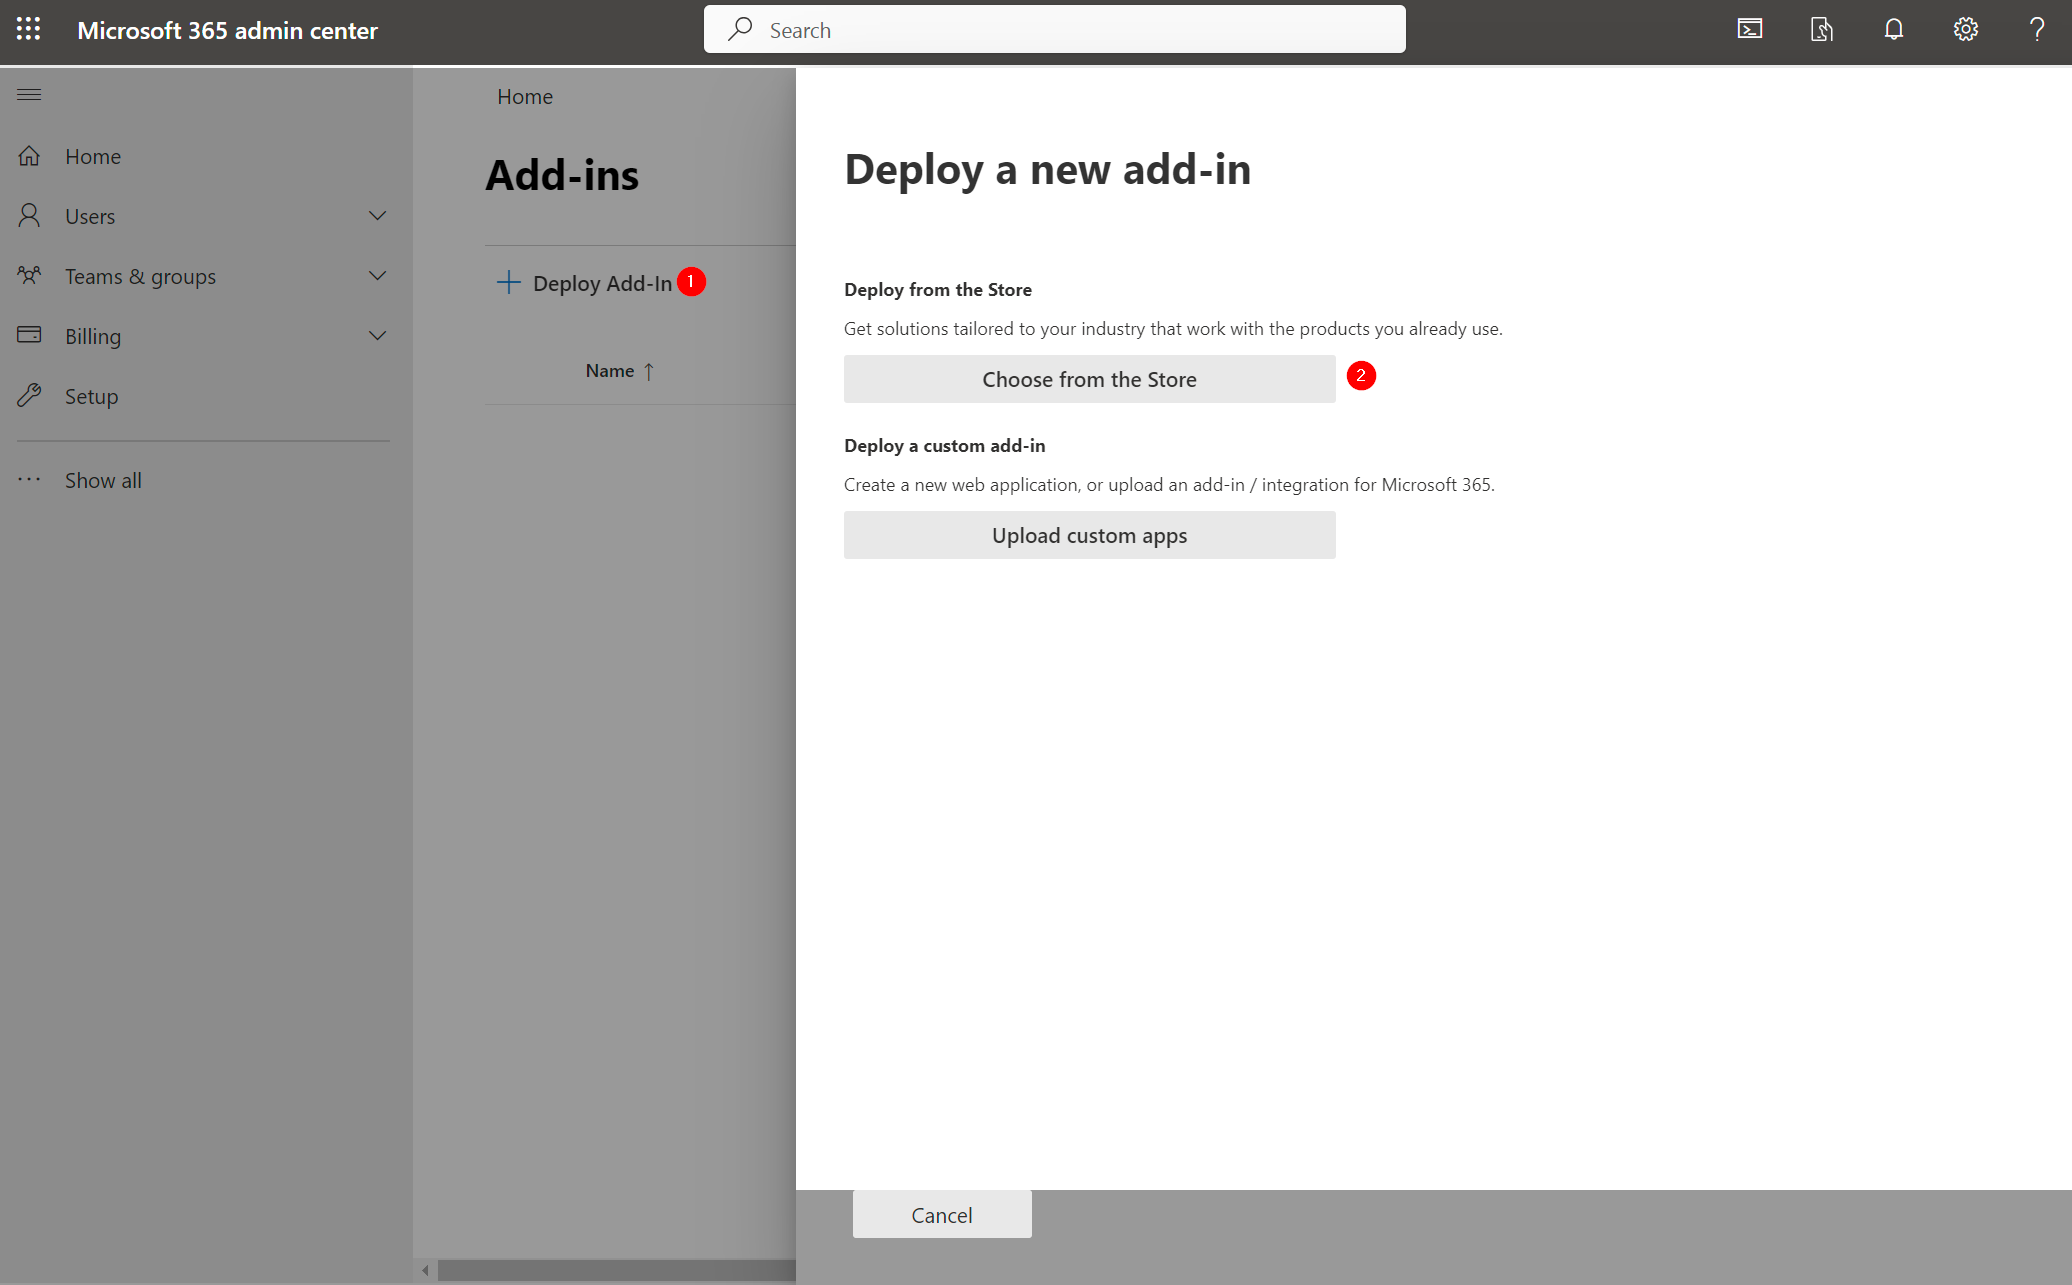
- Click Deploy Add-In.
- Click Next.
- Click Choose from the Store.
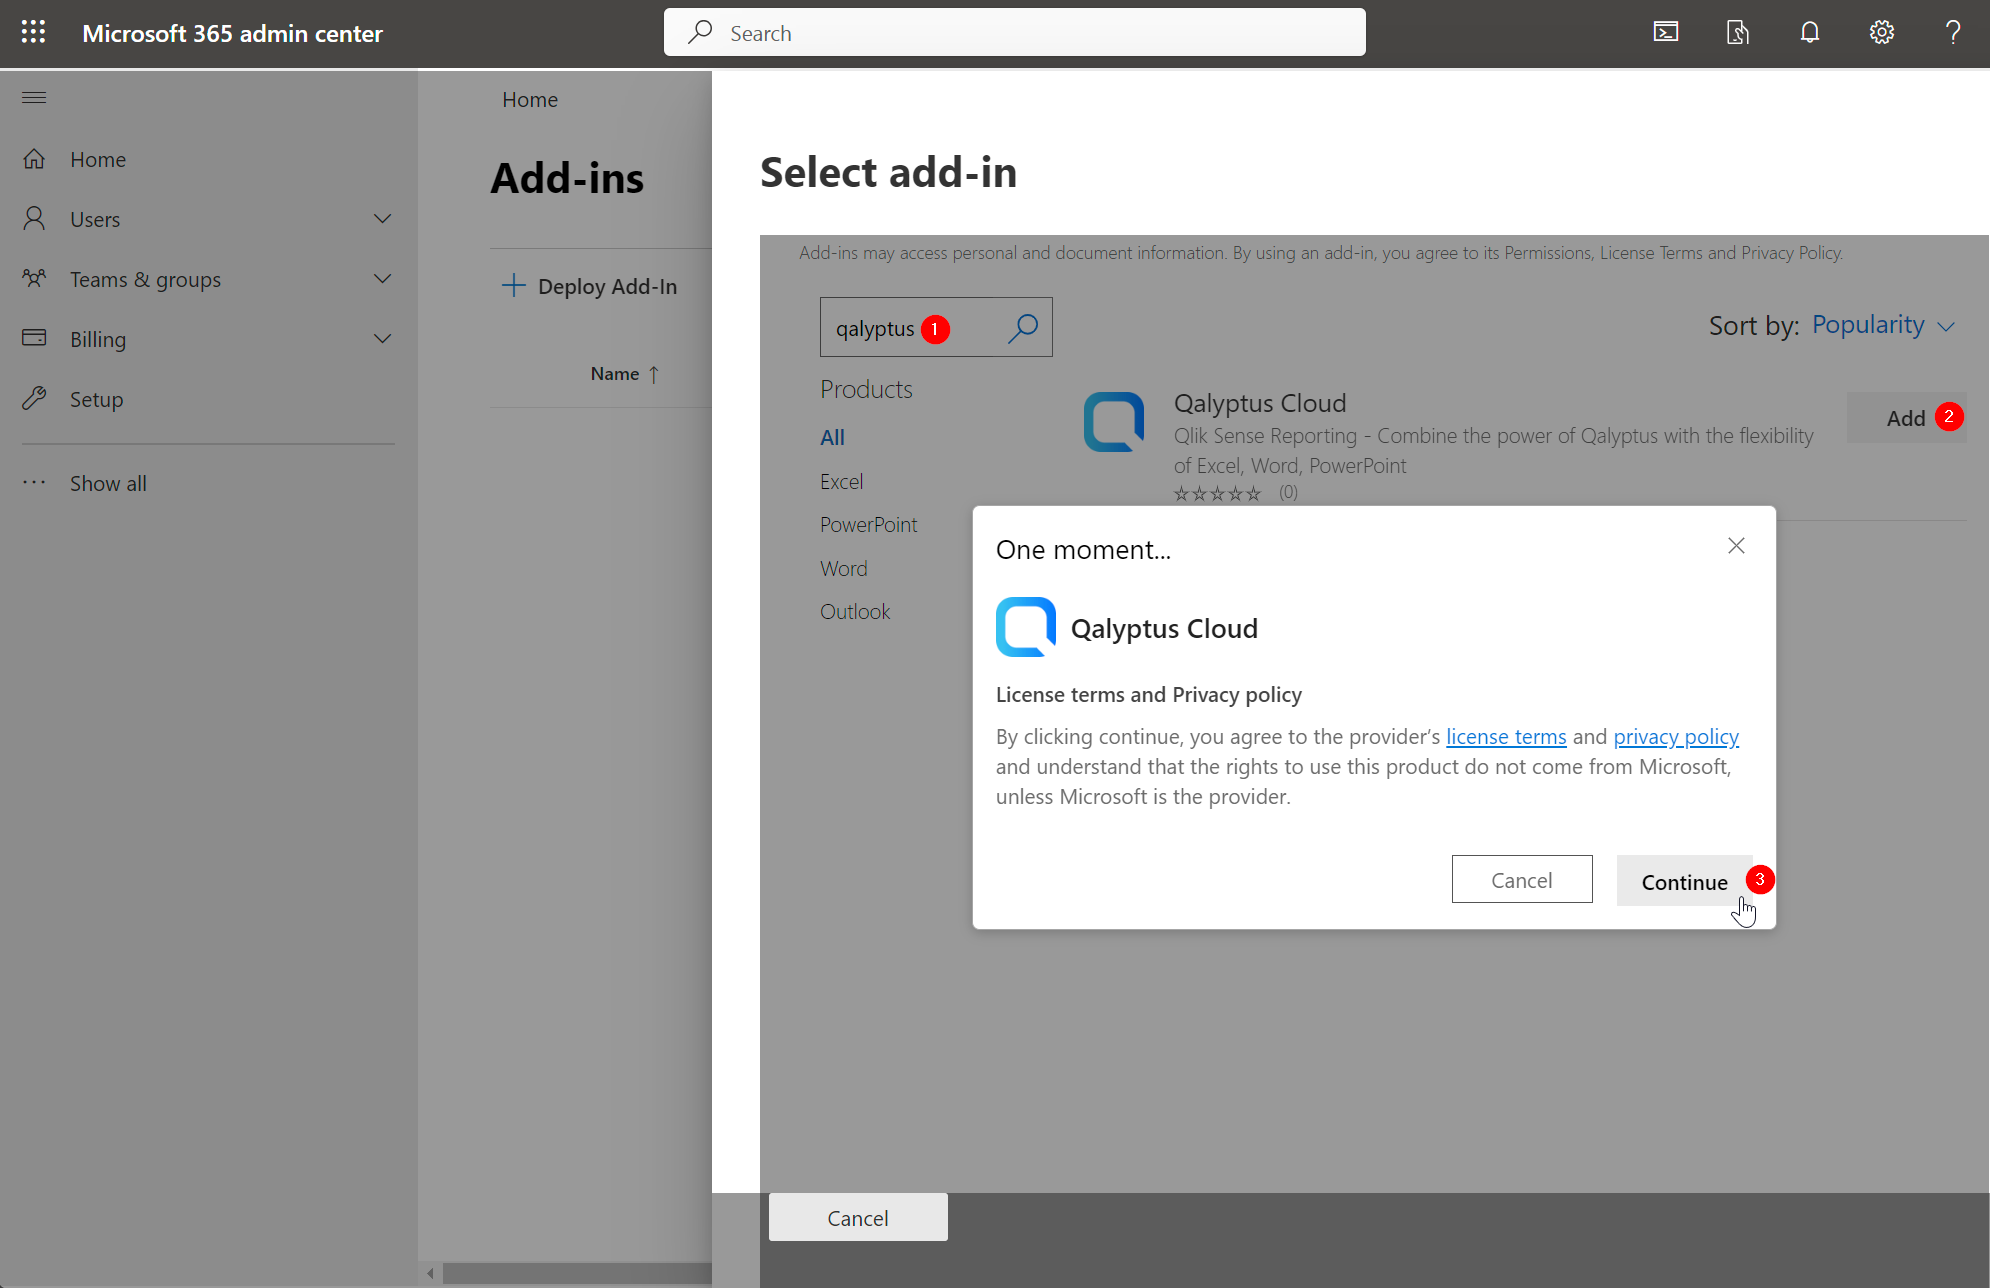
- Search with the word qalyptus in the list of add-ins.
- Select Qalyptus Cloud add-in and click Add.
- Click Continue to accept the License terms and Privacy policy.
- Choose which users will have access to the Qalyptus Cloud add-in.
- Click Deploy.
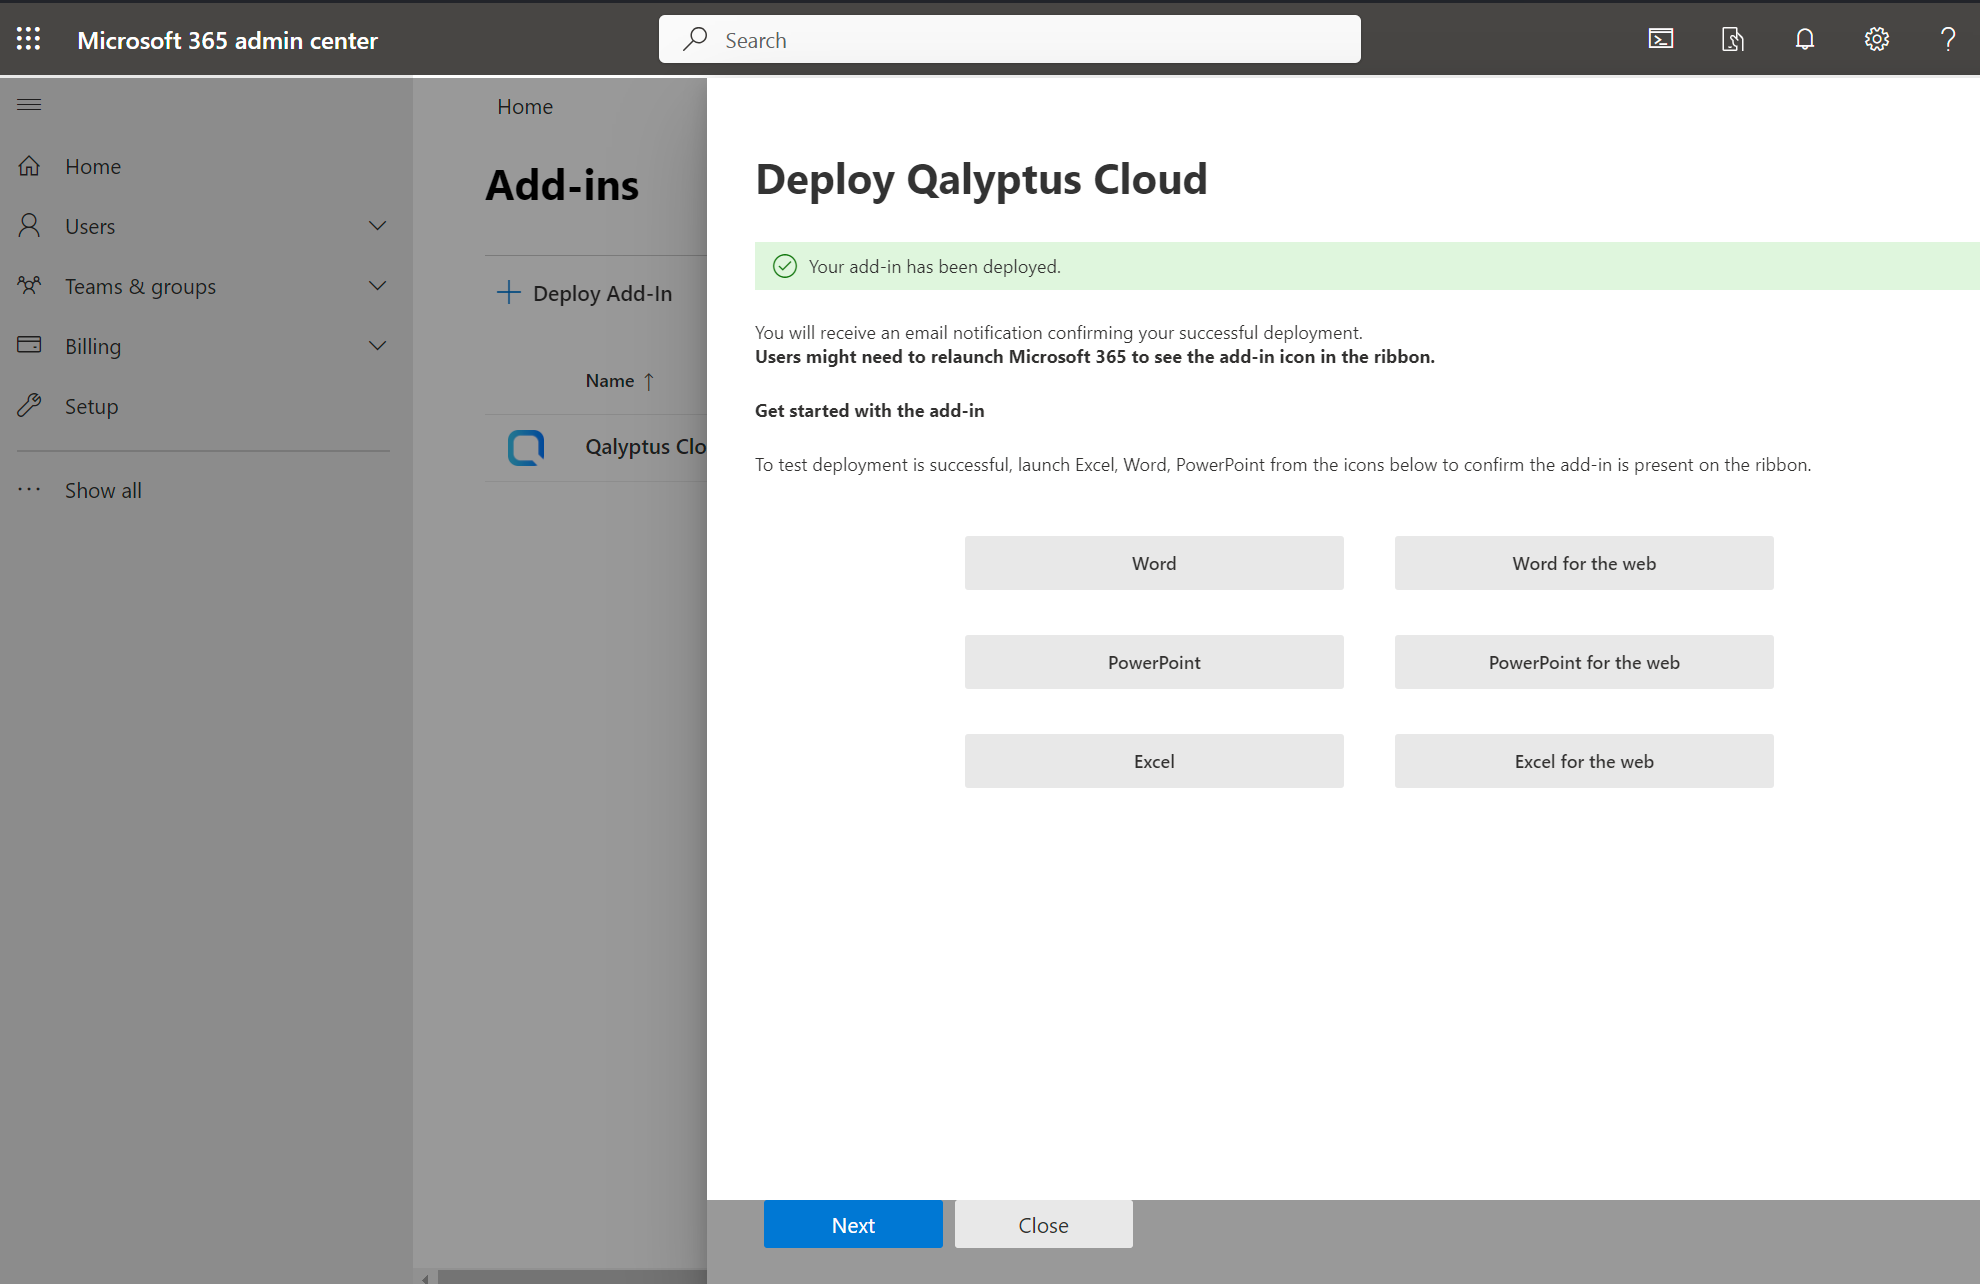
- You should see a message confirming the deployment of the add-in.
- Click Next, then Close.
- The configuration is done.
- When a user edits a Qalyptus Cloud report template, the Qalyptus add-in opens automatically.

Local deployment in Office Desktop options
This section will show how to install the Qalyptus Office add-in in Excel, Word, and PowerPoint.
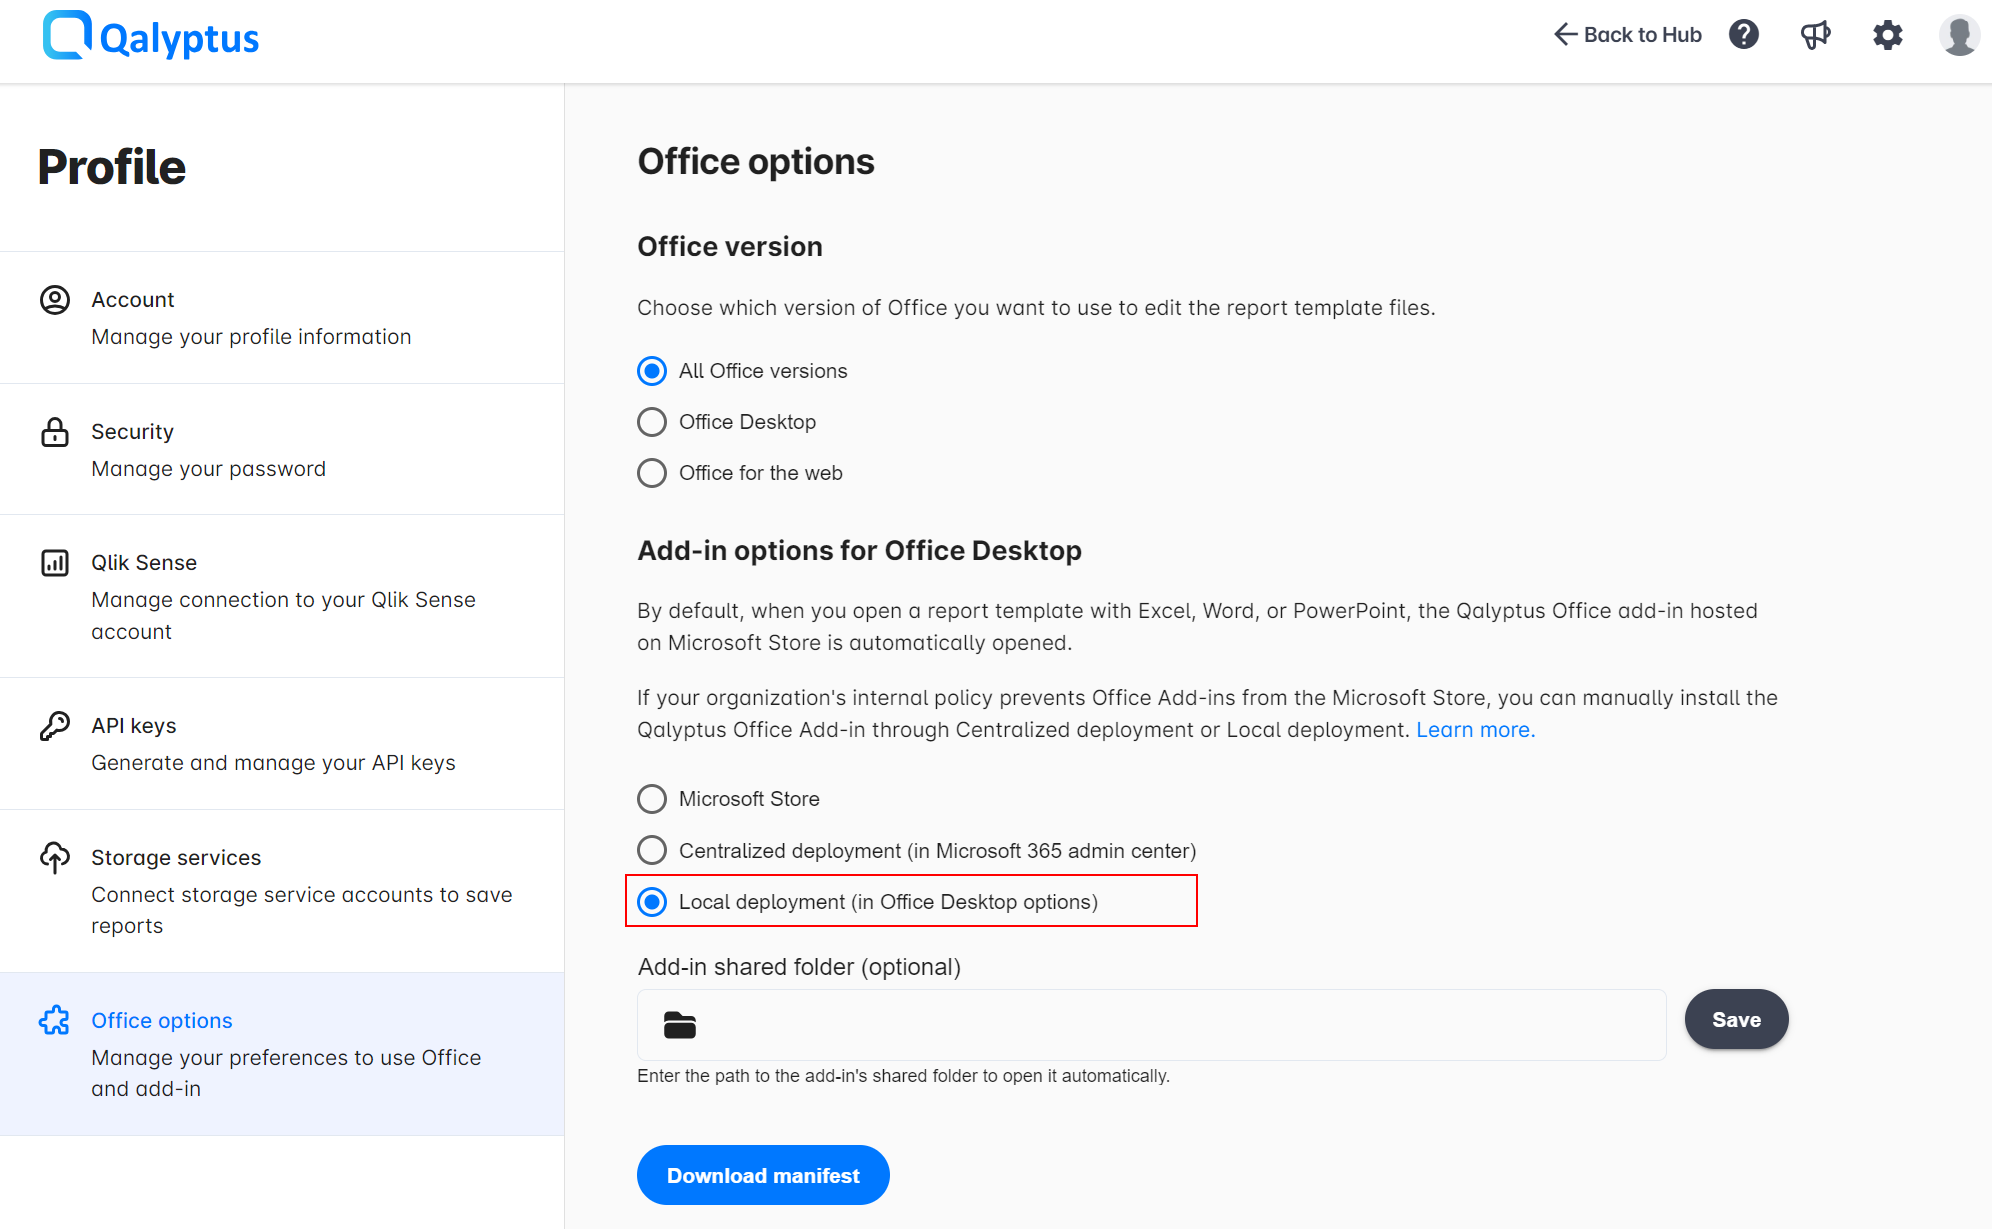
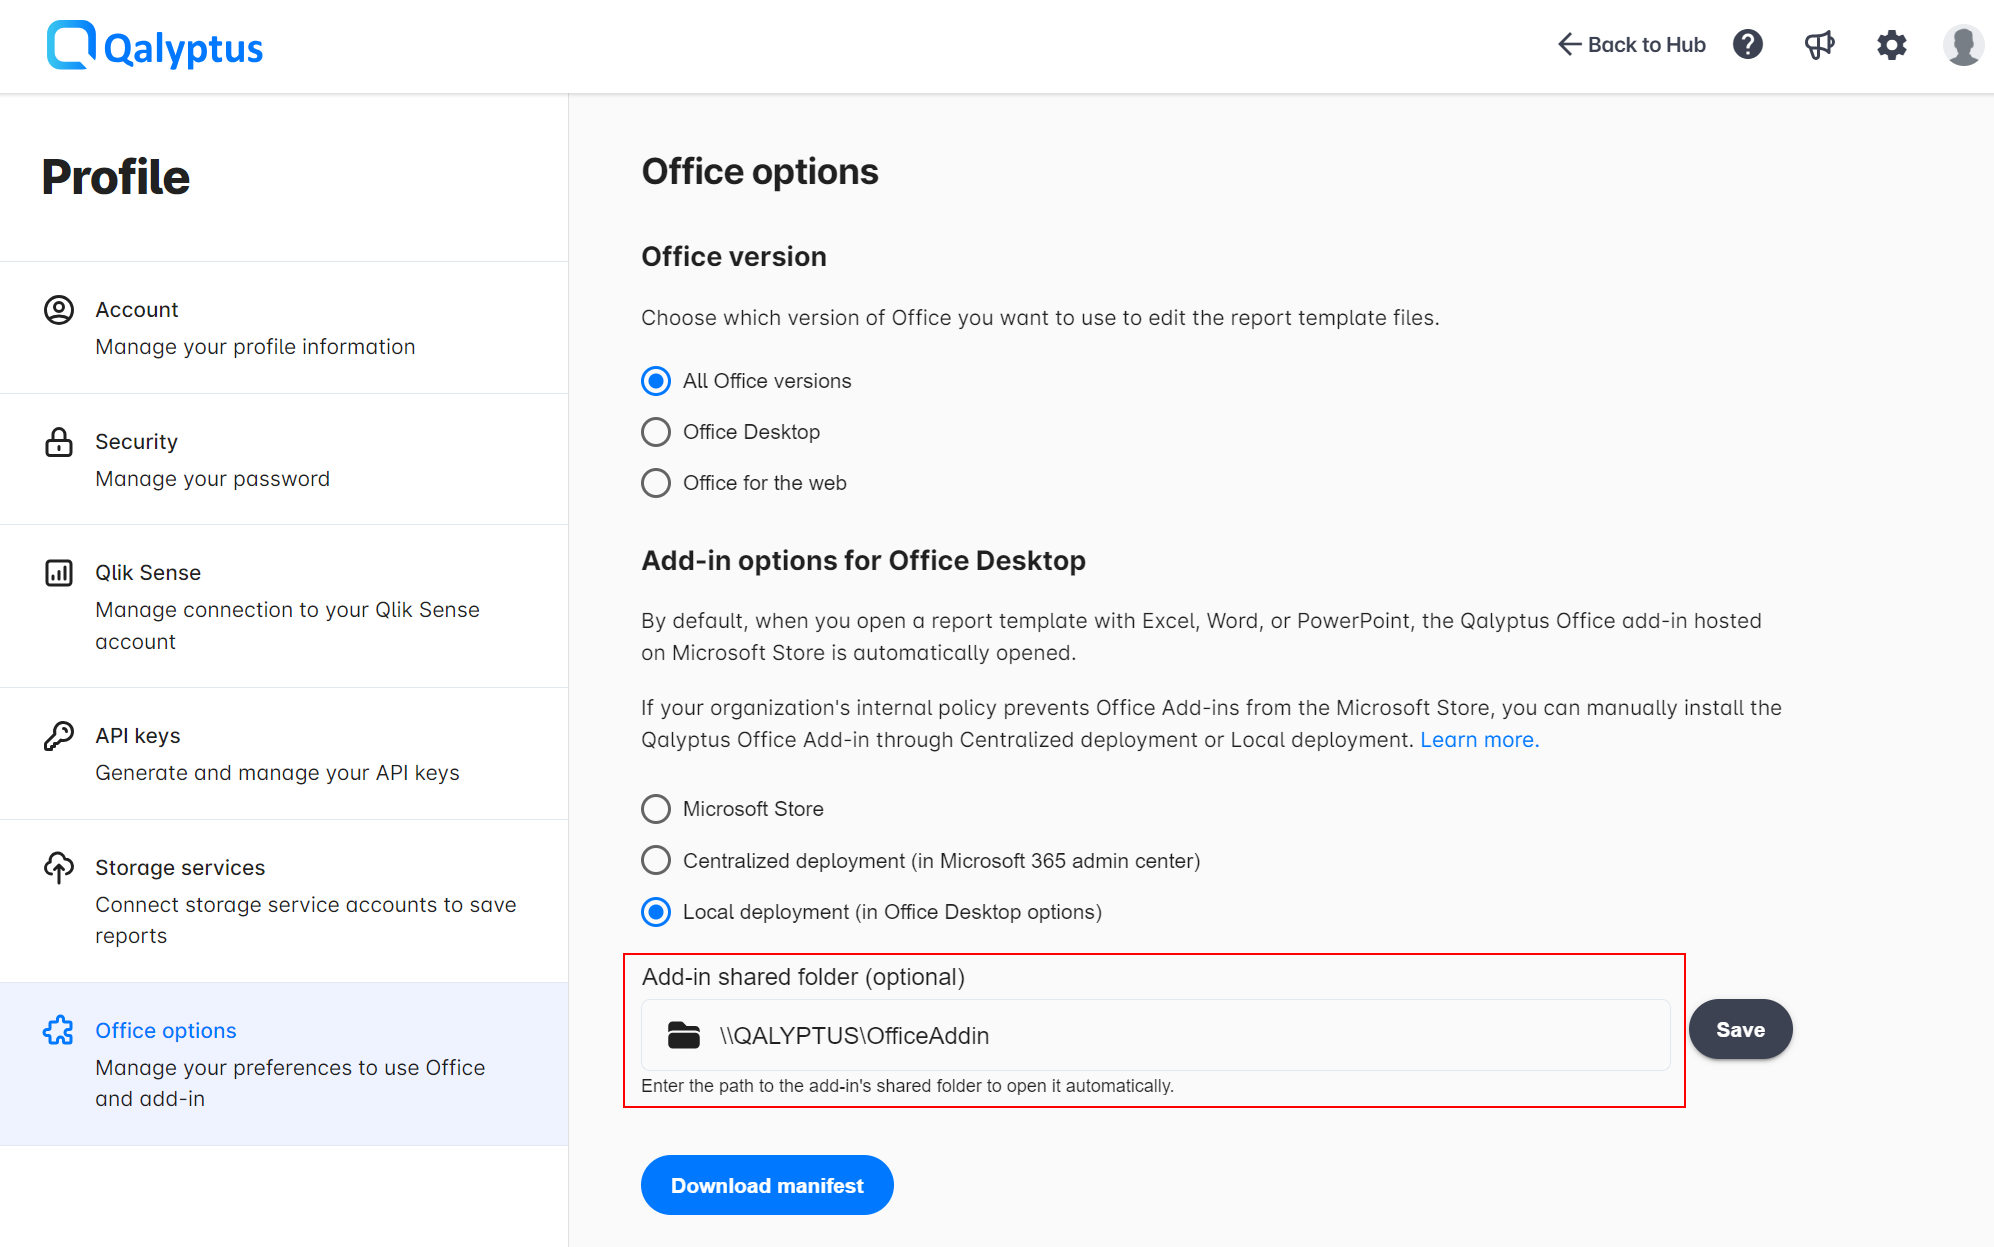
- Open Qalyptus Cloud and navigate to your profile.
- Go the Qalyptus Office add-in section.
- Select the option Local deployment (in Office Desktop options).
- Click Download manifest.
- Save the manifest file in a desired folder on your PC.
- In our example, we saved the manifest file in C:\Qalyptus\OfficeAddin.
- Right-click on the folder and select Properties then share the Folder with your user.
- Copy the share path \\QALYPTUS\OfficeAddin.
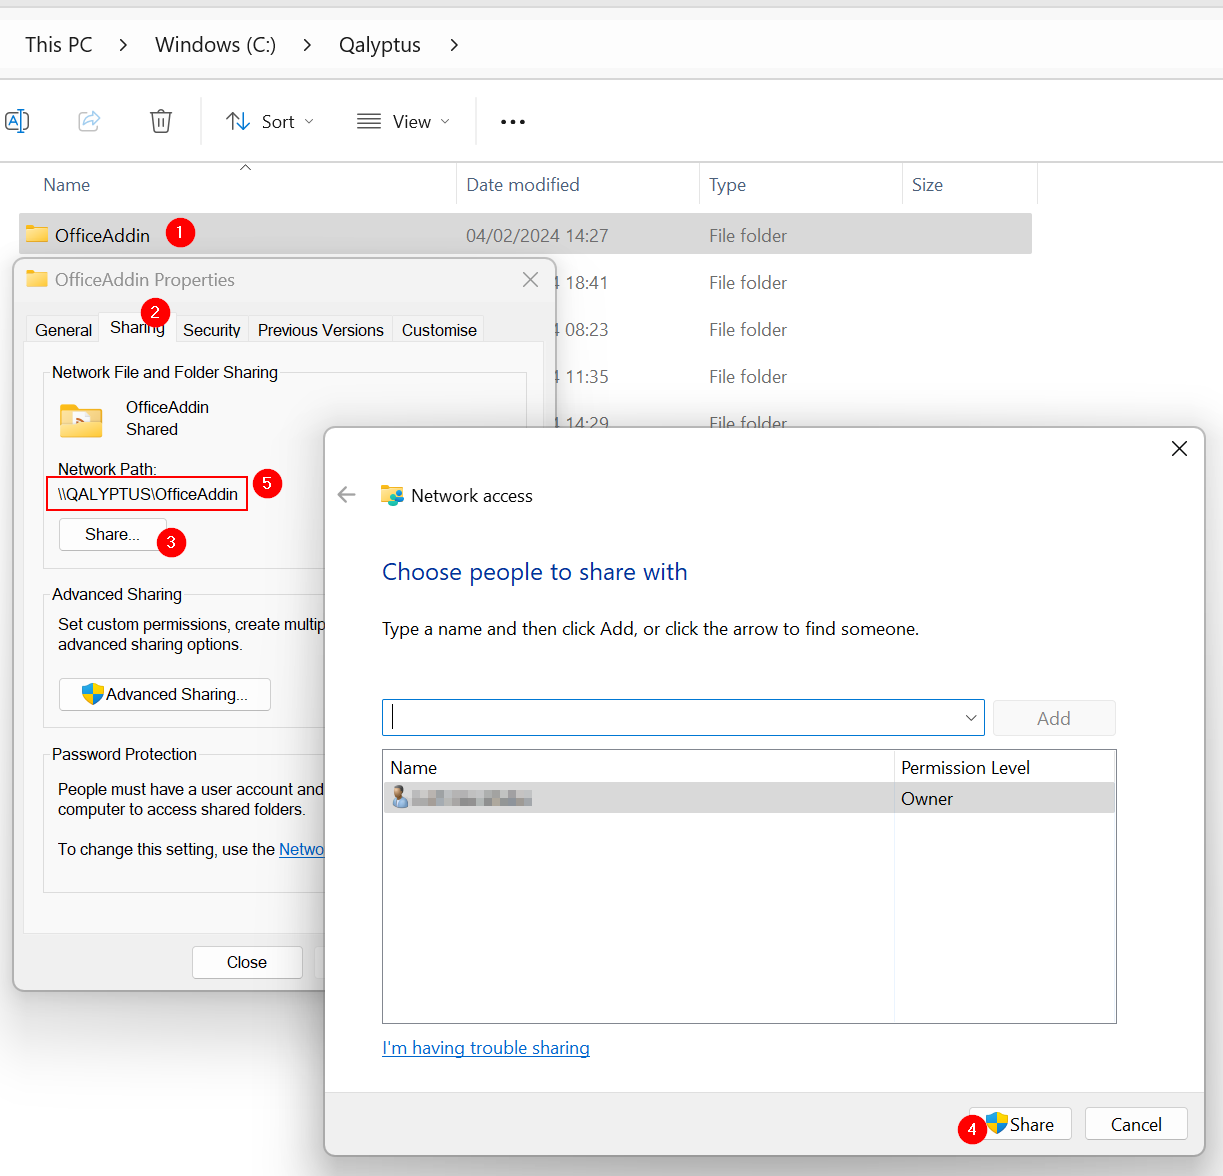
- Come-back to Qalyptus Cloud and paste the path in Add-in shared folder input field and click Save. This allows to open the Qalyptus Office add-in automatically after opening the report template
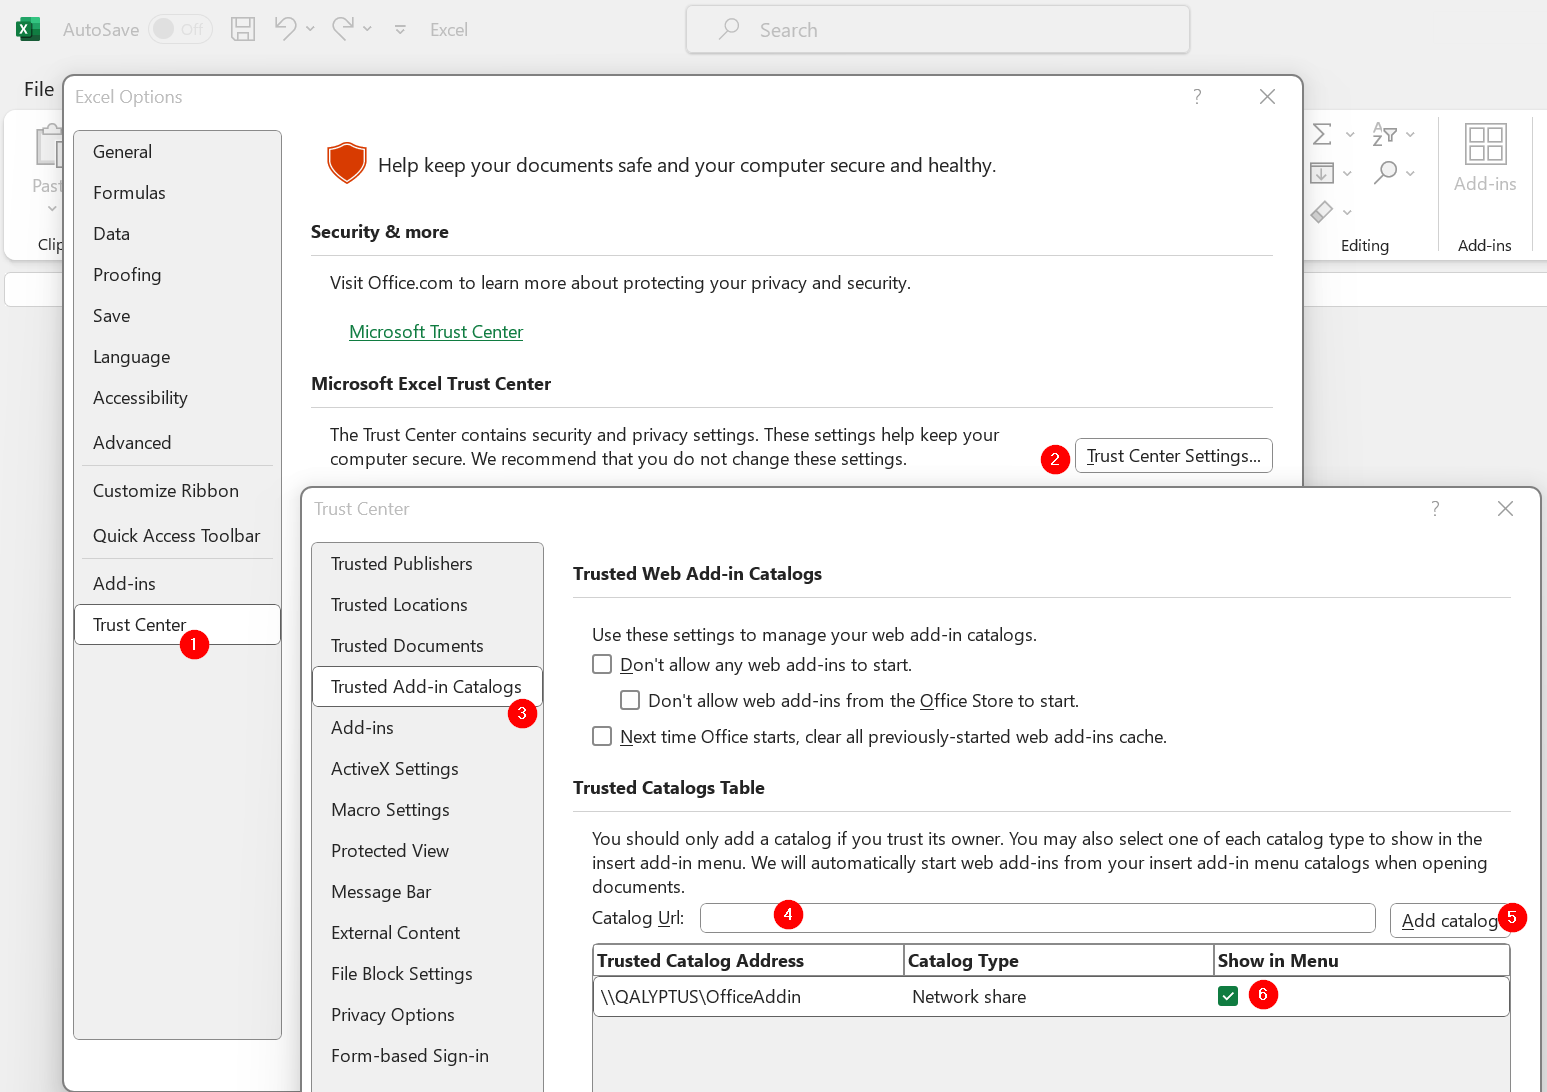
- Open an Office tool (Excel, Word, or PowerPoint) and go to Options > Trust Center > Trust Center Settings... > Trusted Addin Catalogs.
- Paste the share folder path in Catalog Url.
- Click Add catalog.
- Check the option Show in Menu.
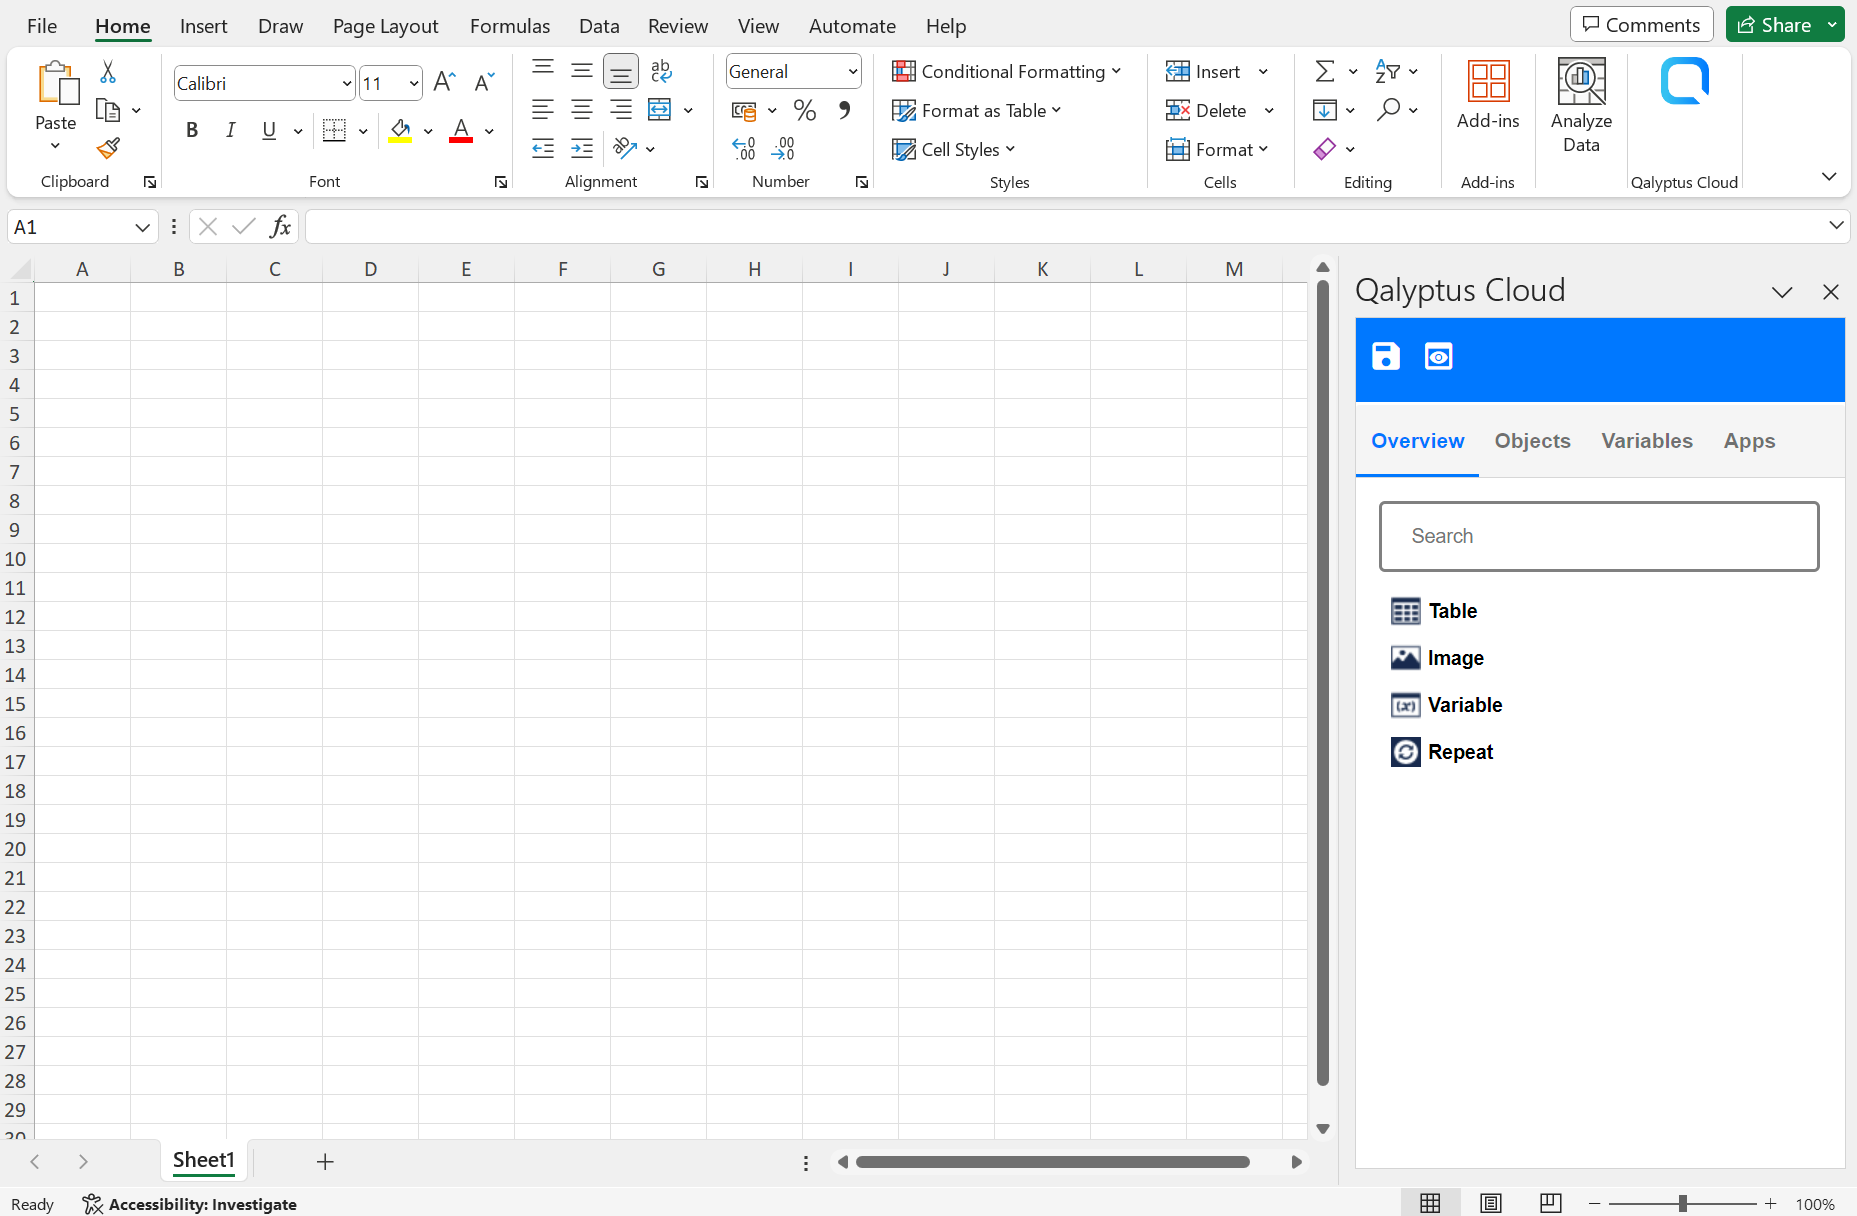
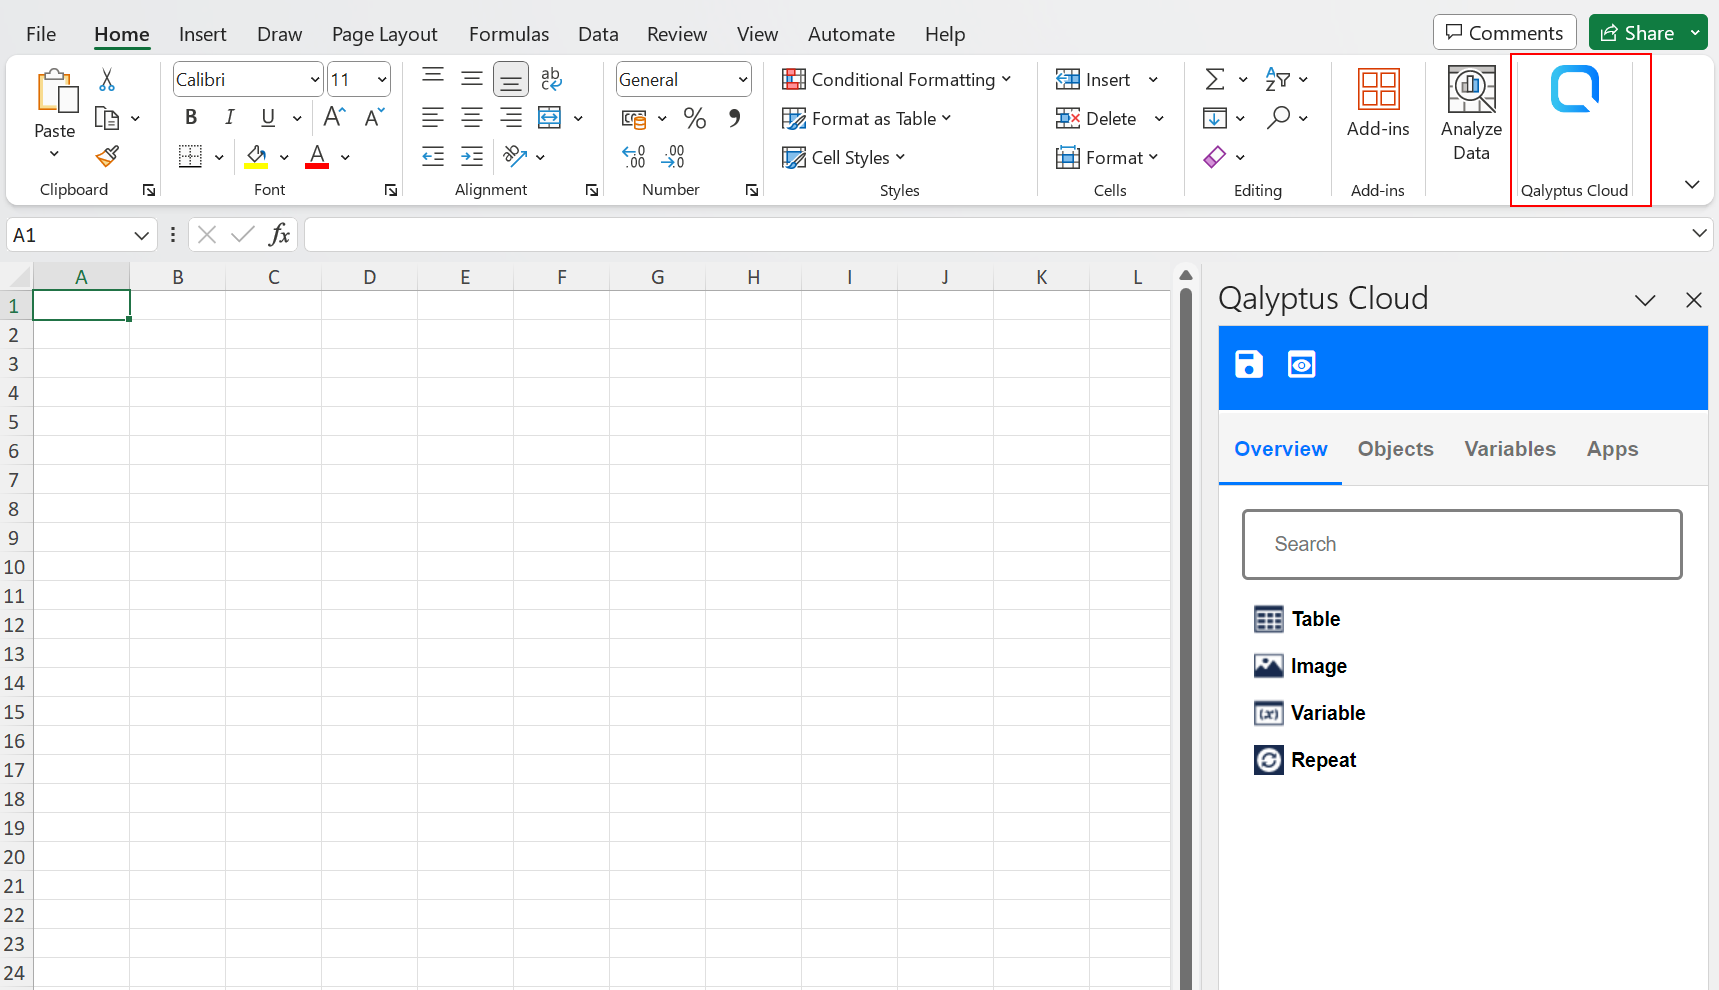
- When you download and open a report template, the Qalyptus Cloud add-in will open automatically
If the add-in is not open automatically, add it manually by doing the following.
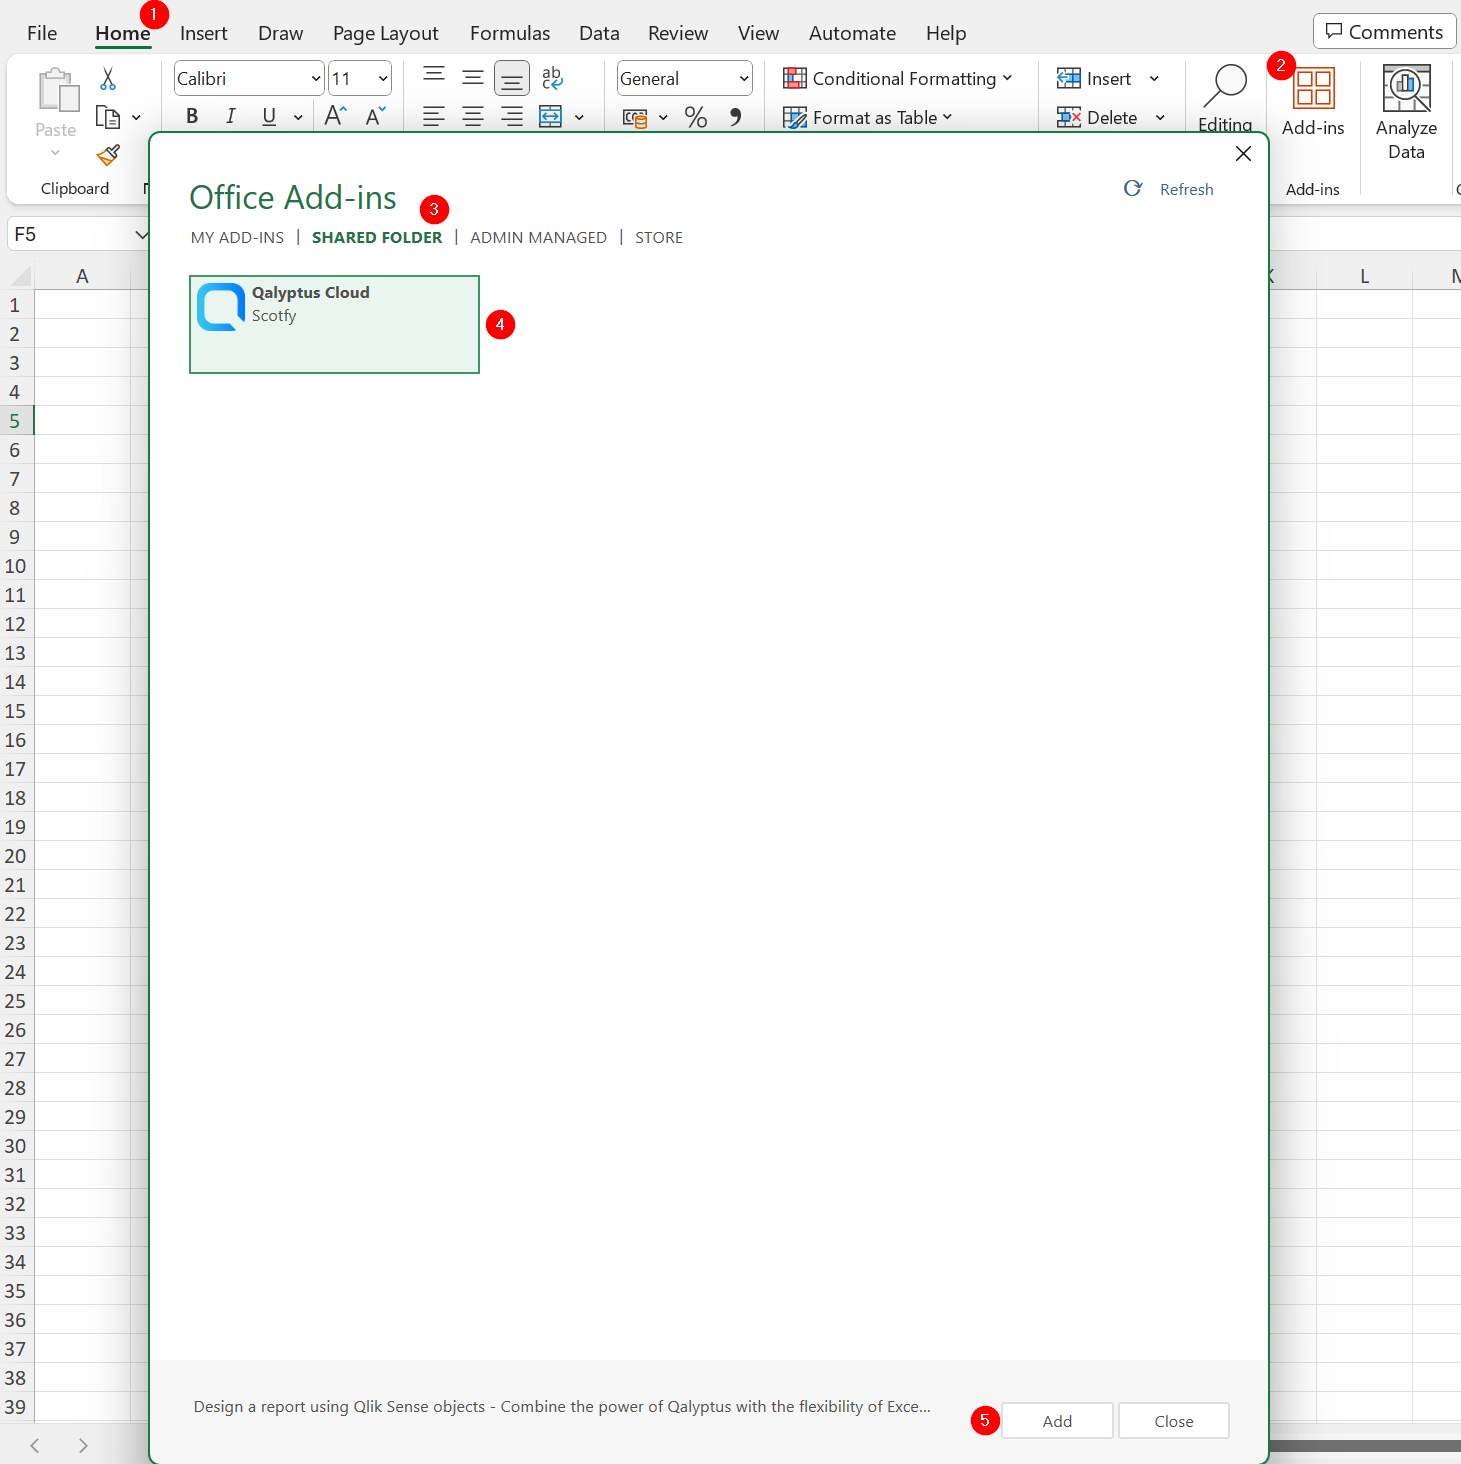
Open the Qalyptus add-in manually
- Open an Office tool (Excel, Word, or PowerPoint).
- Find the Add-ins button and click on it. This button can be in different places depending on the Office version. It can be in the Home tab or the Insert tab.
- In the new Window, go to the SHARED FOLDER tab.
- Select the Qalyptus Cloud add-in.
- Click Add.
- The Qalyptus Cloud add-in will be displayed in your Office and ready to use with report templates.
If you don't see the Add-ins button, you can display it by customizing your Office ribbon in Office Options.
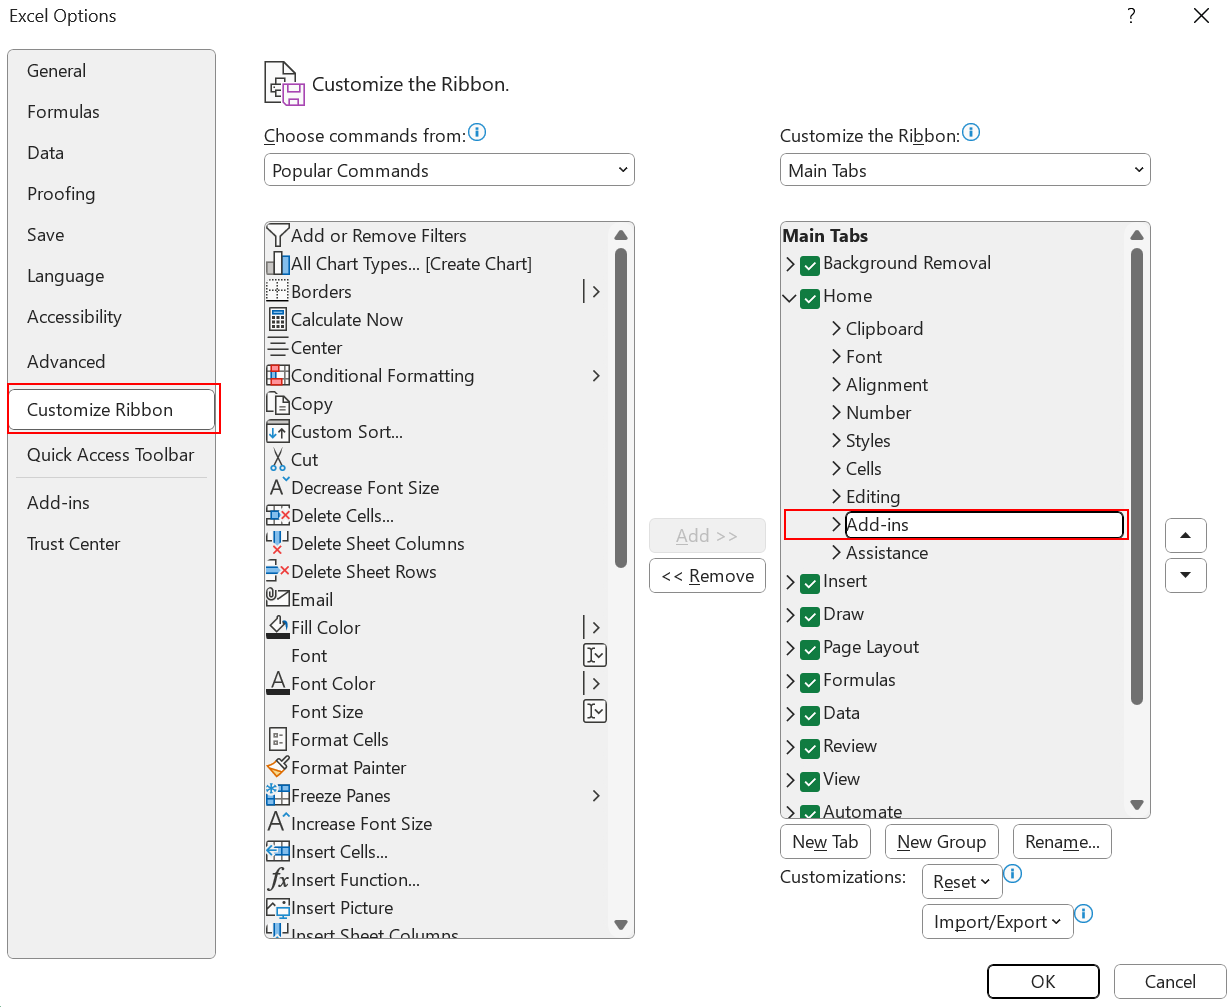
Display the add-in in the Office ribbon
- Open an Office tool (Excel, Word, or PowerPoint).
- Go to Options.
- Click Customize Ribbon.
- Add the Add-ins command to the Home tab.