Reports
Availability: All Qalyptus Cloud subscriptions
Minimum license required: Create: Creator, Edit: Explorer, View: Viewer
Create a report
Qalyptus allows to create reports based on Qlik Sense object using the most used tools: Excel, Word, PowerPoint, and HTML. The report can be generated in multiple standard formats: PDF, Xlsx, Pptx, HTML, etc.
In this section you will learn you who to create reports with the four different template types.
A report is linked to a Project to allows you to organize your content and manage permissions effeciantly.
The creator of the report is the owner. The owner can be changed at any time.
Only the owner and the members that has persmission can have access to the report.
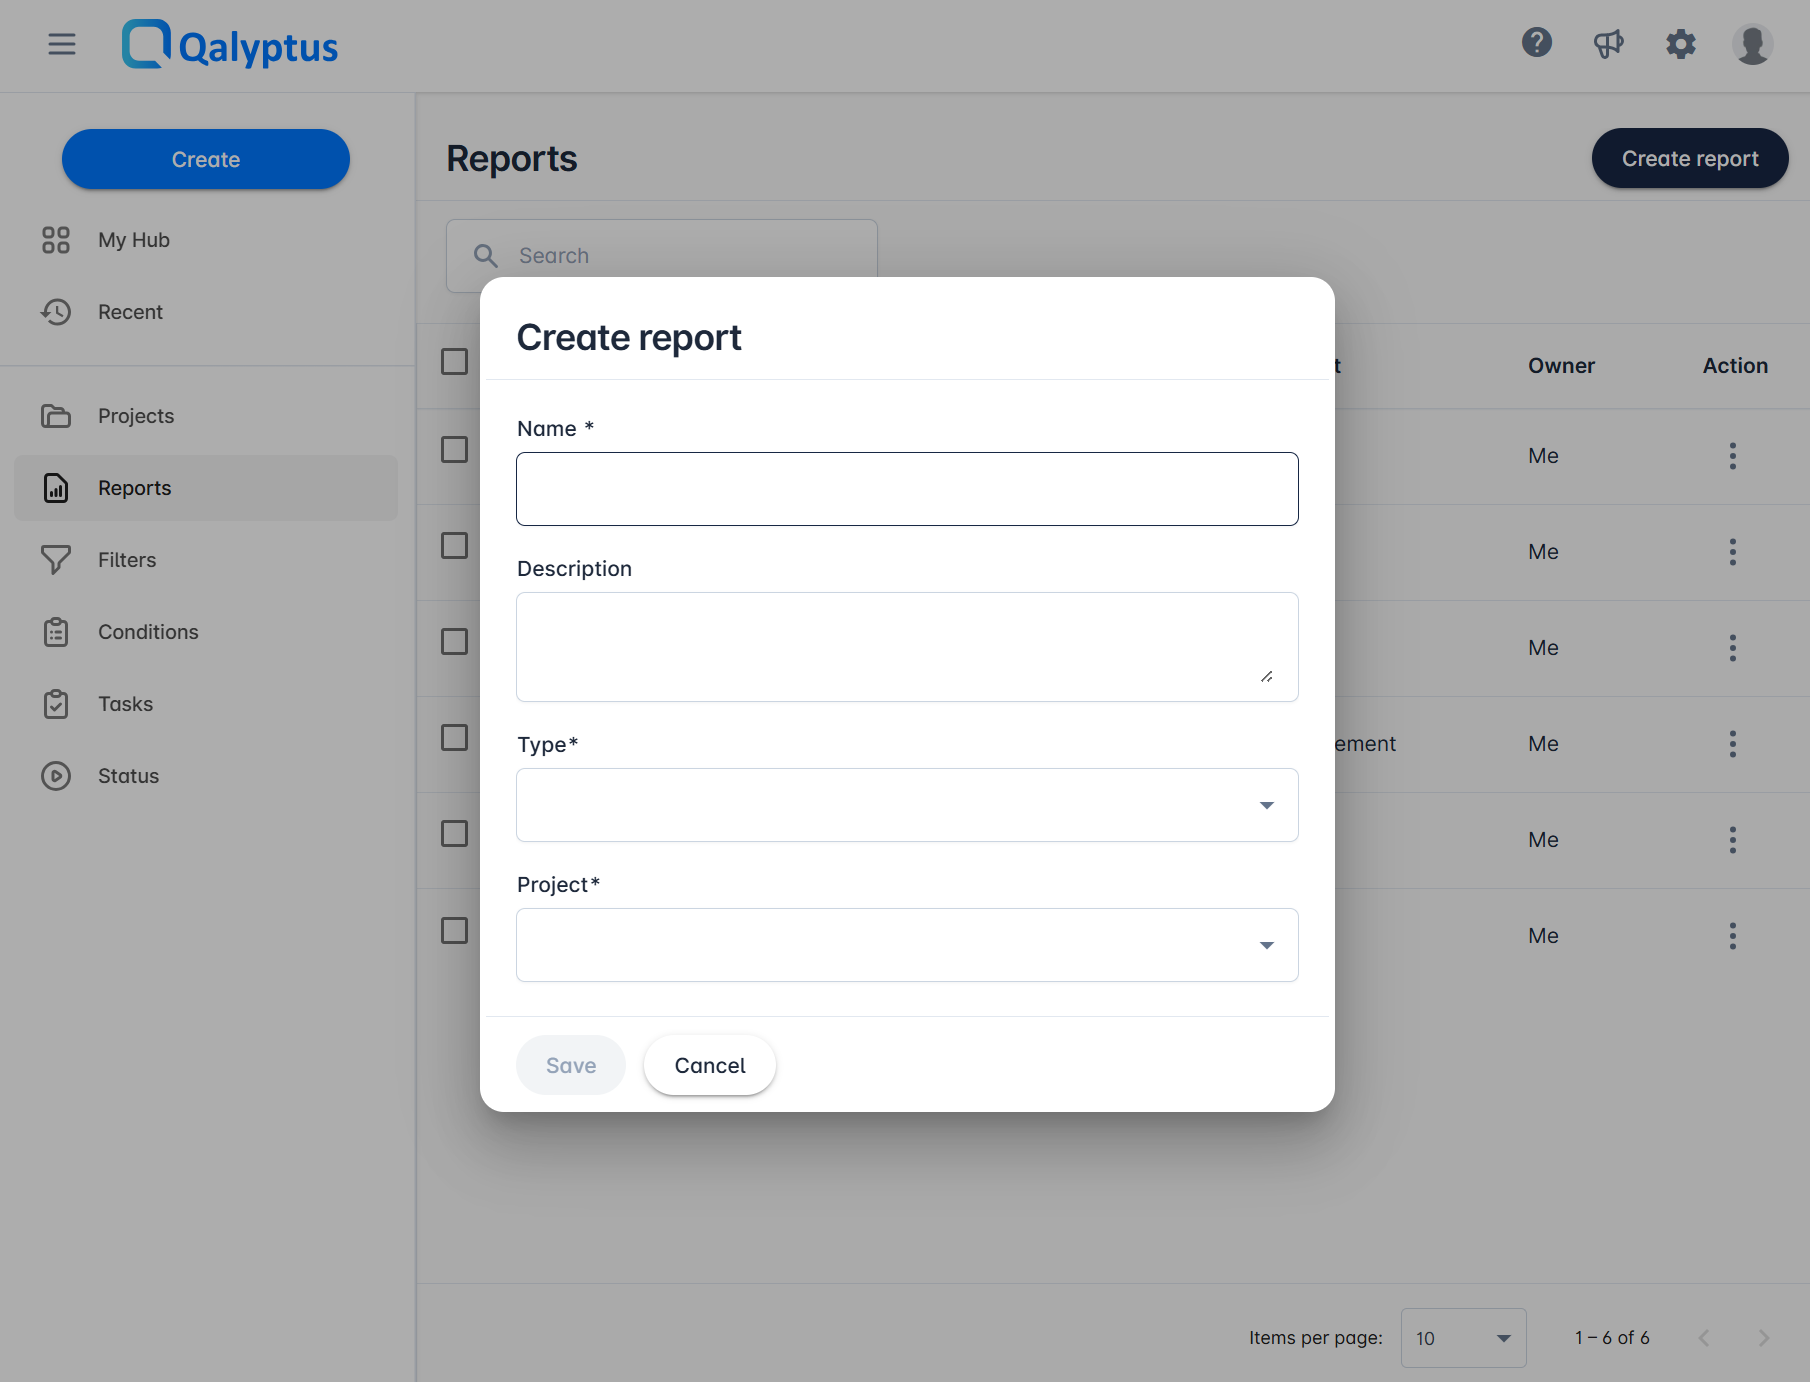
To create a report, do the following.
- Go to the Report page and click Create report.
- Enter a name for the report. The name must be unique across all organizations. The name cannot contains the followning special characters (/, \, :, *, ?, @, ", <, >, |).
- Add a description (optional).
- Select the type of the report from Excel, Word, PowerPoint, or HTML.
- Select the project.
- Click Save. The report owner is set to the creator by default.
Note that when the report is created, you cannot change the Type or the Project of the report.
Edit the report template
Once the report is created, you can start designing the report template. In the Overview of teh report, click on Open in to edit the template file.
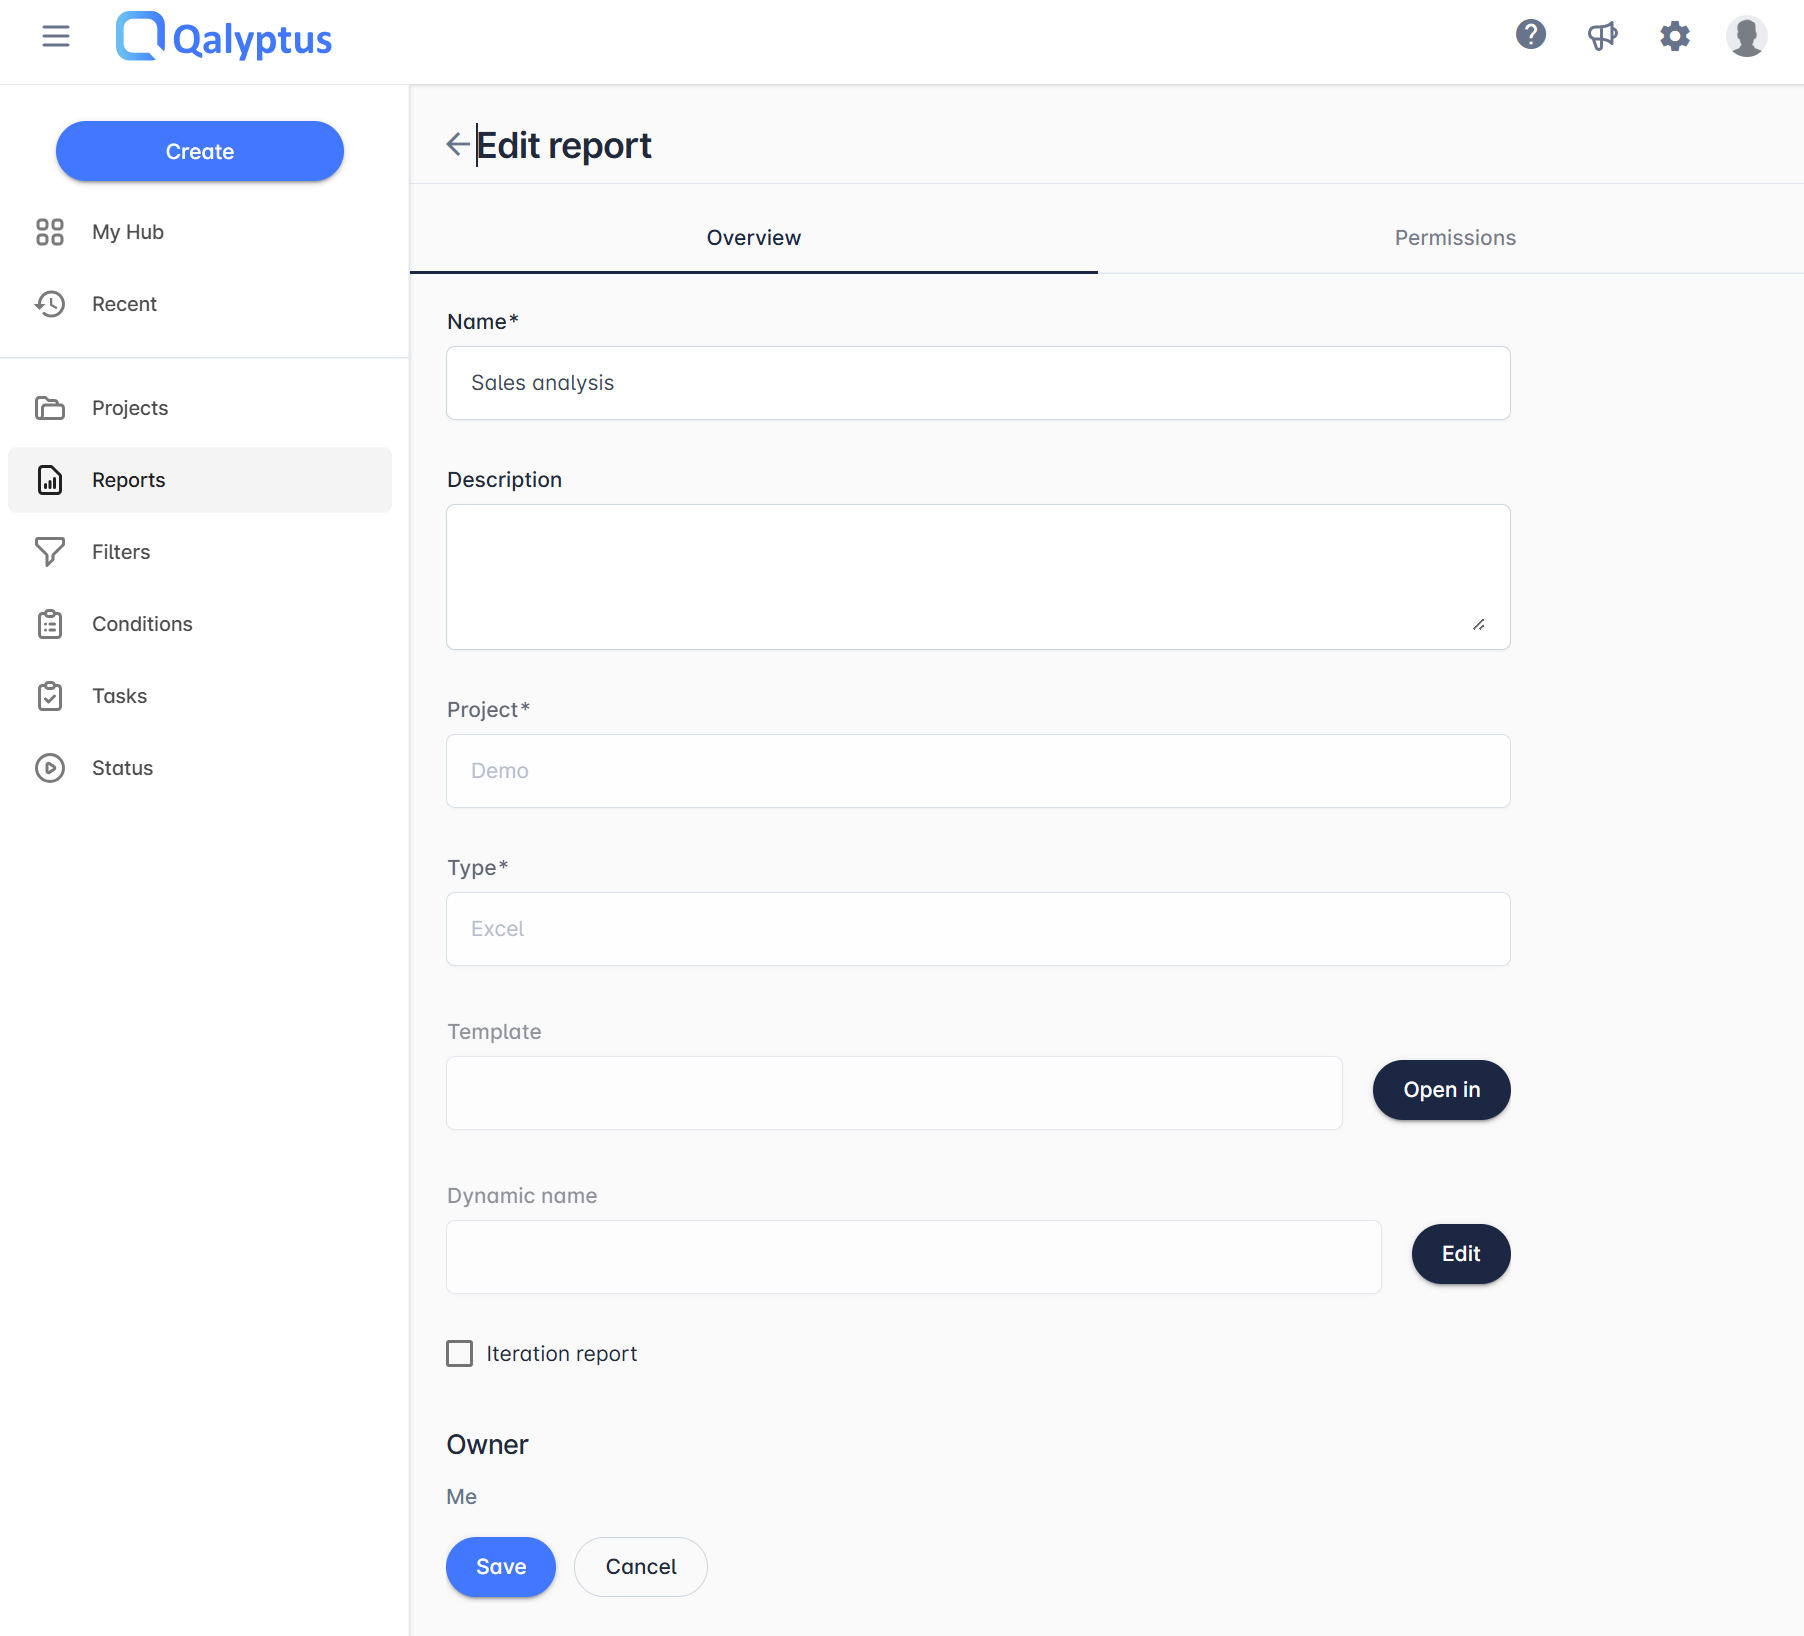
Depending on the report Type, Qalyptus allows you to edit the file in Microsoft Office Desktop (installed version of Excel, Word, and PowerPoint), Microsoft Office for the web, and in an HTML editor.
When the retport type is Excel, Word, or PowerPoint, Qalyptus use an Office-Addin when you edit the template file to help you design the report template with the Qlik Sense obejcts. The Office-addin is by default installed and opened automaticly when you open the report template file. The Qalyptus Office add-in is hosted in the Microsoft AppSource store. If your internal security policy don't allow you to use Office-addins from the Microsoft store, you can eather internaly deploy the Qalyptus office add-in or use Microsoft for the web version.
You can manage your Microsoft Office preferences in your profile.
If your organisation doesn't use Miscrosoft Office Desktop, you can work with Office online version. Thanks to our partenership with Microsoft, you can edit your template files using Office for the web.
Select one of the report types below to explore step-by-step instructions for designing the corresponding report template.
🗃️ Excel report
3 items
🗃️ Word report
3 items
🗃️ PowerPoint report
2 items
🗃️ HTML report
2 items
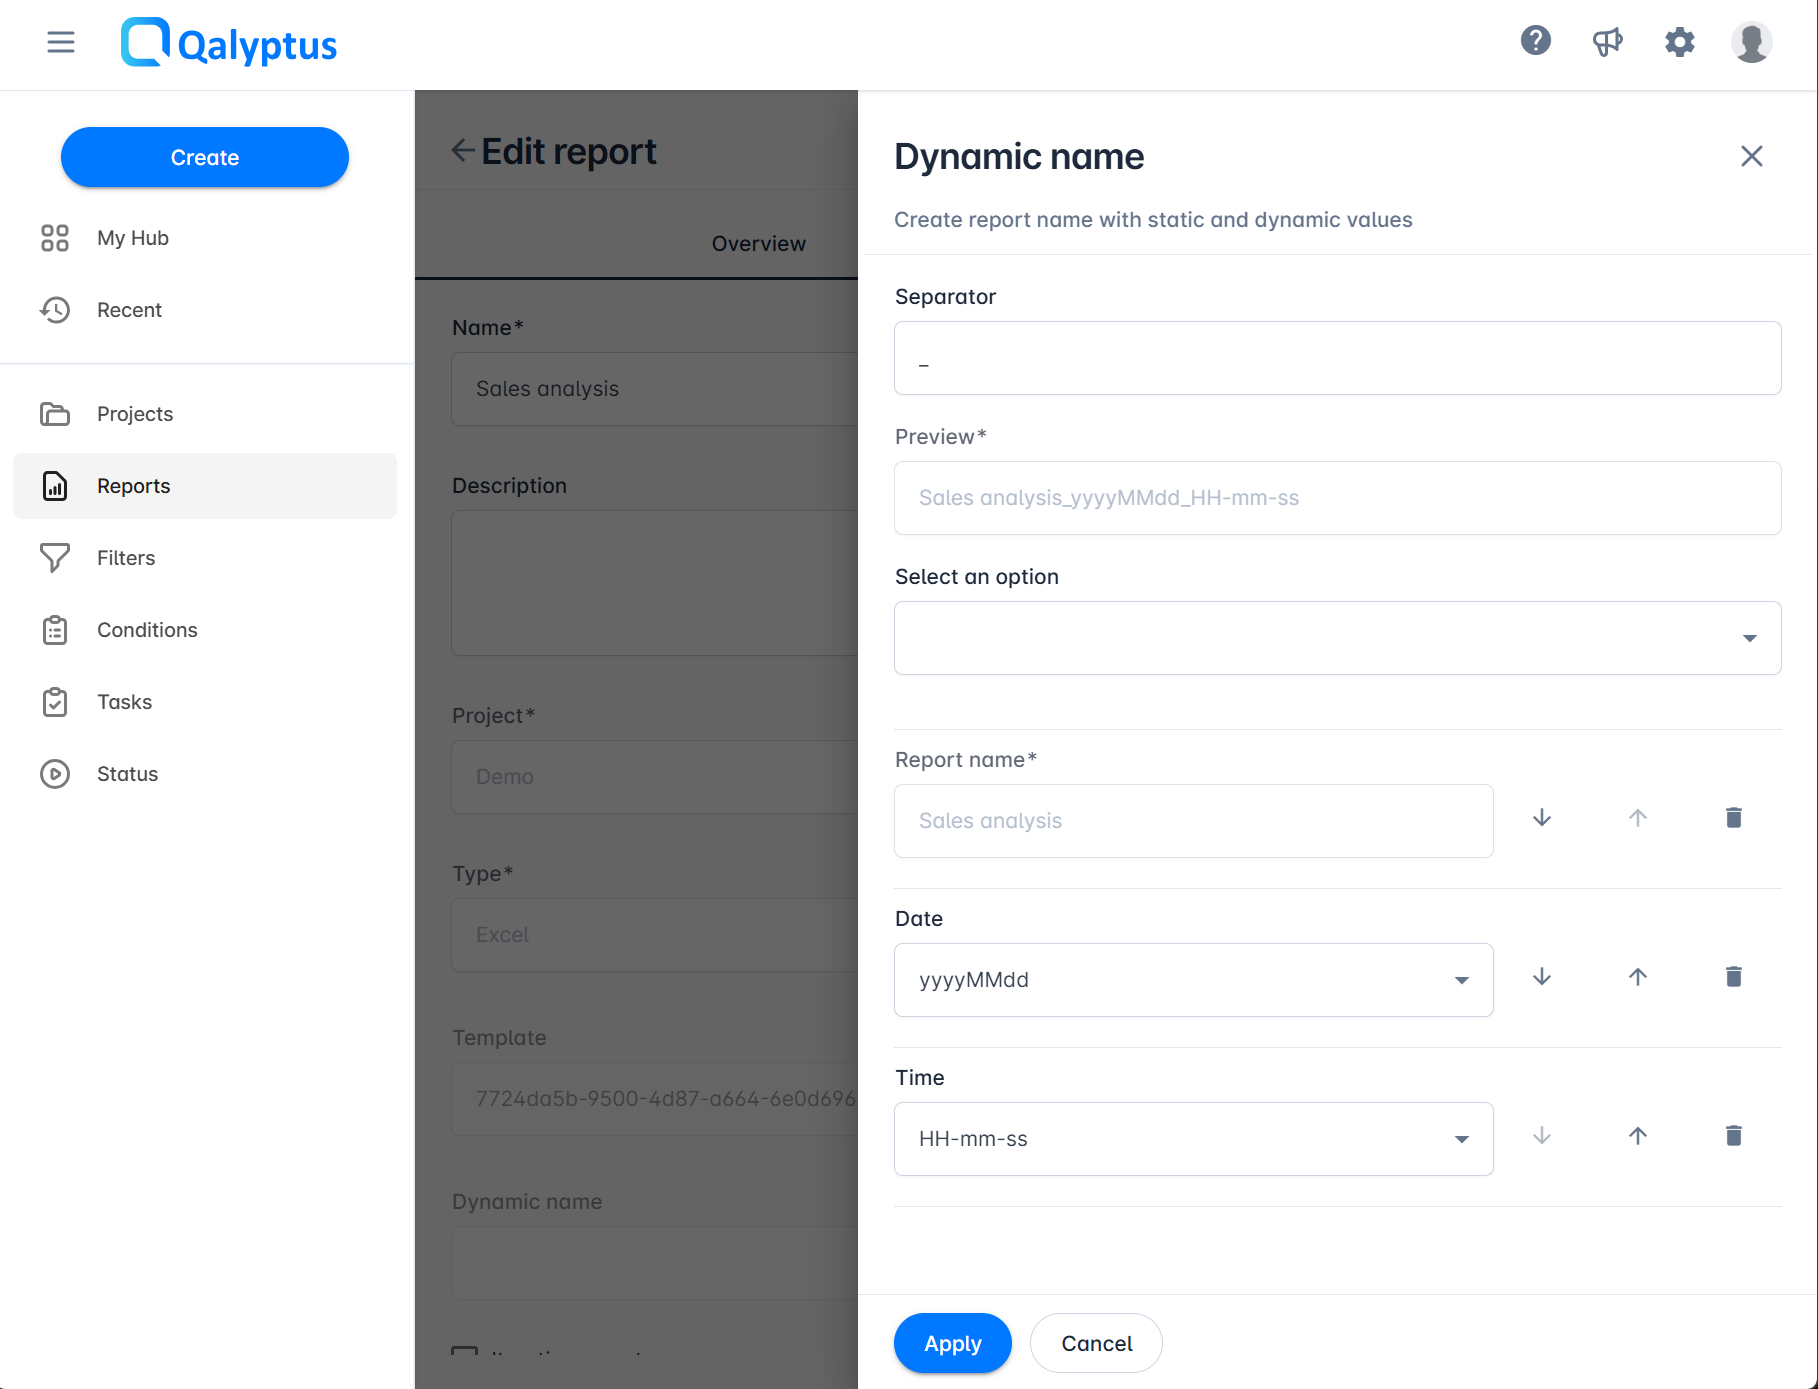
Dynamic name
By default, the output report file name is the name of the report. You can create a dynamic name using the following options:
- Report name: The name of the report.
- Custom text: Any text without that not contains the special characters: /, \, :, *, ?, @, ", <, >, |.
- Date: The date when the report is generated in the following possible format:
yyyyMMdd,yyyy-MM-dd,yyyy MM dd,yyyyMM,yyyy-MM,yyyy MM,MMddyyyy,MM-dd-yyyy,MM dd yyyy,MMyyyy,MM-yyyy,MM yyyy,ddMMyyyy,dd-MM-yyyy,dd MM yyyy. - Time: The time when the report is generated in the following possible formats:
HH-mm-ss,HHmmss,HH mm ss,HH.mm.ss. - Qlik Sense variable: Qlik Sense variables available in the Qlik Sense apps used to create the report. The list is empty if there no Qlik Sense object used yet in the report template or if there is no variables in the Qlik Sense app.
- Iteration field value (only for Iteration reports): It represent the Iteration fields used to Iteratate the report. The dynamic name will contain the value of each Iteartion. Example: If the Iteration field is "Region", the dynamic name will contain the name of the region in each file.
- Separator: A text to use to separate teh different values. It can be empty, one character or text with many characters.
To Add a dynamic name to the report:
- Go to the Report page and click on the report to edit it.
- In the Overview tab > Dynamic name, click Edit.
- Create the dynamic name using the option listed above
- Click Applay.
- The click Save to applay the changes.
Iteration report and filter per user
The Iteration Report option allows you to generate multiple reports by iterating over the values of one or more fields in a Qlik Sense application.
By default, a report generates a single output file. With iteration, Qalyptus can generate multiple files from the same report, each filtered on different field values.
For example, if you want to generate a report per region, you can select the Region field. Qalyptus will iterate over each region value and produce one report per region, with data filtered accordingly. The report structure remains the same, but the content reflects the selected field value.
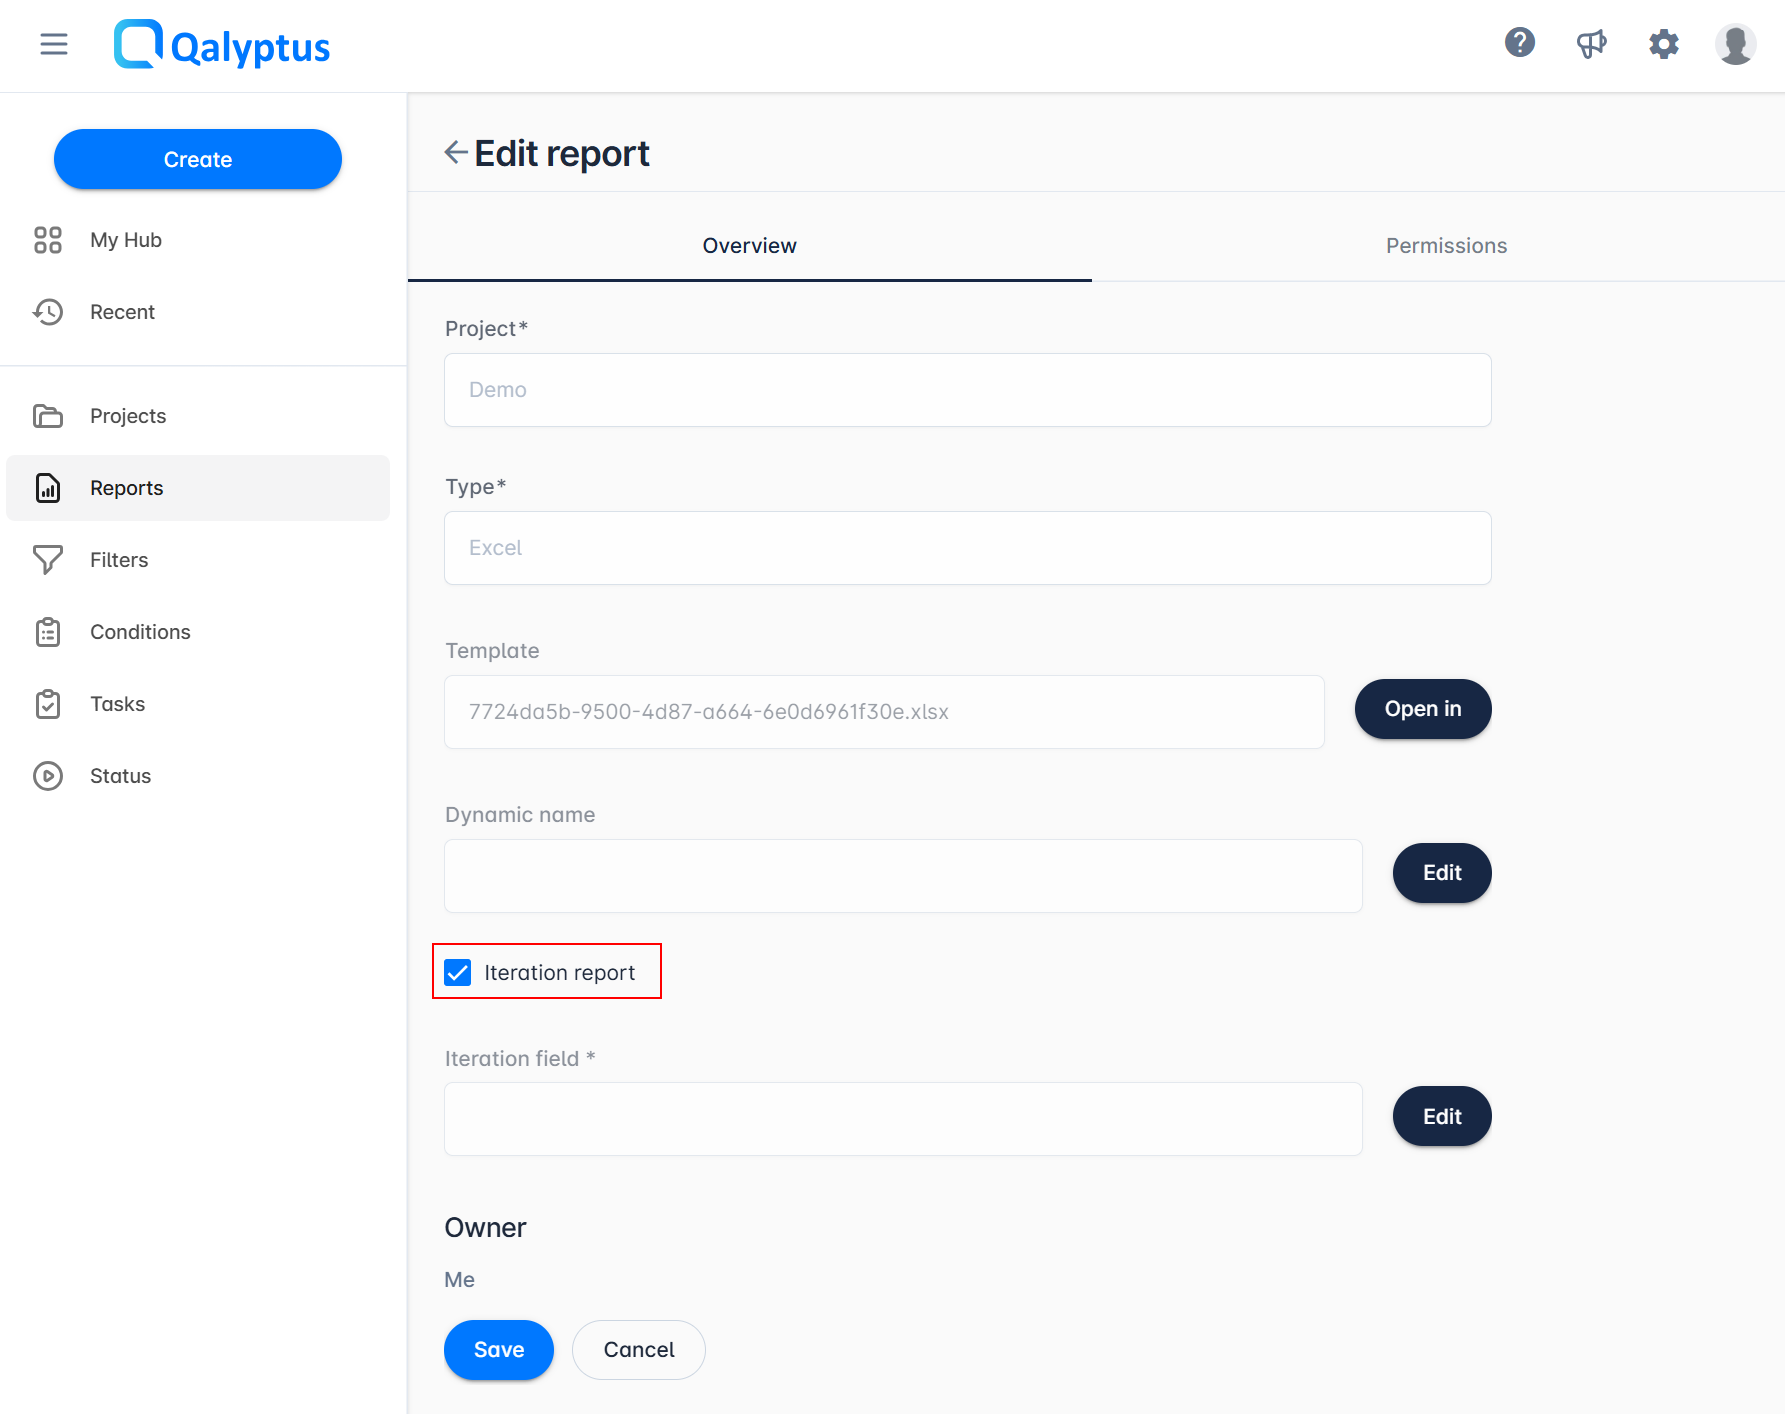
Enable the Iteration Report Option
To activate this option:
- Open the report in Qalyptus Cloud.
- Click Edit to edit the report.
- Go to the Overview tab.
- Select the checkbox Iteration Report.
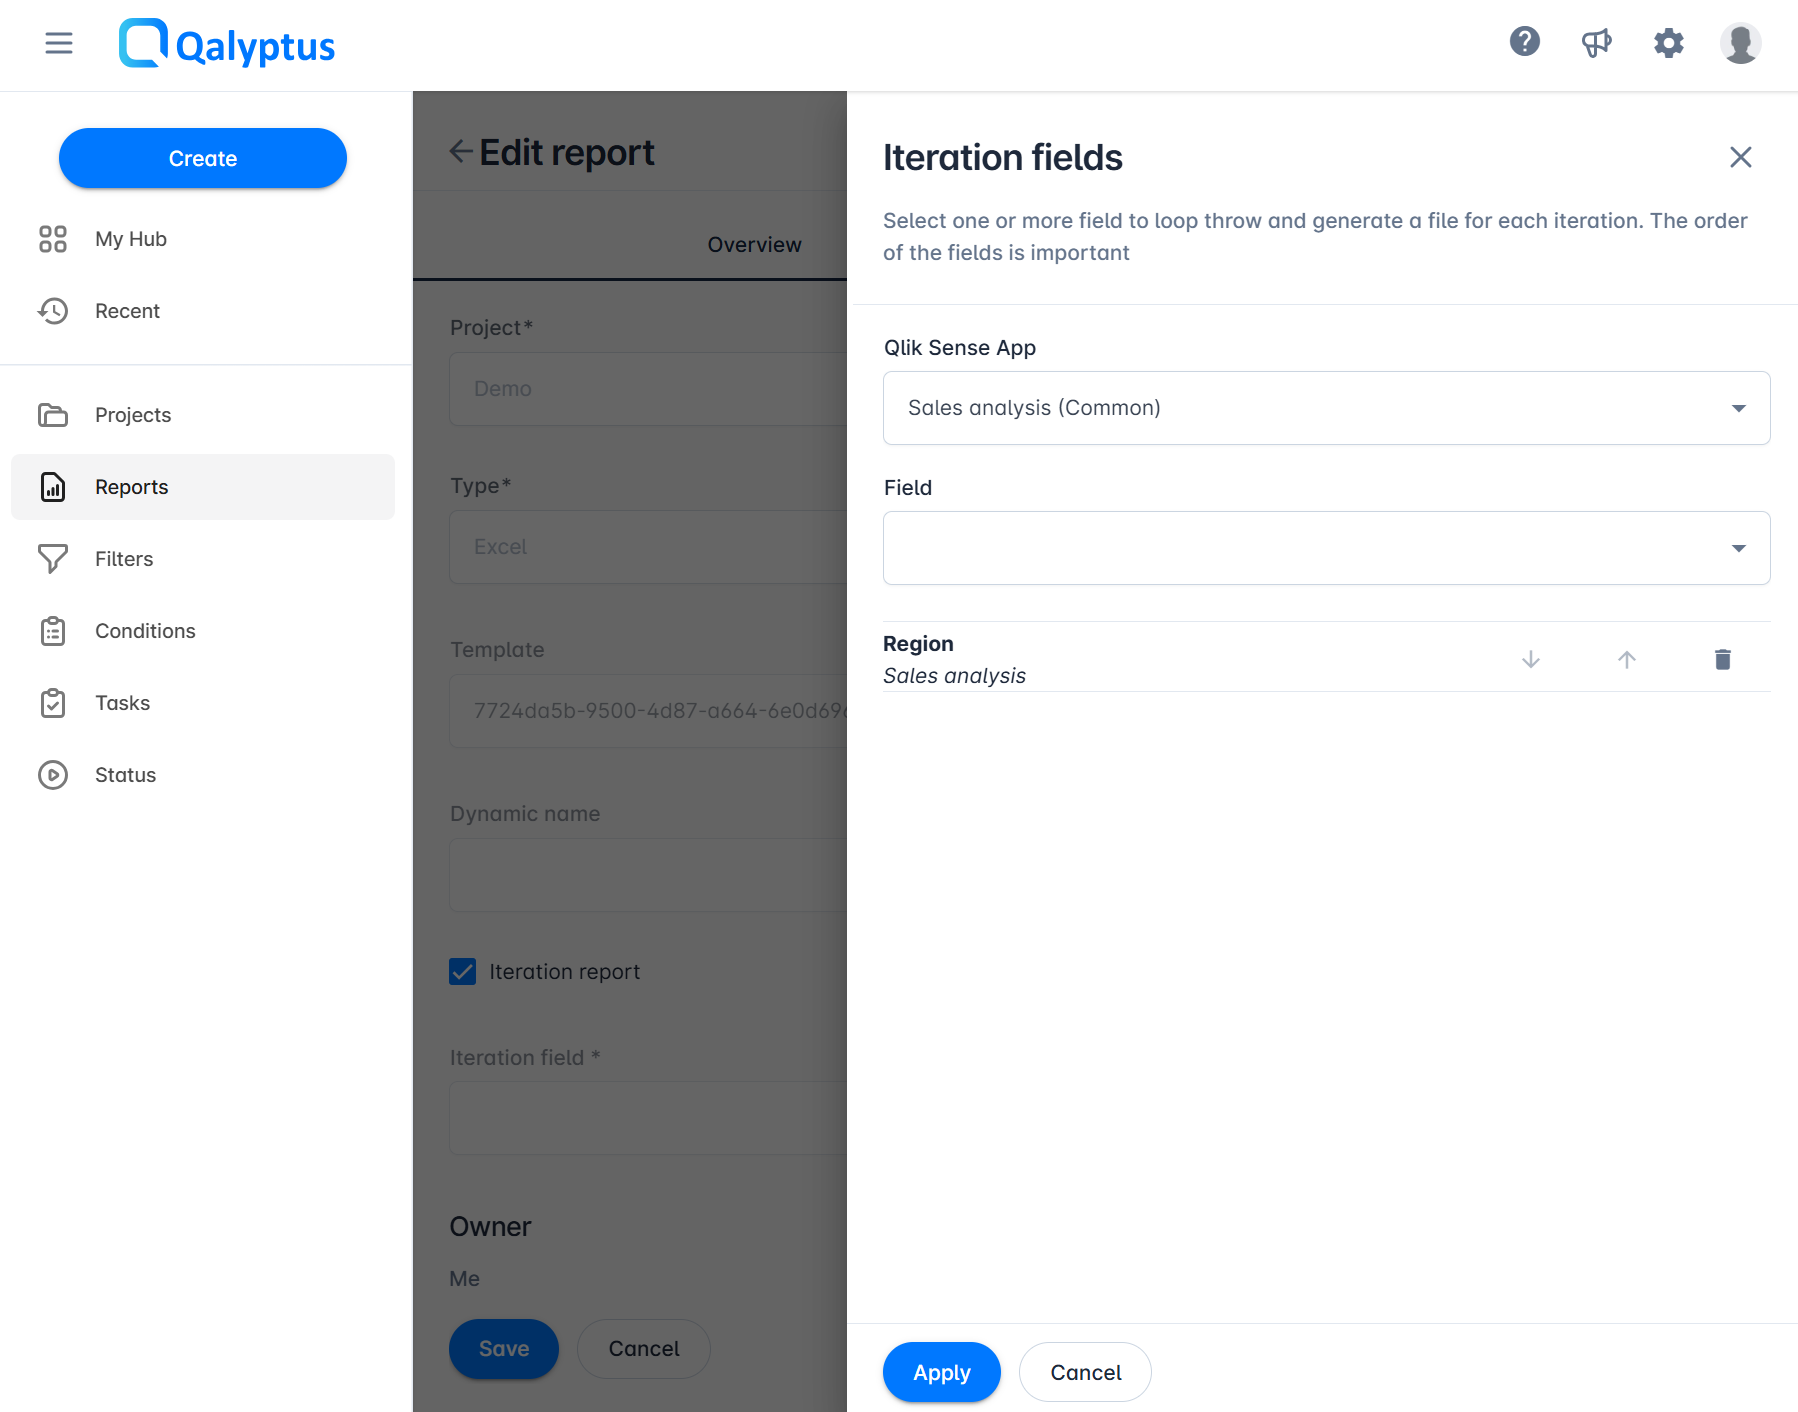
- Click the Edit button to configure iteration.
- Choose the Qlik Sense application to use.
- The list only shows applications already used in the report.
- Select one or more fields on which Qalyptus will iterate.
- The order of fields matters. Add them in the desired order.
- Use the up and down arrows to reorder fields.
- Use the remove button to delete a field.
- Click Apply, then Save to confirm changes.
It is recommended to configure a dynamic file name by including at least the iteration field in the name.
This ensures that each generated file has a clear and explicit name.
If no dynamic name is set, Qalyptus will use the report name and append a sequential number to differentiate files and guarantee uniqueness.
Distribute Iteration Reports by Email
In addition to all standard distribution methods offered by Qalyptus, the Iteration Report option allows you to send each iteration result to specific recipients.
When a task runs with an Iteration Report:
- Each generated report (per field value) can be sent by email.
- You can assign one or more recipients for each iteration result.
Example:
If you generate a sales report by iterating over the field Region, Qalyptus can automatically send:
- The report for North America to
john.smith@company.com, - The report for Europe to
pierre.dupont@company.com, maria.garcia@company.com - The report for Asia to
sarah.lee@company.com
This ensures that each manager only receives the report relevant to their region.
1- Add recipient emails in your Qlik Sense app
In the Qlik Sense app used to create the report, load the recipients' email addresses and link the Email field to the iteration field chosen in your Qalyptus report.
You can load email addresses in different ways: from your database, from an Excel file, or from an Inline[] table.
The email field can contain either a simple address or a name with an email address in the following formats: lara.jobs@company.com, Lara Jobs <lara.jobs@company.com>.
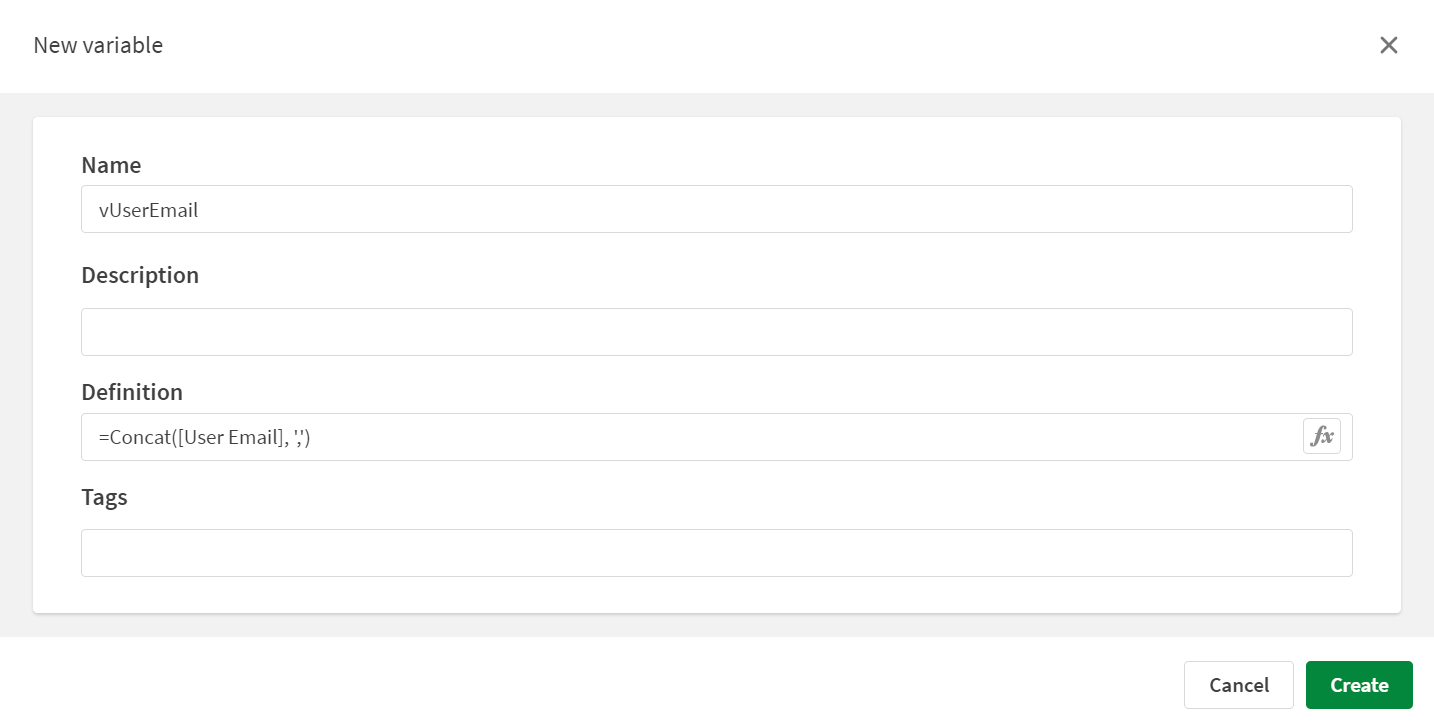
2- Create a variable for email distribution
Once the recipients' email addresses are available in the Qlik Sense app, create a variable that returns the email address linked to each iteration field value.
The variable can return one or more email addresses, separated by commas.
The variable expression must start with an equal sign (=). For example: =Concat([Email address], ',').

3- Add the report to a task
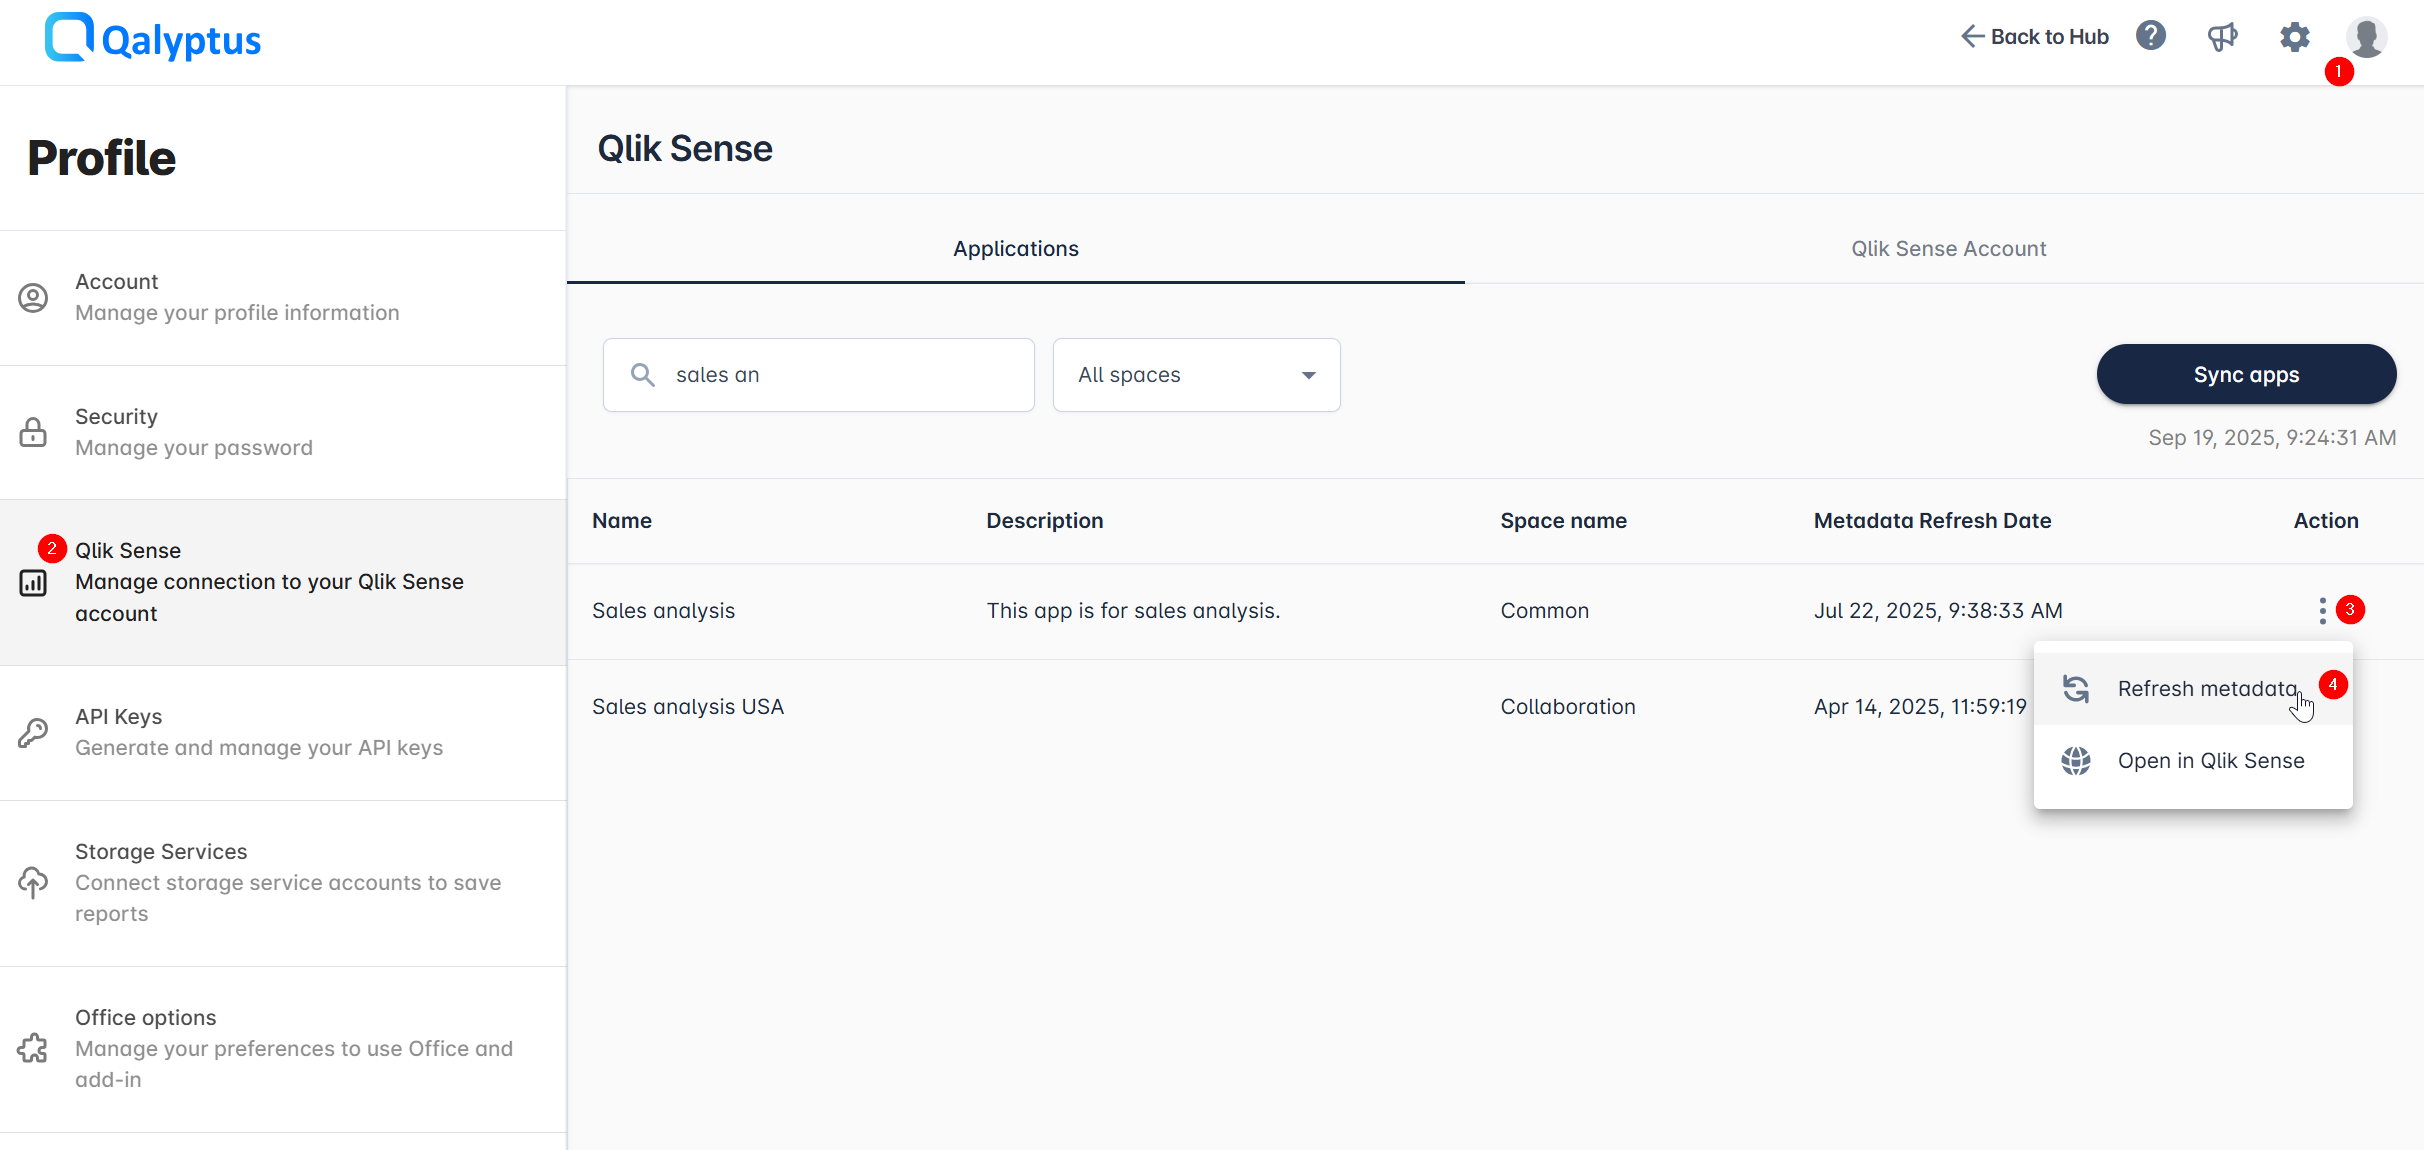
3.1 Refresh the app metadata
You need to refresh the app metadata in Qalyptus to make the new variable available.
- In Qalyptus Cloud, click your avatar in the upper-right corner > Profile
- Go to the Qlik Sense section
- Stay in the Applications tab
- Click the three-dot action menu for the app
- Select Refresh metadata
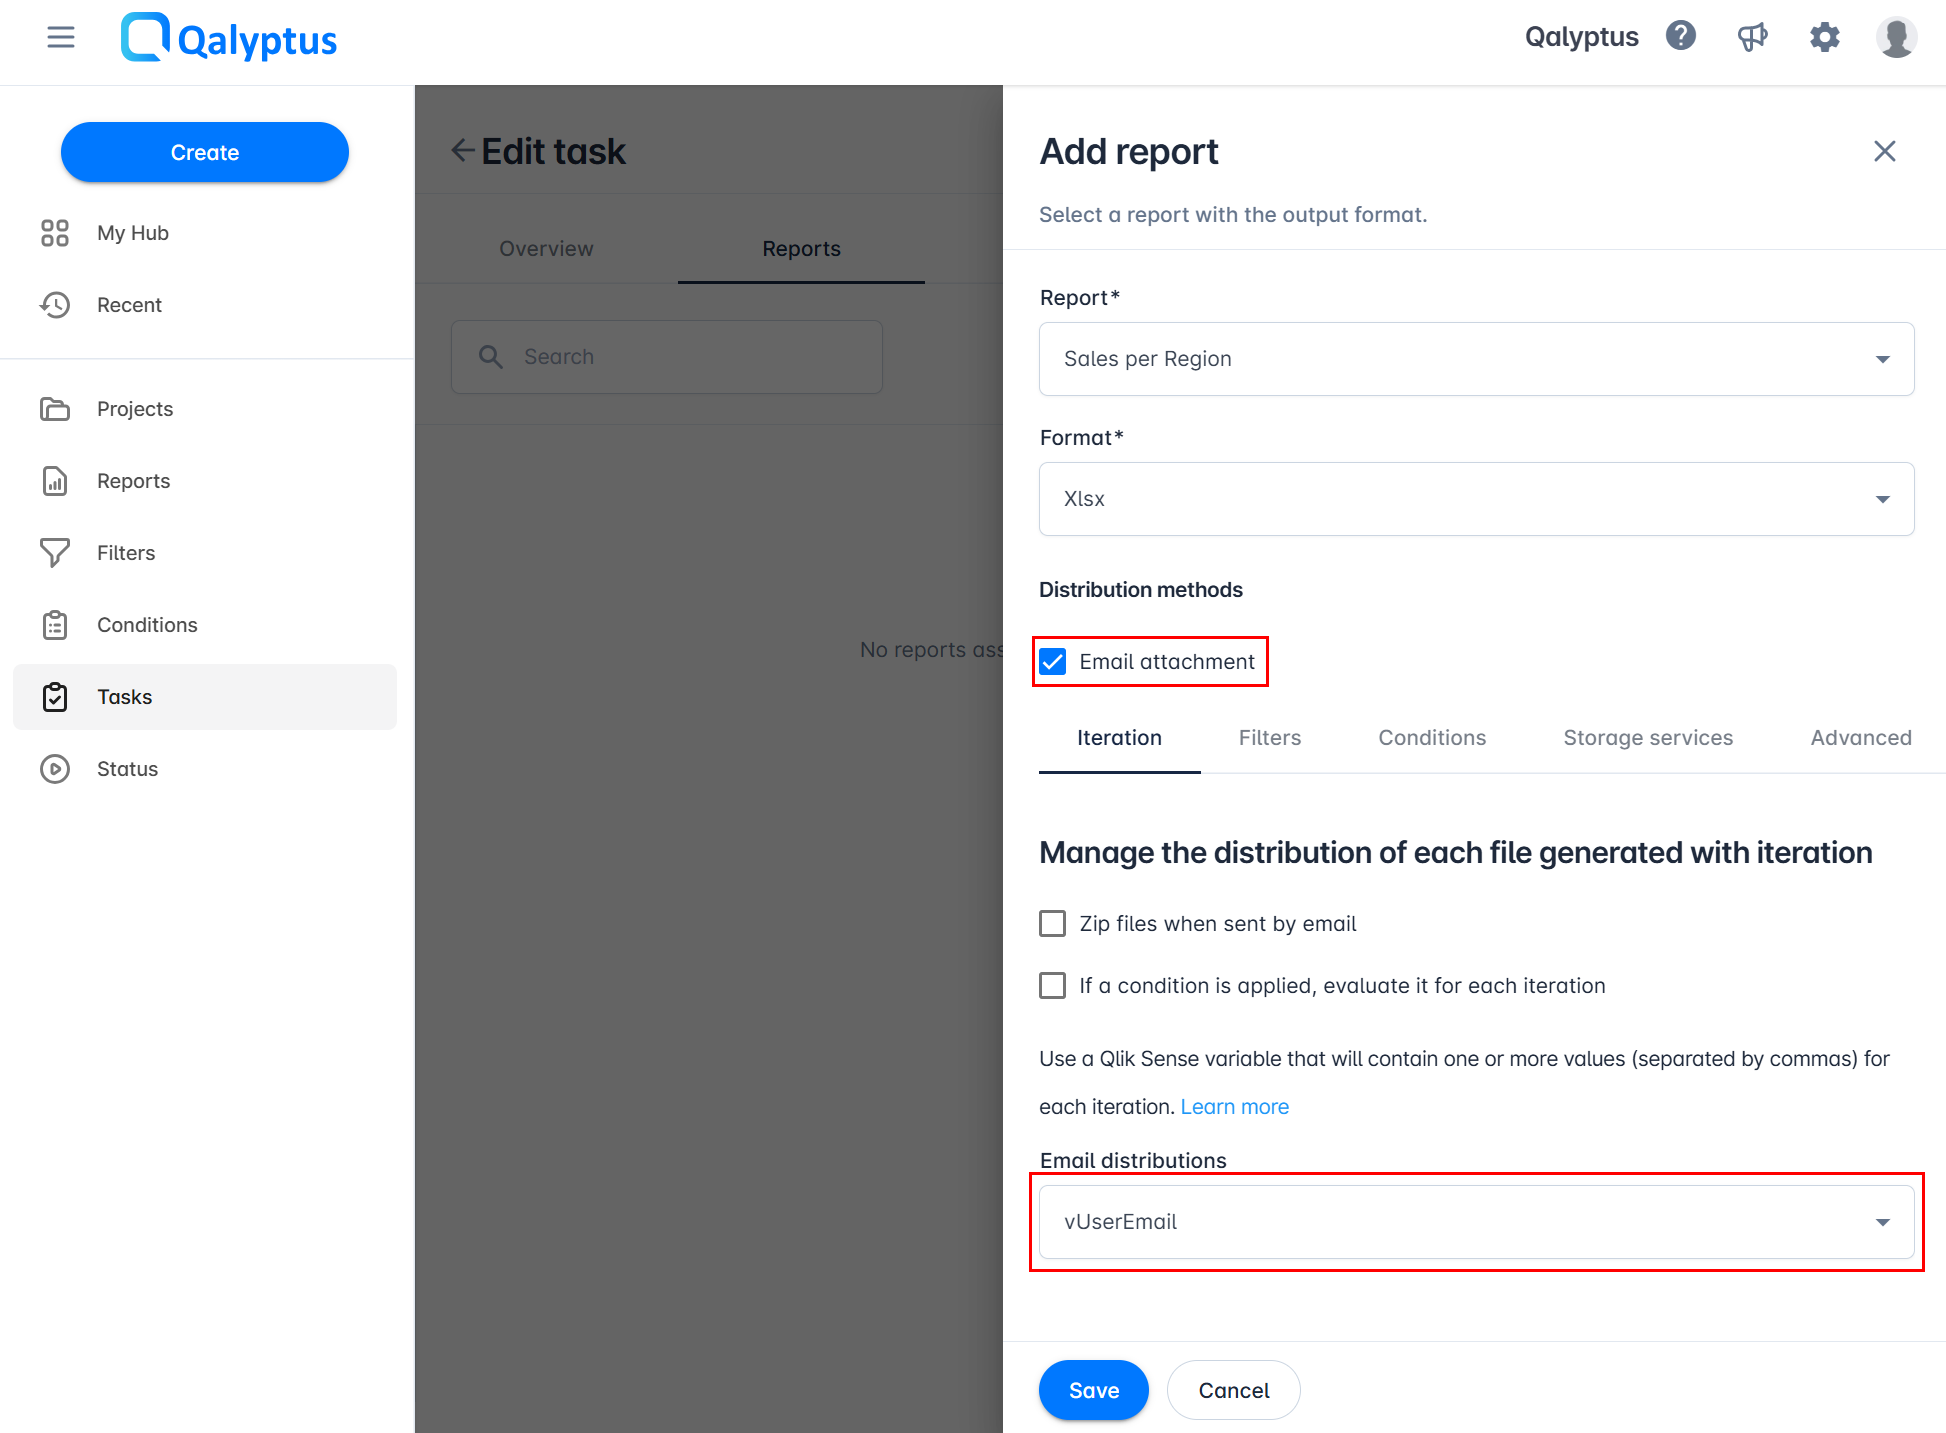
3.2 Add the report to a task
- In Qalyptus Cloud, go to Tasks.
- Create a new task or edit an existing one.
- In the Reports tab, click Add report.
- Select the report and choose the output format.
- Check the Email attachment option to attach the file.
- In the Iteration tab, select the variable you created in the Email distribution dropdown.
- Click Save.
After running the task, each recipient will receive one or more reports.
We recommend enabling Test mode in your task to validate the results before sending reports to actual recipients.
Two scenarios are possible:
Assume you have salespersons linked to one or more offices.
- To send one or multiple report files to each salesperson, choose the field Salesperson as the iteration field.
- To send a single report file containing data for one or more offices, choose the field Email address as the iteration field.
Qalyptus sends one email per user, even if the user has multiple reports. All reports for that user will be attached to the same email.
If you want to send separate emails to a user who should receive more than one report, use a tag (+xxx) in the email address.
Before
| Region | |
|---|---|
| USA | user1@qalyptus.com |
| USA | user1@qalyptus.com |
| UK | user2@qalyptus.com |
- Qalyptus will send two emails.
- User1 will receive one email with two reports attached.
After
| Region | |
|---|---|
| USA | user1+t1@qalyptus.com |
| USA | user1+t2@qalyptus.com |
| UK | user2@qalyptus.com |
- Qalyptus will send three emails.
- User1 will receive two separate emails, each with one report attached.
Duplicate a report
You can duplicate the report to have a copy. You can duplicate the report in the same project or create a copy in another project in the same organization or in another one.
The duplication will create a new report with a different name and duplicate the report settings and template file.
The Duplicate Report option allows you to create a copy of an existing report.
A report can be duplicated:
- In the same project and same organization
- In a different project within the same organization
- In a different organization and project
The duplicate will include:
- The same settings and configuration
- The same report template
- The same permissions applied to the original report
The new report will have the same name as the original, with the prefix Copy added.
The owner of the duplicated report is the user who performed the duplication.
Permissions Required
To duplicate a report into a target project:
- The user must have the Create report permission in the target project.
- The user must be a member of the target organization.
Without these permissions, duplication will not be possible.
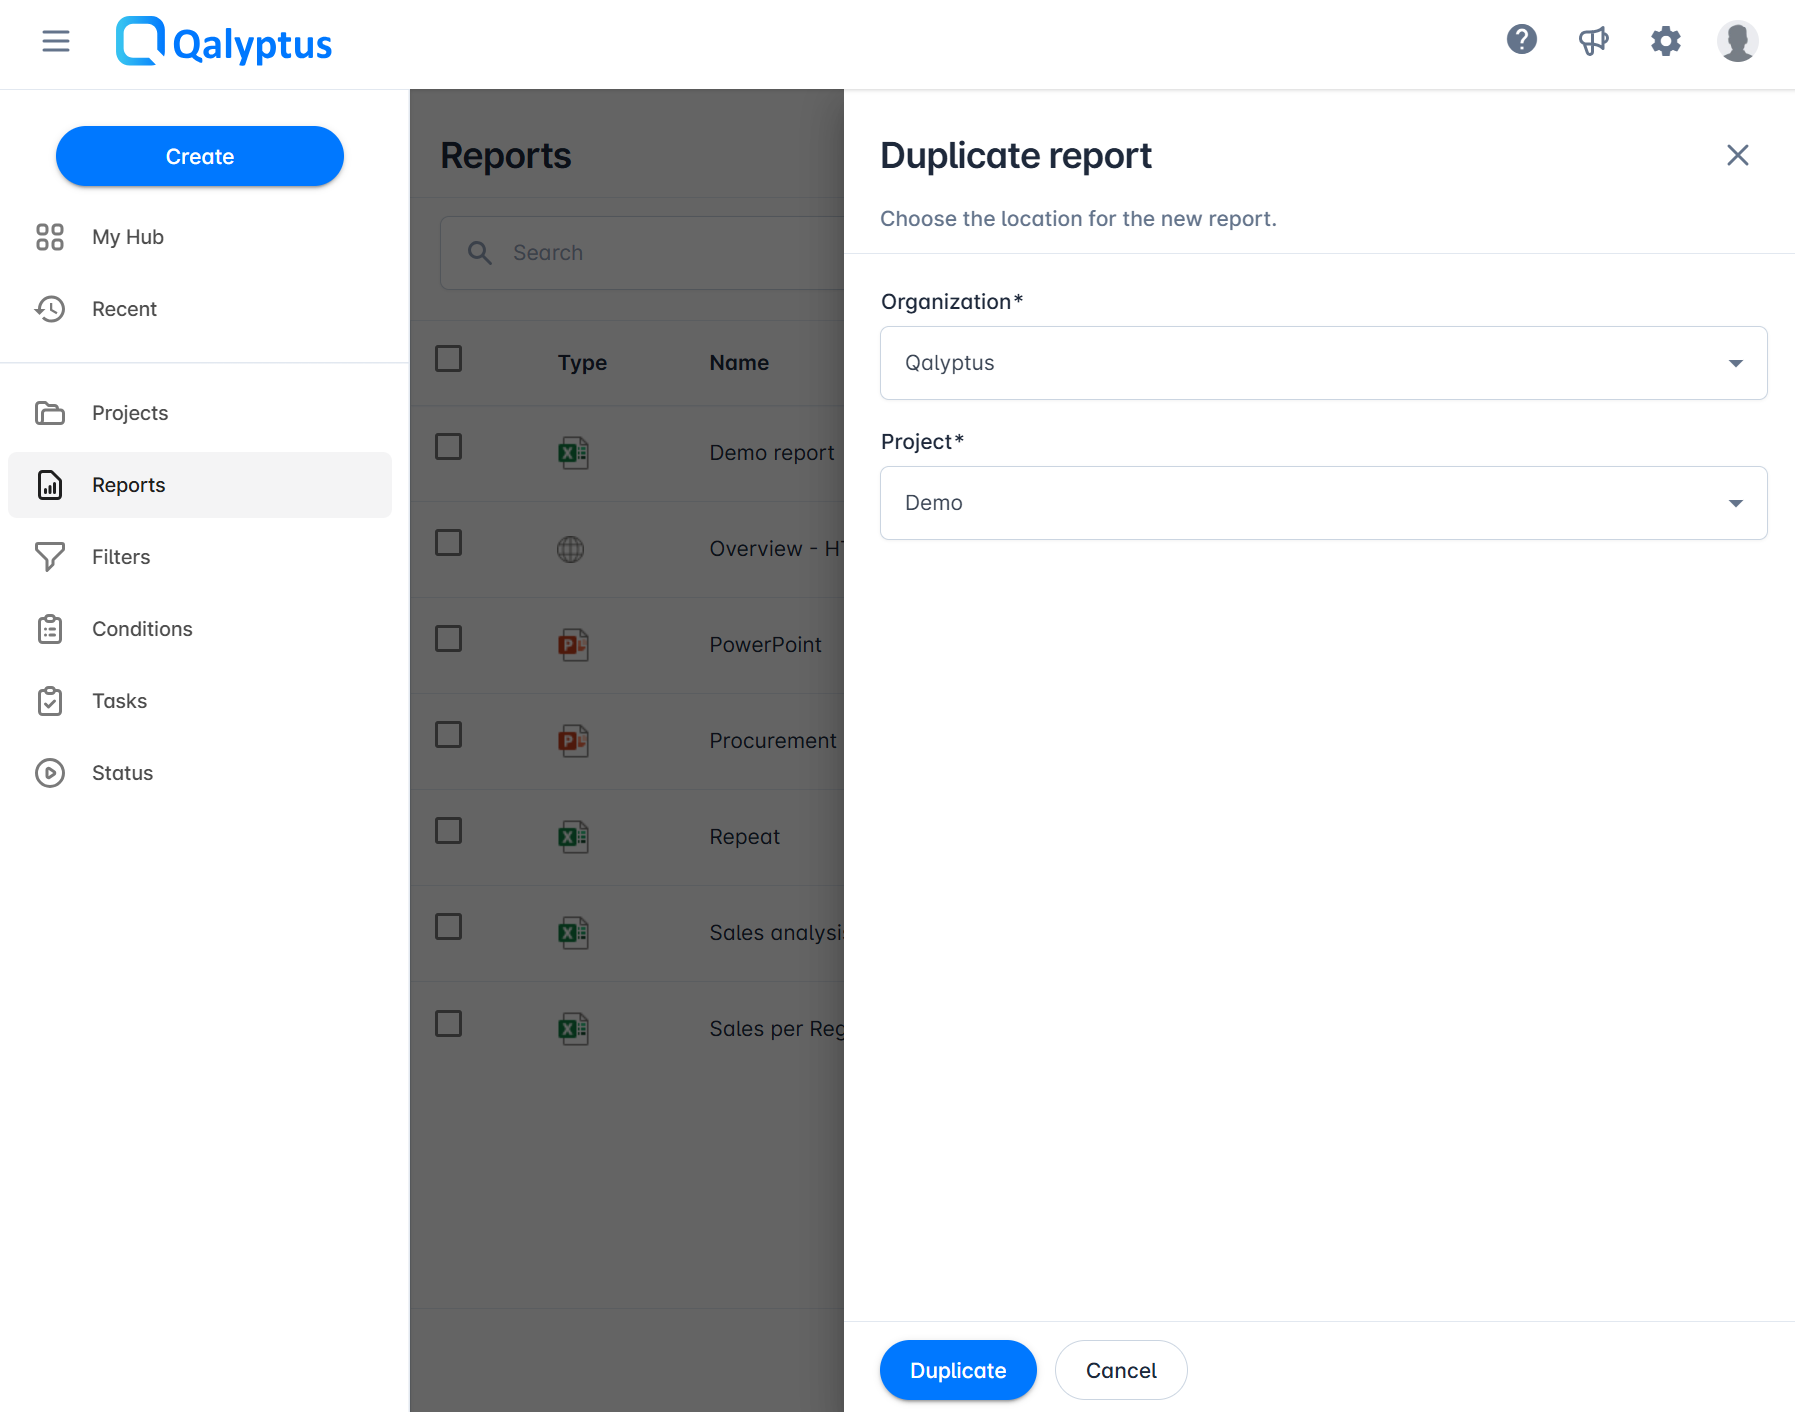
Steps to Duplicate a Report
- Go to the Reports list.
- Find the report you want to duplicate.
- Click the Action button next to the report.
- Select Duplicate.
- In the dialog box, choose:
- The target organization
- The target project
- Click Duplicate.
A new report will be created in the selected organization and project with identical configuration, permissions and template.
Key Points
- Duplicated reports always include the same parameters, permissions, and template as the original.
- The new report name is prefixed with Copy.
- The owner of the duplicated report is the user who created the duplicate.
Duplication is useful when you want to reuse an existing report structure in another project or organization without having to recreate it from scratch.
Duplication can also be used as a simple backup and restore strategy.
Since a report is permanently deleted once removed, you can create a copy of important reports in a dedicated project with restricted access.
This ensures that sensitive reports are preserved and can be restored if needed.
Change Owner
The Change Owner option allows you to transfer ownership of a report from one user to another.
Only users with a Creator license can perform this action, and only users with a Creator license can become the new owner.
When the owner of a report is changed:
- The new owner gains full rights over the report.
- The former owner may lose access if they do not have sufficient permissions on the report.
Permissions Required
- Only Creator users can change the owner of a report.
- The new owner must also have a Creator license.
- Recipient users cannot be assigned as report owners.
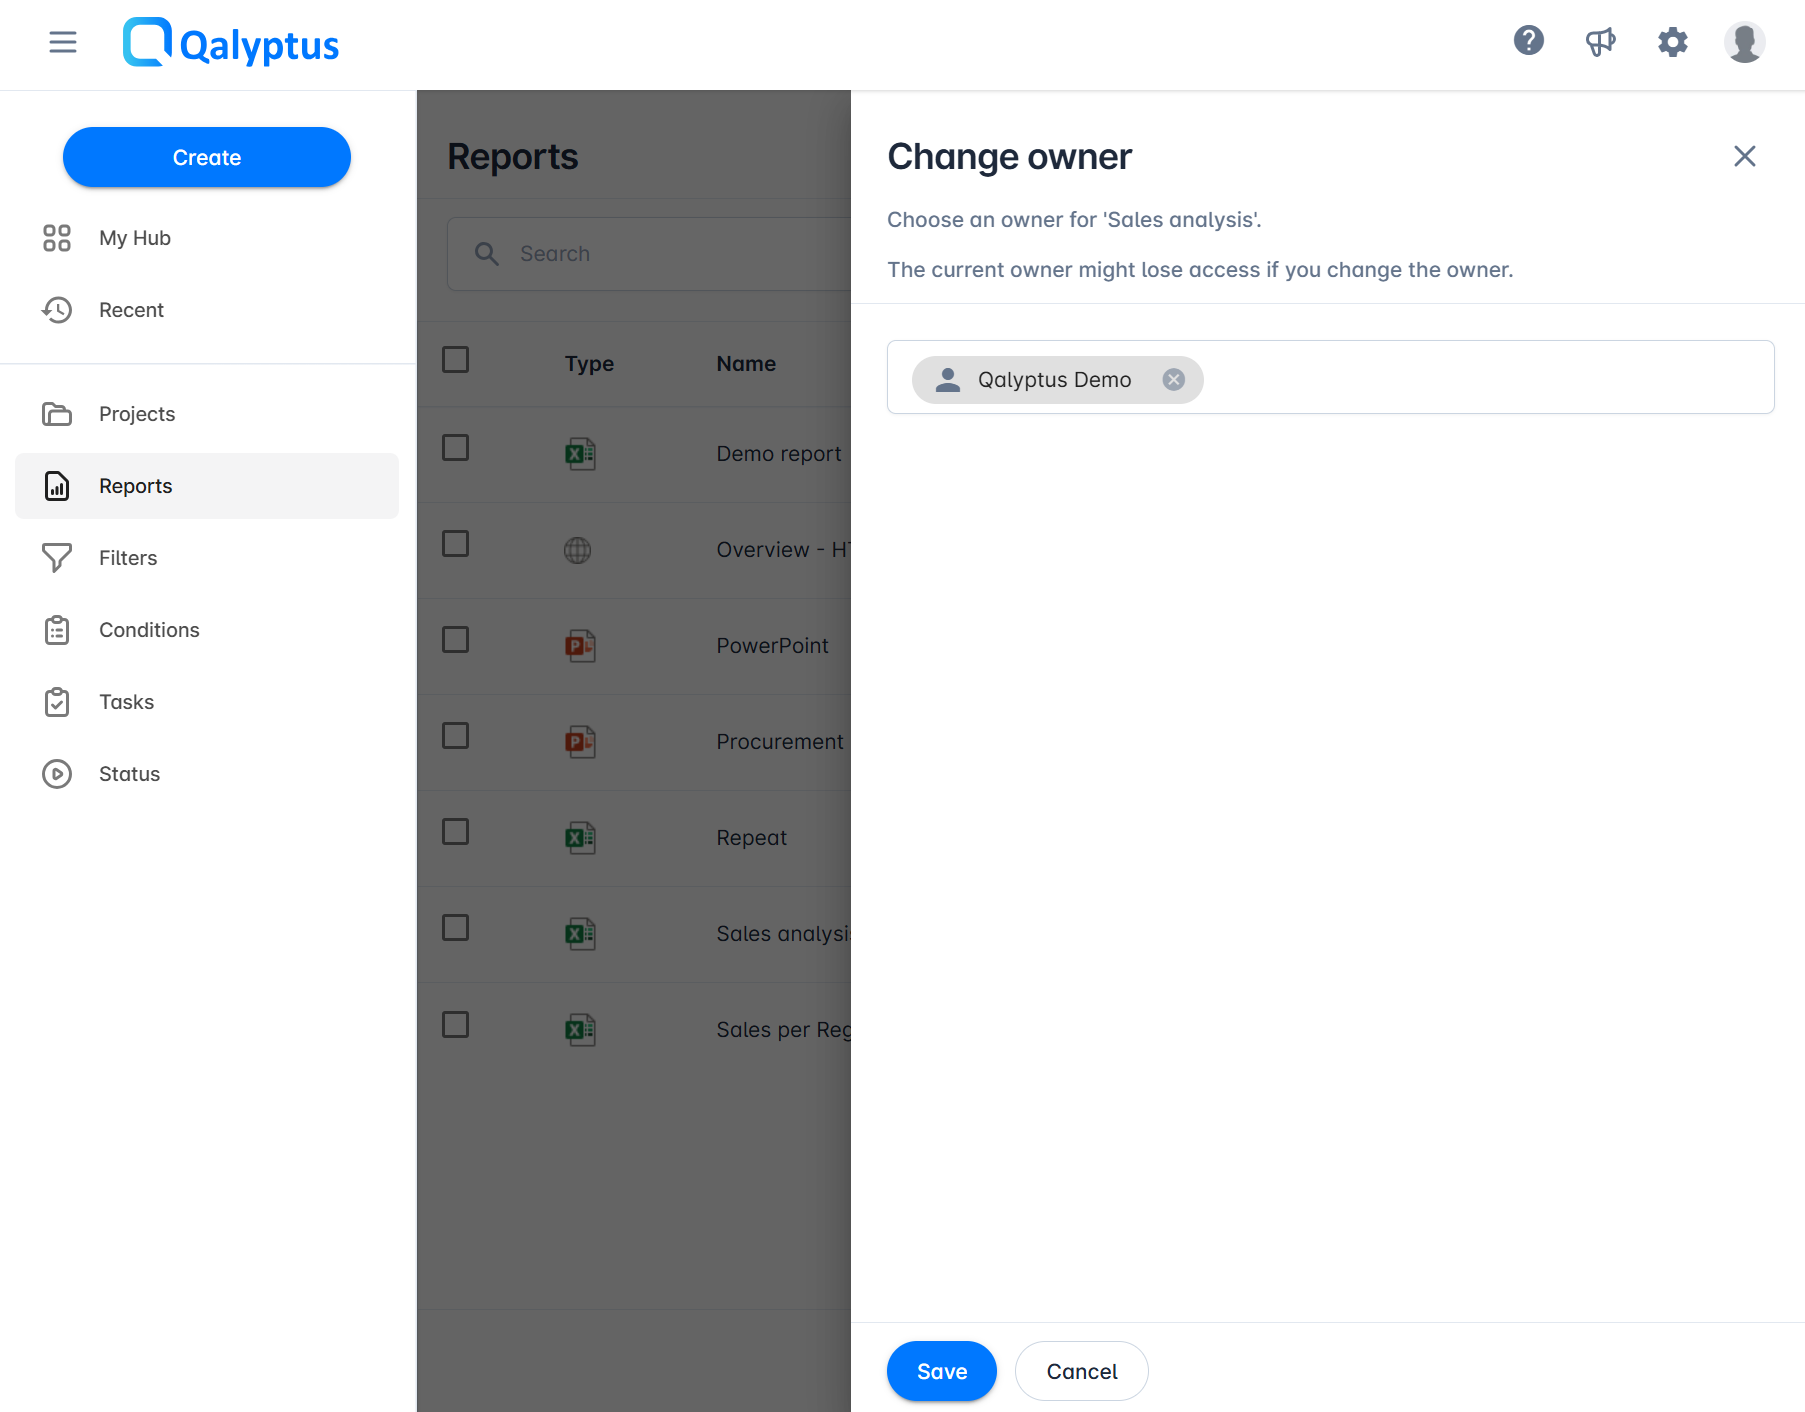
Steps to Change the Owner of a Report
- Go to the Reports list.
- Find the report whose owner you want to change.
- Click the Action button next to the report.
- Select Change Owner.
- In the dialog box, search for and select the new owner.
- Click Save to confirm.
The ownership of the report will be updated, and the new owner will now have full control.
Key Points
- Only Creator users can initiate and receive ownership.
- The new owner has full rights to the report.
- The former owner may lose access if they lack the required permissions.
- Recipient users cannot be assigned as owners.
Use the Change Owner option when a team member leaves or when responsibility for a report needs to be transferred to another Creator in the organization.
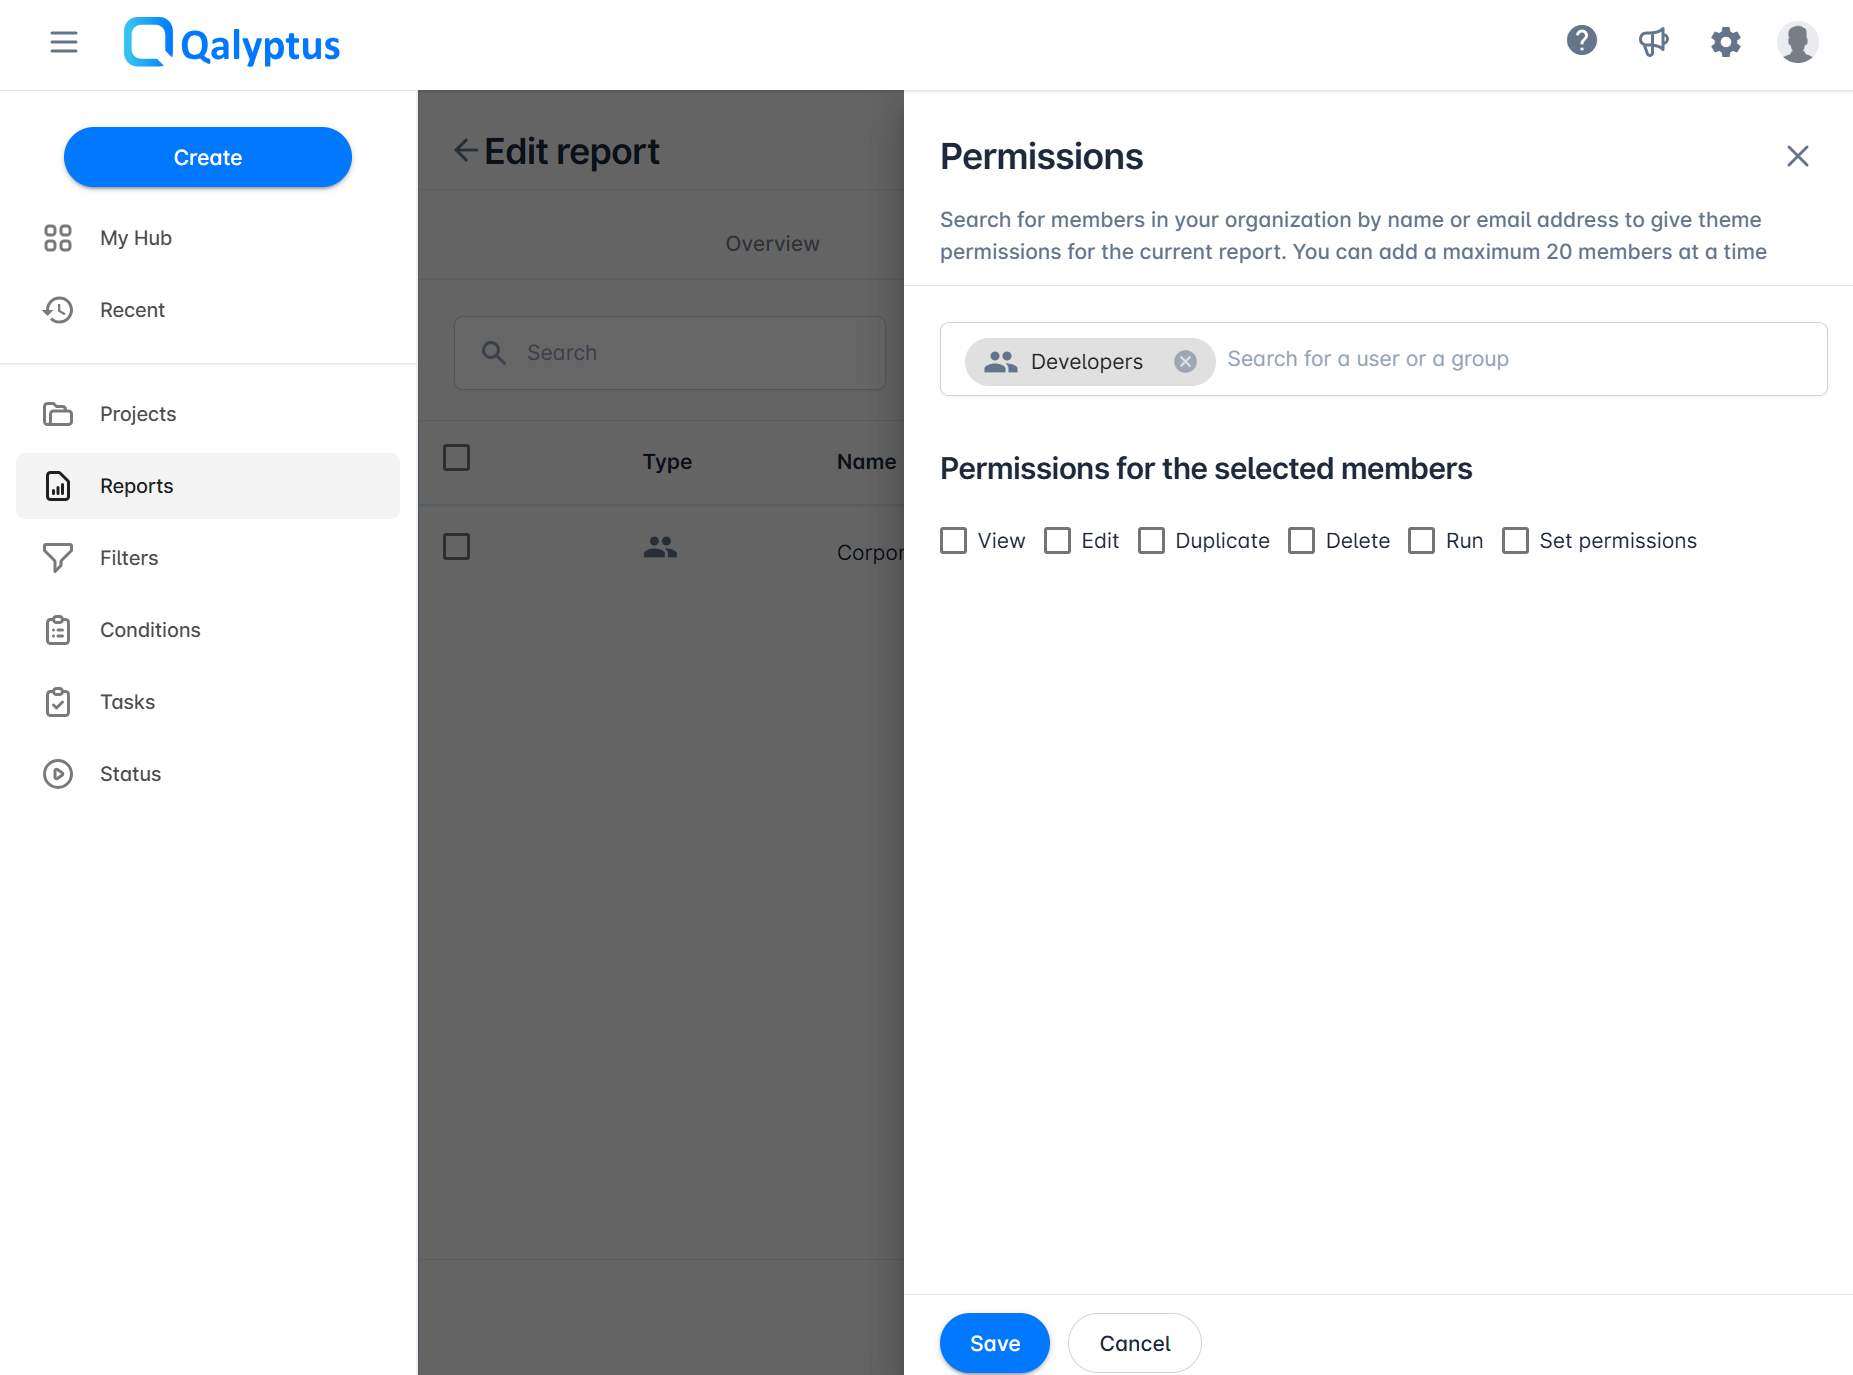
Permissions
Project permissions allow you to control permissions for the project. You can choose the permissions you want to assign to a user or a group. Available permission are: View, Edit, Duplicate, Delete, Run, and Set permissions.
Note taht you can change the report permissions only if the report project is configured with Customizable permissions. Learn more about project permissions.
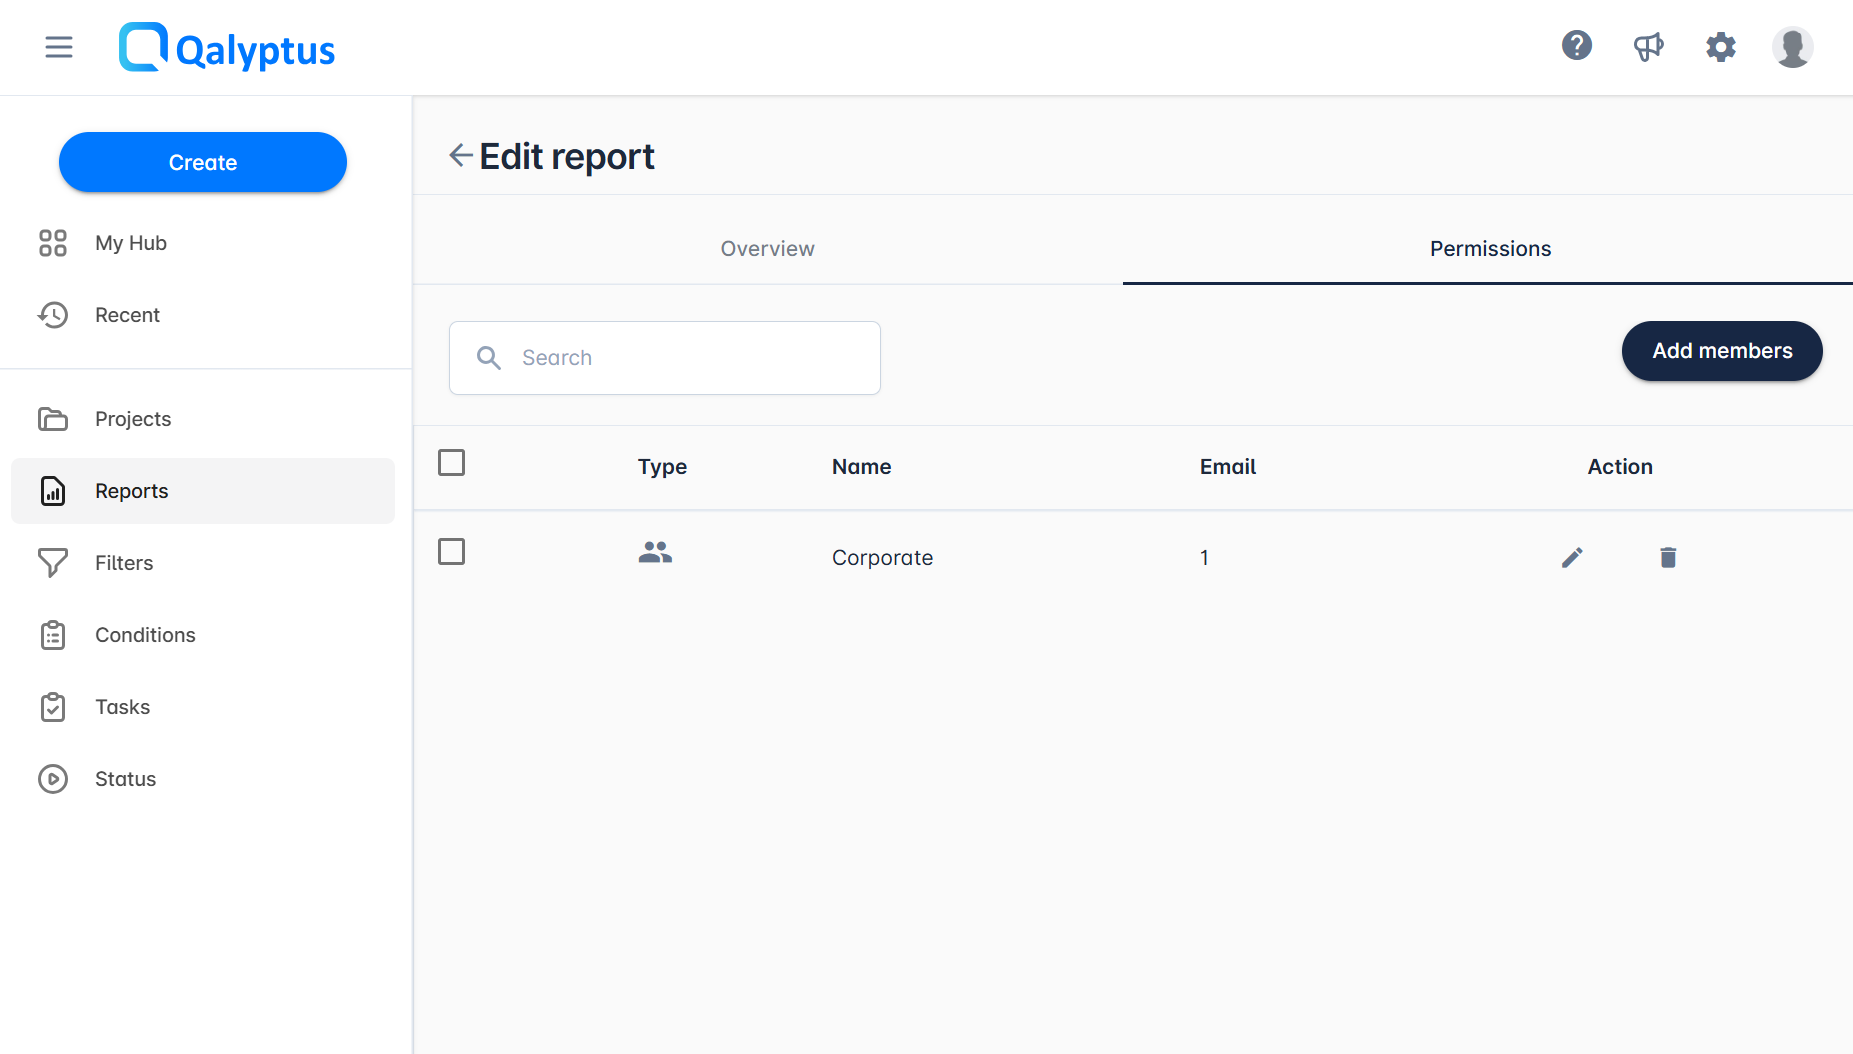
To set permission to users or groups to a report, do the following
- Go to the Report page and click on the report to edit it.
- Click on the Permissions tab.
- Click Add members.
- Select the members.
- Choose the permissions.
- Click Save
- You can change or delete each member's permissions separately.
Related Links
- Distribute reports – Learn the different methods available to distribute reports.
- Choose output formats – Generate and distribute reports in multiple output formats.
- Protect report files – Add password protection to distributed report files.
- Filter reports – Apply filters to reports to limit or refine data.
- Generate reports by condition – Configure reports to run only when a specific condition is met.