Qlik Sense Applications
This section covers the configuration and synchronization of Qlik Sense applications in Qalyptus Hub, the single access point where users find their Qlik applications, reports, and resources.
As in Qlik Sense Hub, users can only see the applications they are authorized to access in Qlik Sense.
Synchronizing Qlik Sense Applications
Before synchronizing, ensure that the Qlik Sense server address and a service user are configured.
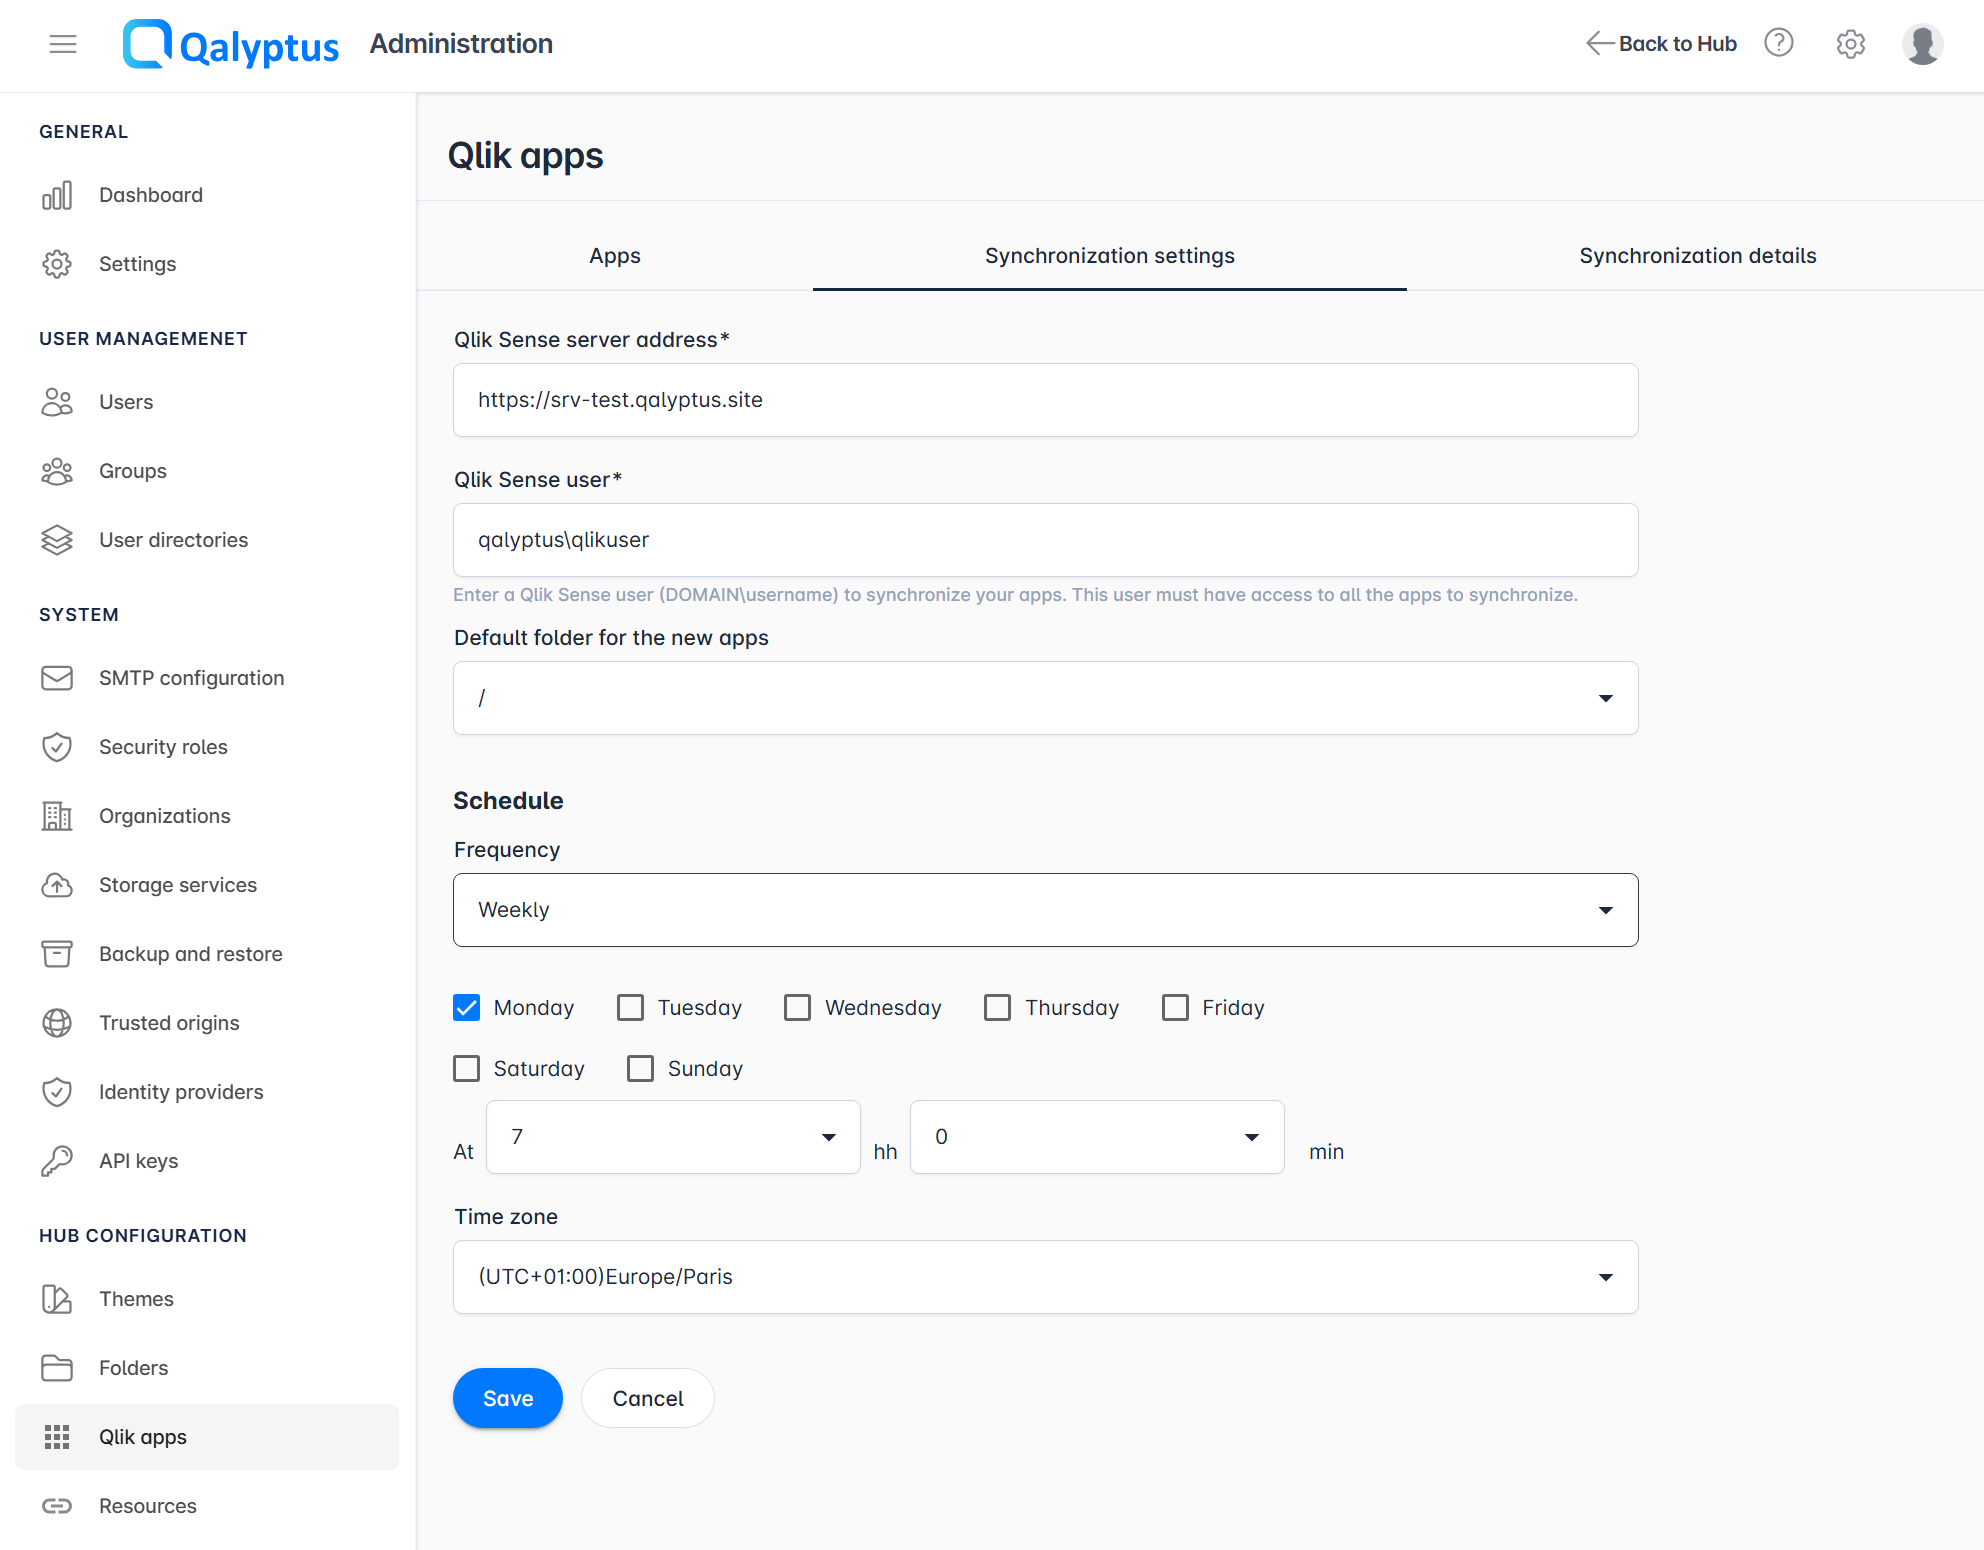
Synchronization settings
- Navigate to Administration > Hub Configuration > Qlik apps > Synchronization settings
- Enter your Qlik Sense server address
- Enter an admin Qlik Sense user in the format UserDirectory\UserID
- Select the Default folder where newly synchronized apps will be stored
- Select the schedule frequency to synchronize the apps automatically
- Click Save
The Qlik Sense user must have sufficient administrative permissions to retrieve all applications and their associated access rights.
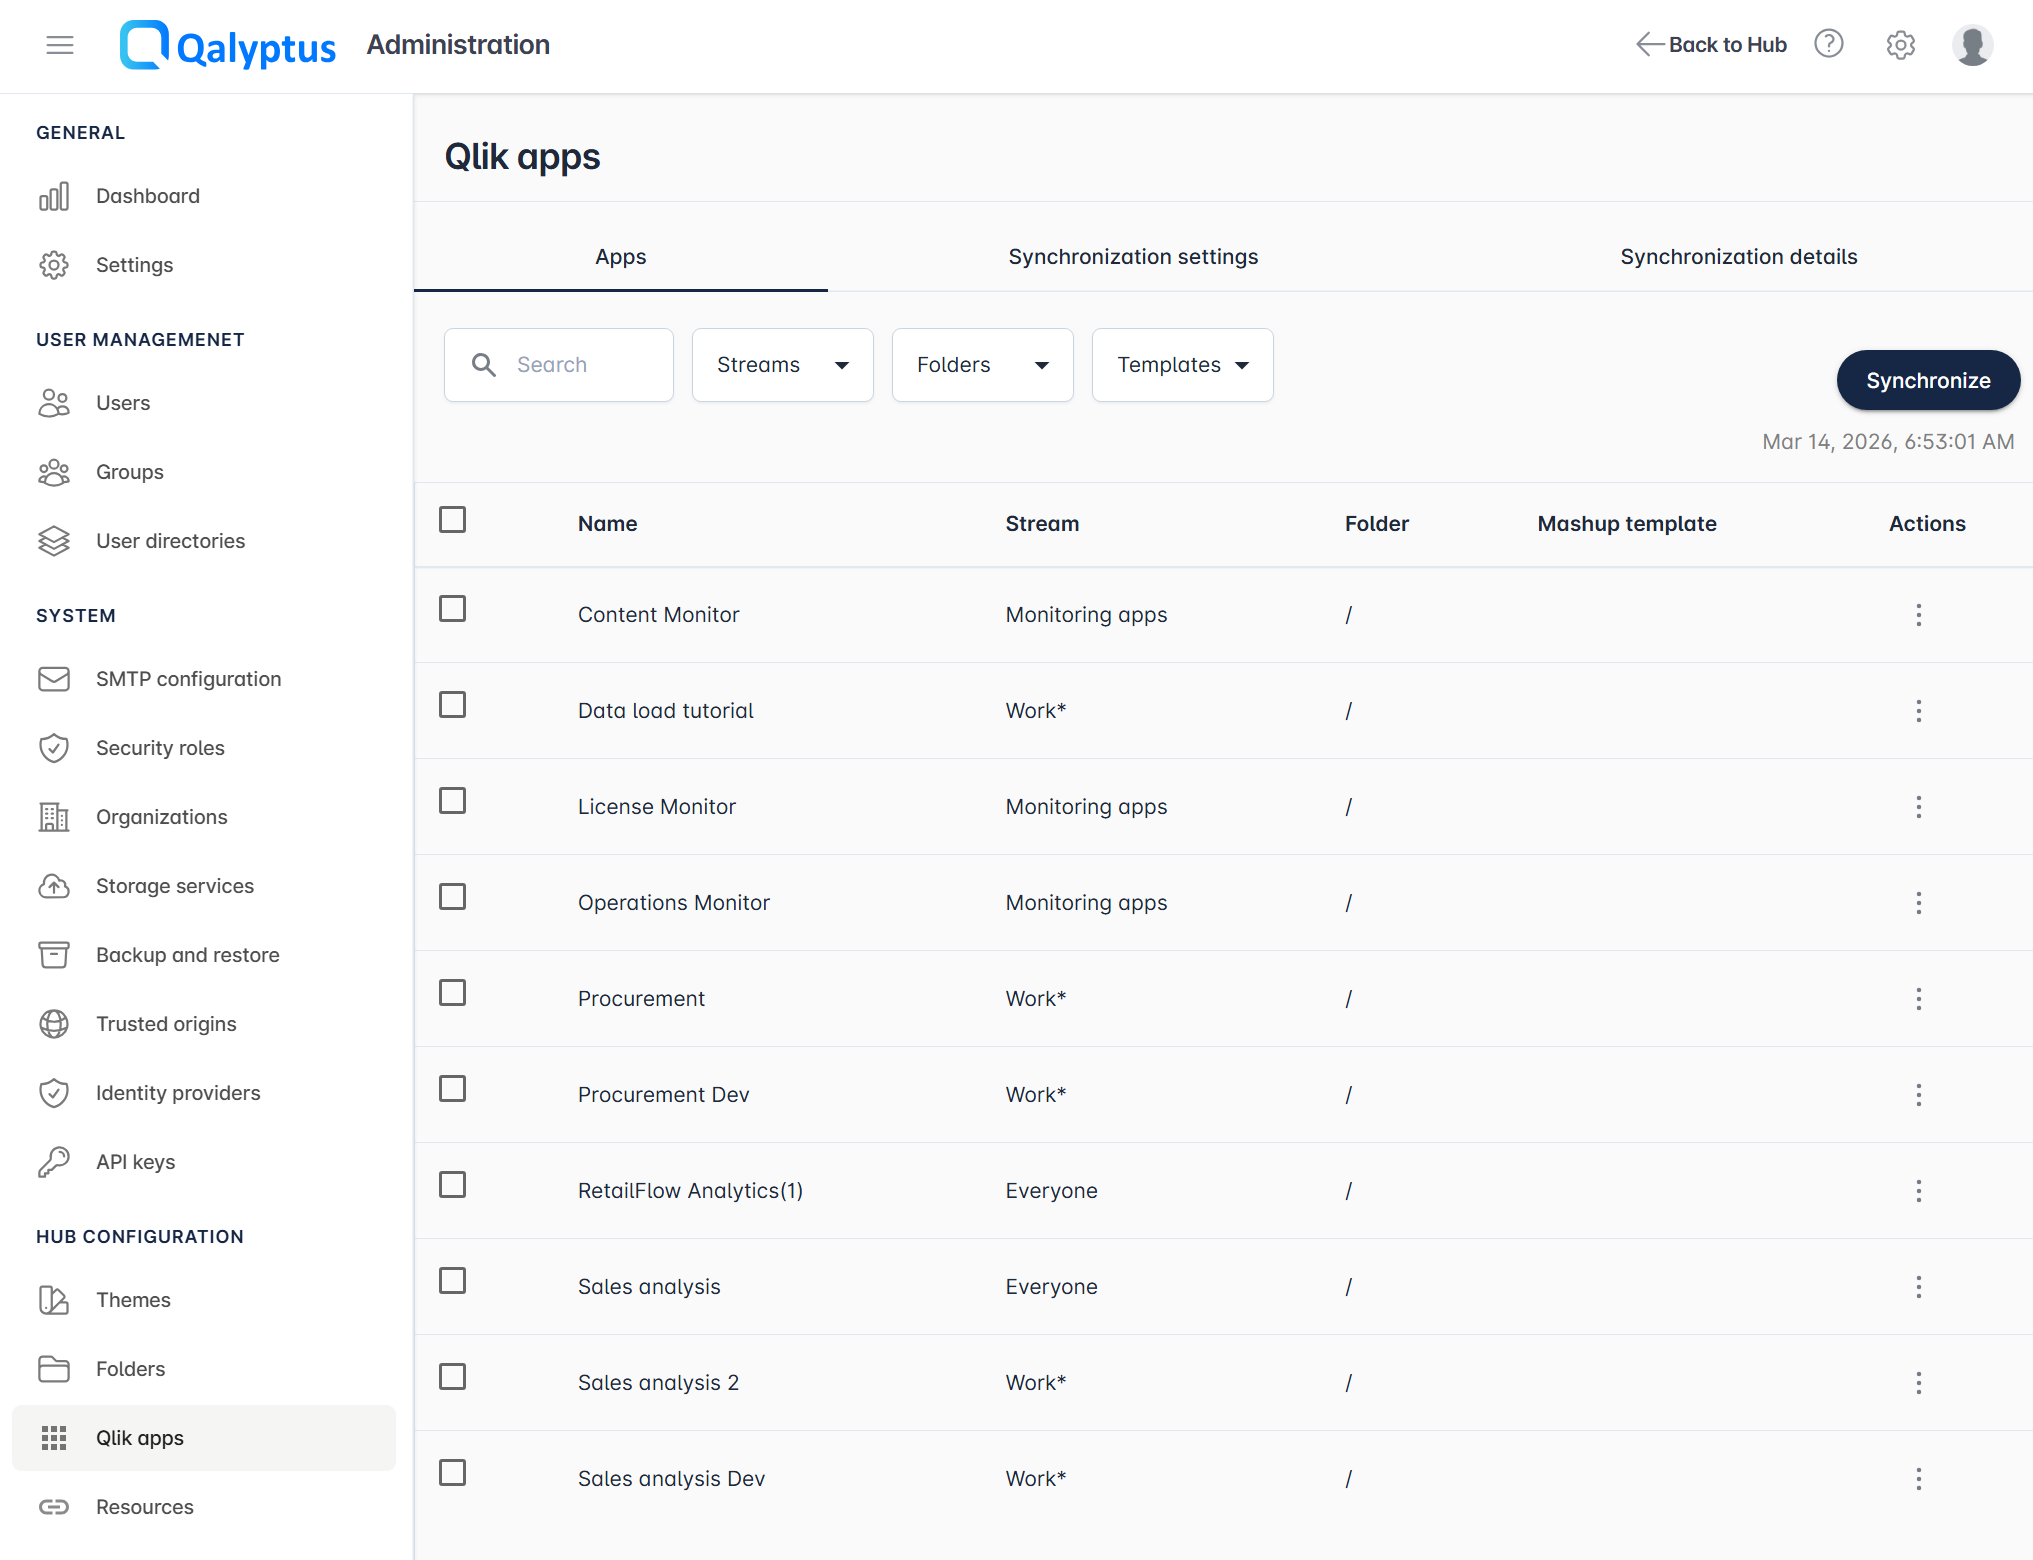
Start synchronization
- Navigate to Administration > Hub Configuration > Qlik apps > Synchronization settings
- Click Synchronize
- The synchronization starts and you are redirected to the Synchronization details tab, which displays:
- The last synchronization start time
- The synchronization status: Never, Running, Error, or Stopped
- The next scheduled execution time, if a frequency has been configured
- A confirmation message on success, or an error message if the synchronization failed
- Once the synchronization is complete, go to the Apps tab
- The updated app list is displayed, reflecting the following changes:
- New apps in Qlik Sense are added to the list and the Hub
- Existing apps have their metadata updated
- Deleted apps in Qlik Sense are removed from the list and the Hub
Users will see in the Hub only the apps they are authorized to access in Qlik Sense. To ensure correct app visibility, each user's domain account must be added to their profile in Qalyptus Server before the synchronization.
You can synchronize a single application individually. This updates only that app's metadata without affecting others.
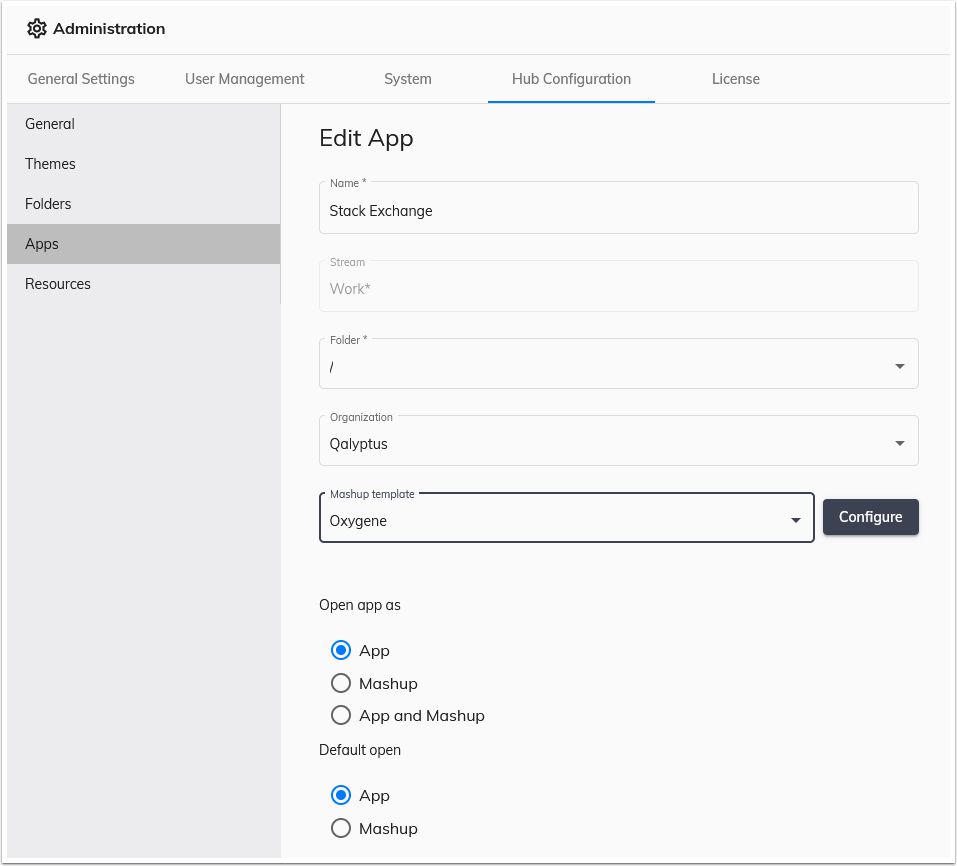
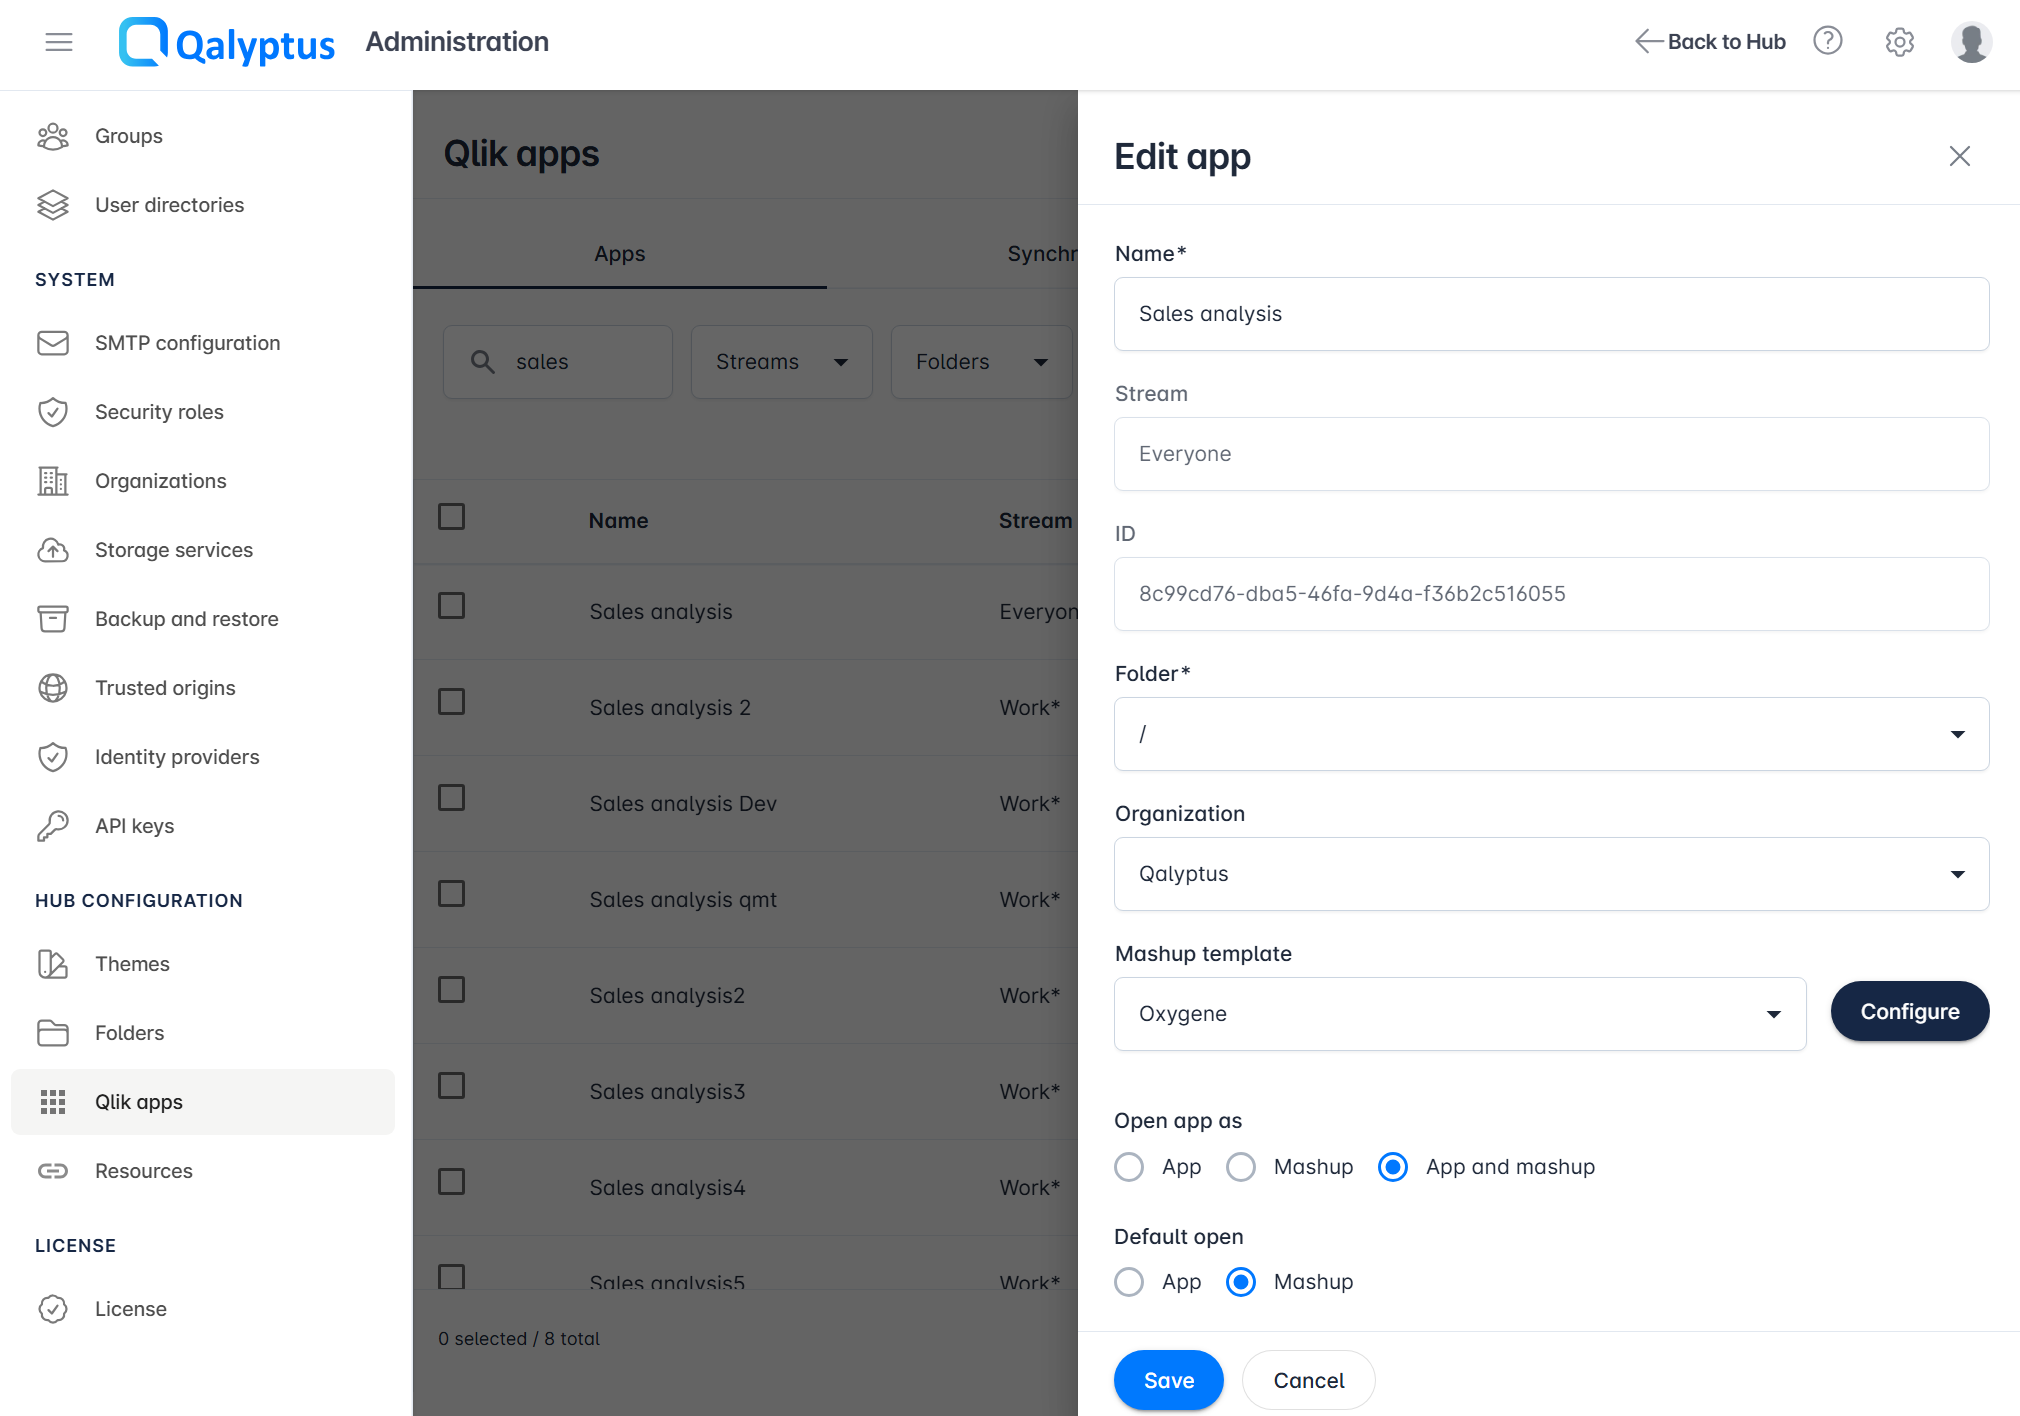
Configuring a Qlik Sense Application
Each synchronized application can be individually configured to improve the user experience in Qalyptus Hub:
| Setting | Description |
|---|---|
| Folder | Choose which folder or subfolder the app appears in |
| Organization | Restrict visibility to members of a specific organization (the user must also be authorized in Qlik Sense) |
| Mashup | Link a custom mashup to the app |
| Open As | Allow users to open the app as a standard Qlik Sense app, as a mashup, or both |
| Default Action | Define what happens when a user clicks the app thumbnail: open as app or as mashup |
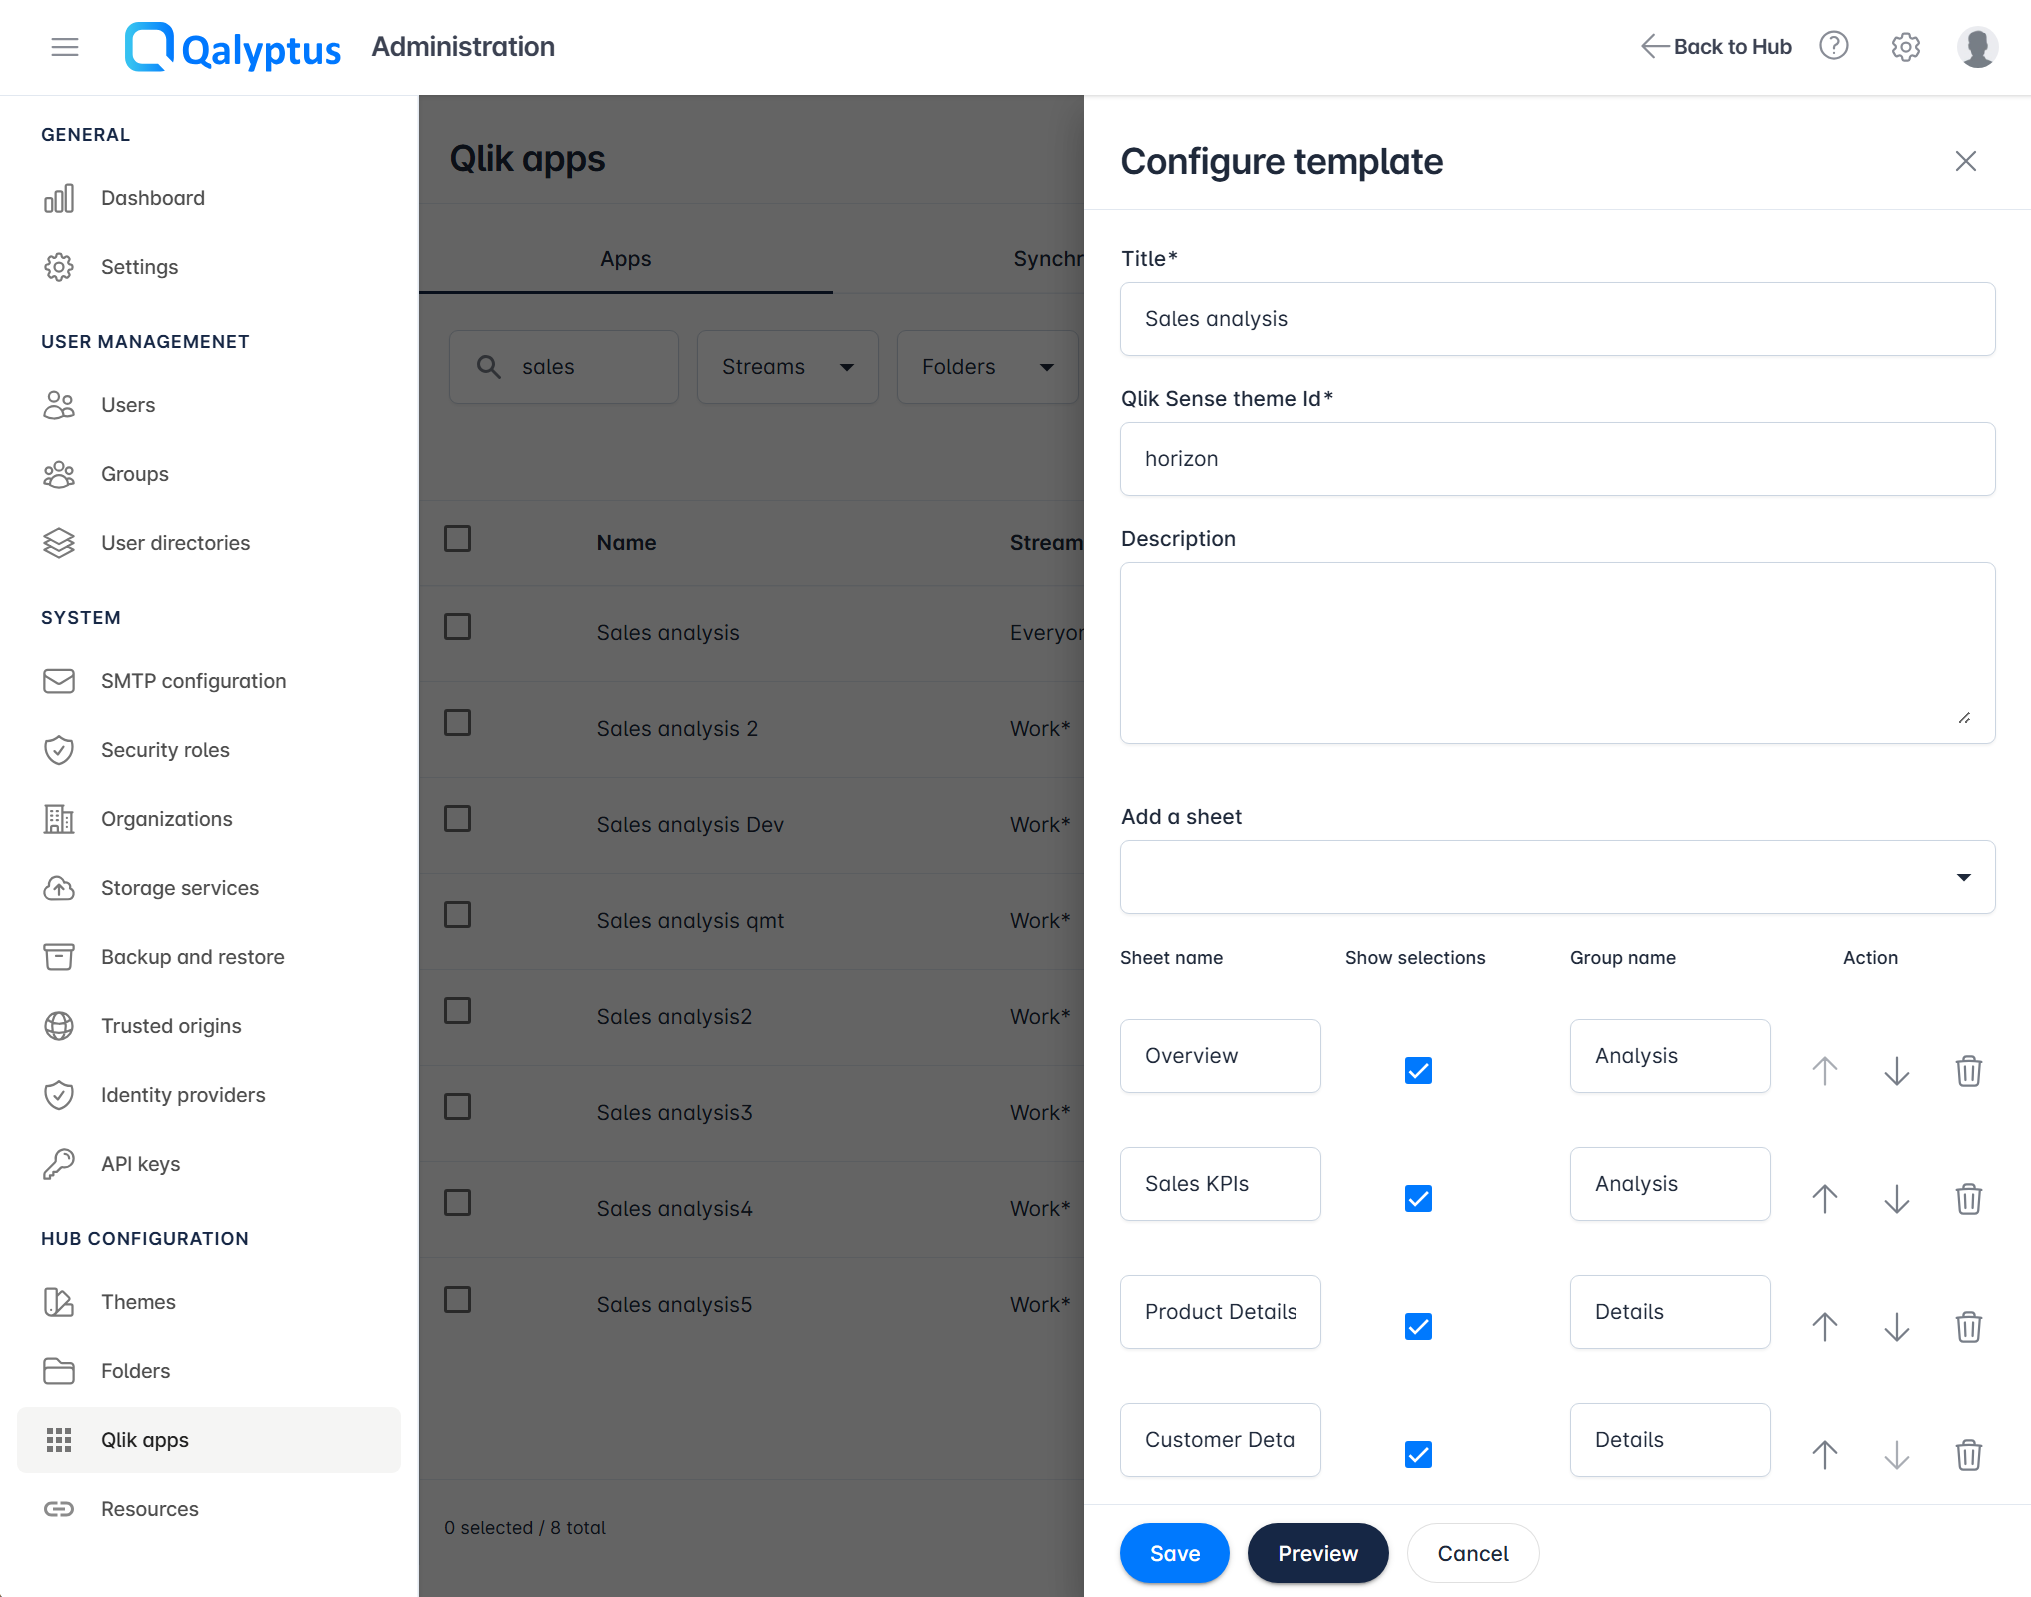
Creating a Mashup for a Qlik Sense Application
Qalyptus Hub enables users to open Qlik Sense applications either through the standard Qlik Sense interface or via a custom mashup, providing a simplified and organized view of selected sheets.
To create a mashup:
- Go to Administration > Hub Configuration > Qlik apps > Apps and edit an app
- Select a Mashup Template
- Click Configure
- In the configuration window:
- Enter a Title for the mashup
- Optionally enter a Qlik Sense Theme ID to apply a custom theme
- Add a description if you wish
- Select the Sheets to include
- Rename or reorder sheets as needed
- Toggle the Selections Toolbar visibility per sheet
- Optionally group sheets together
- Click Preview to validate the result
- Click Save
Then in the Open As setting, choose Mashup or App and Mashup to control how users can open the application:
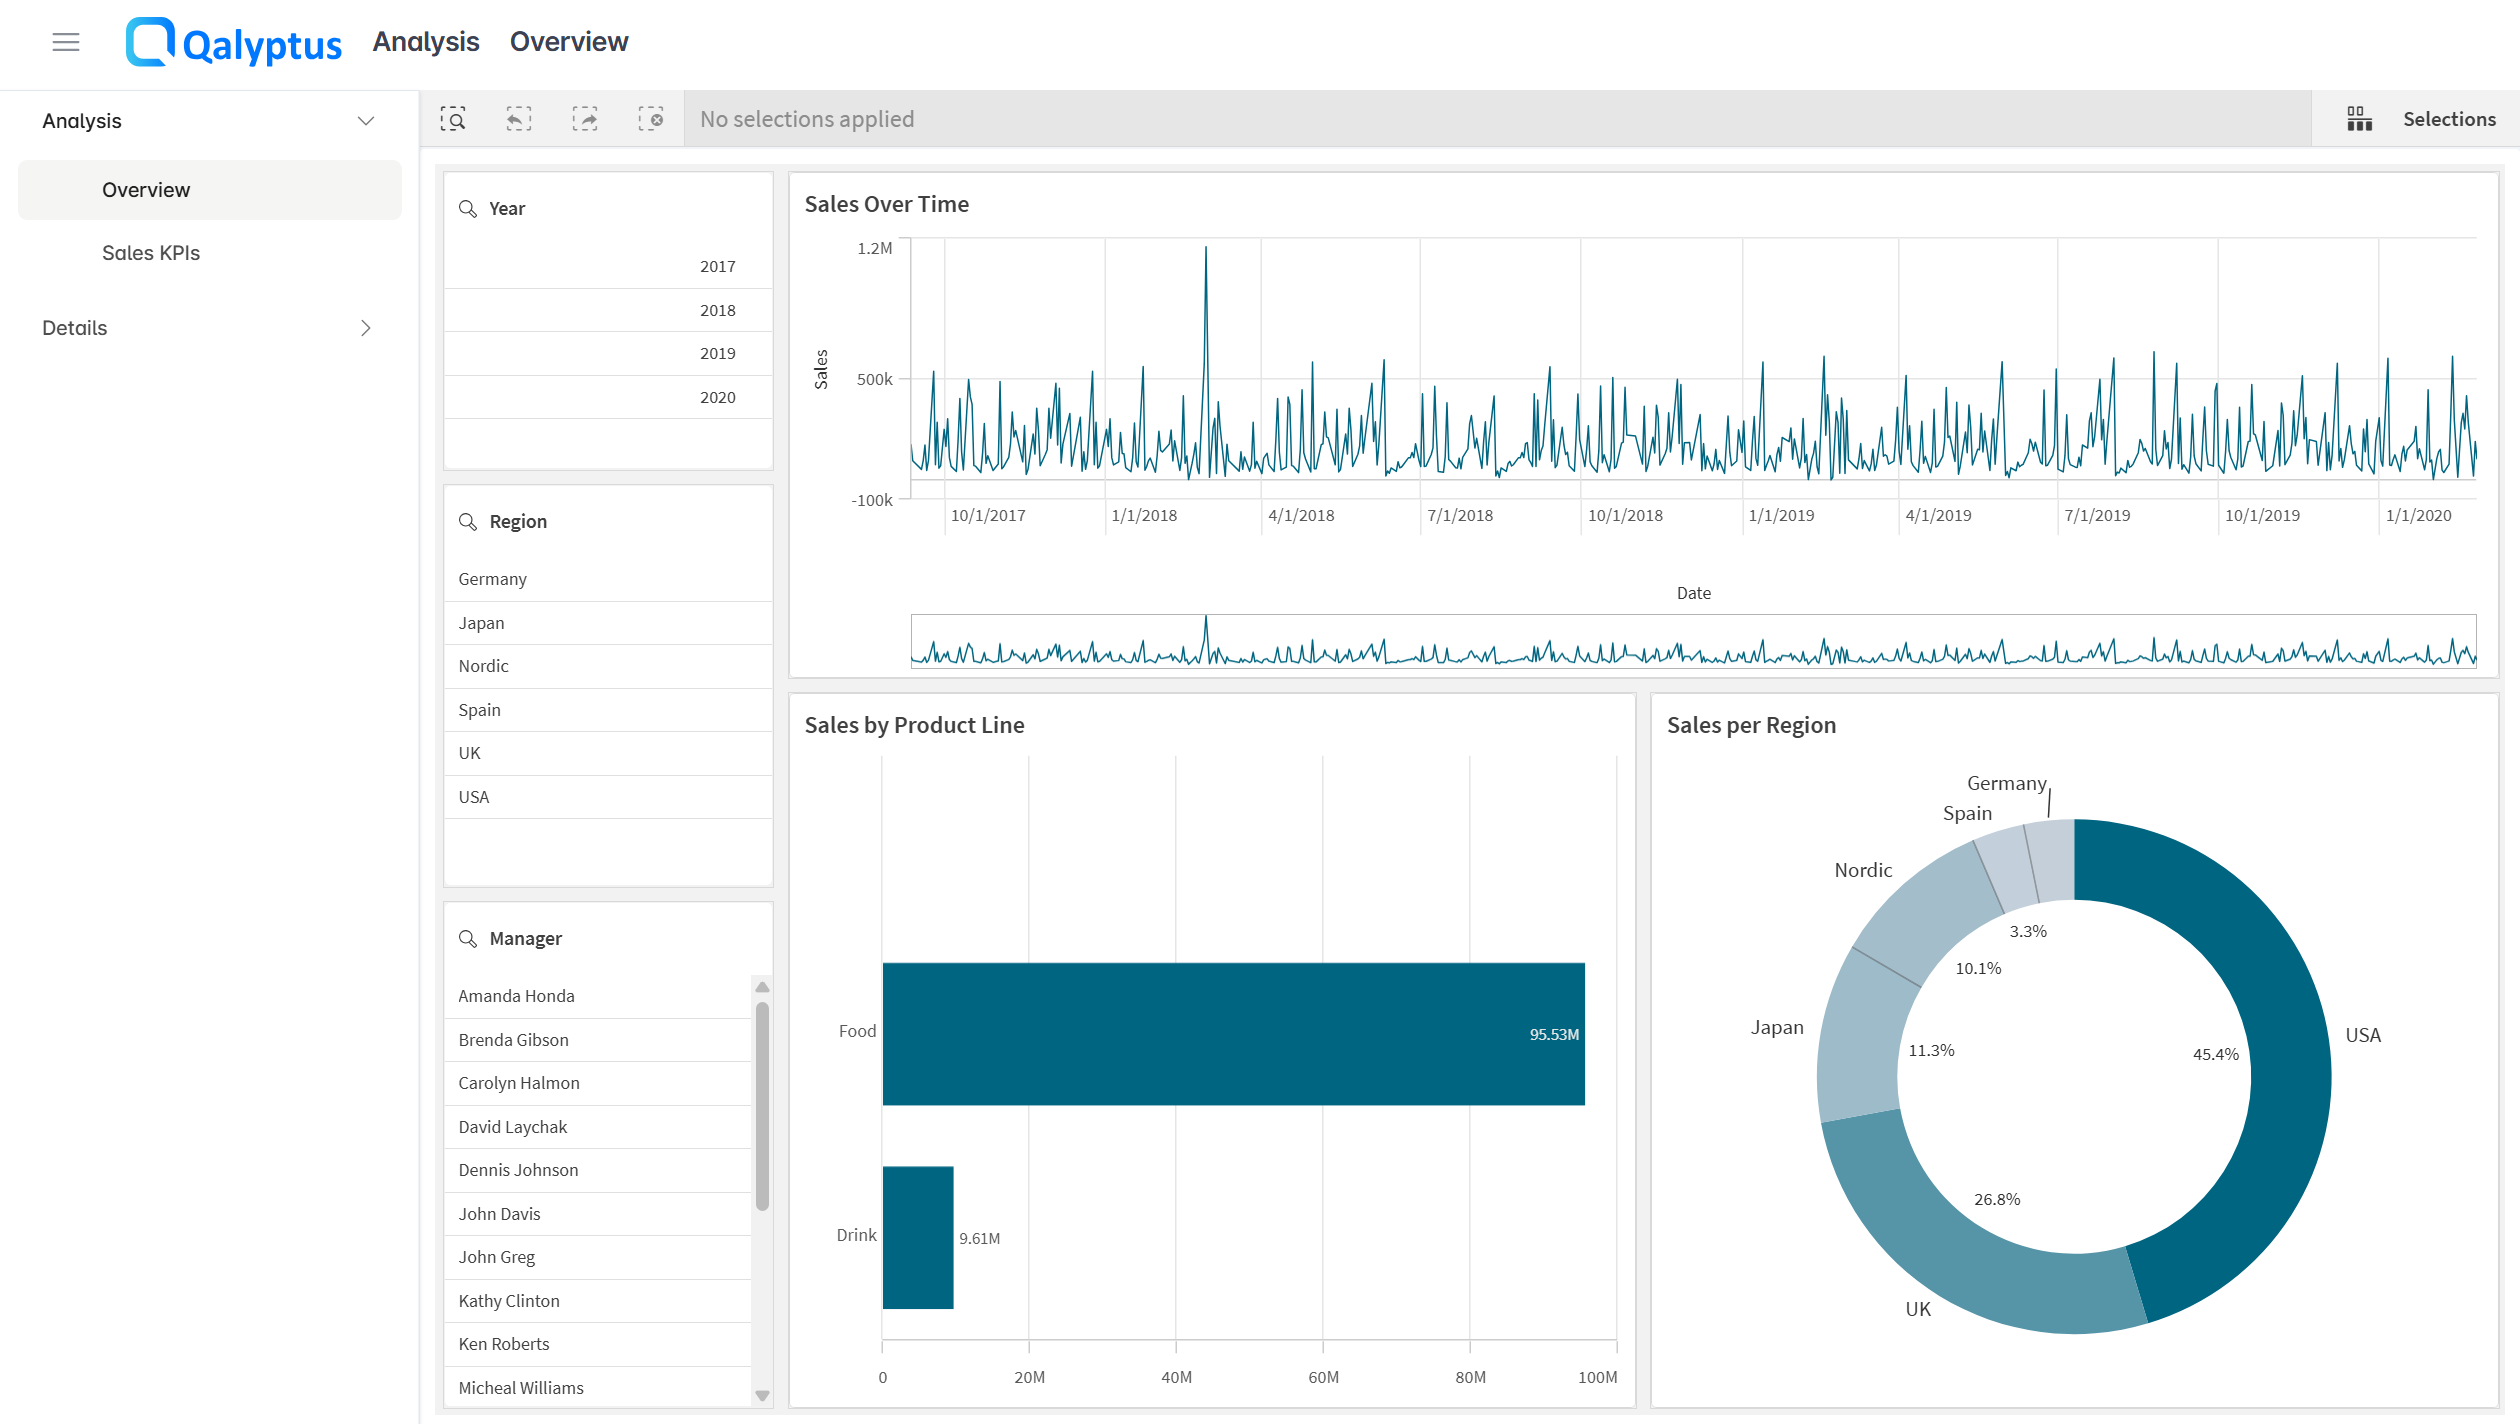
Users in Qalyptus Hub can now open the app directly as a mashup:
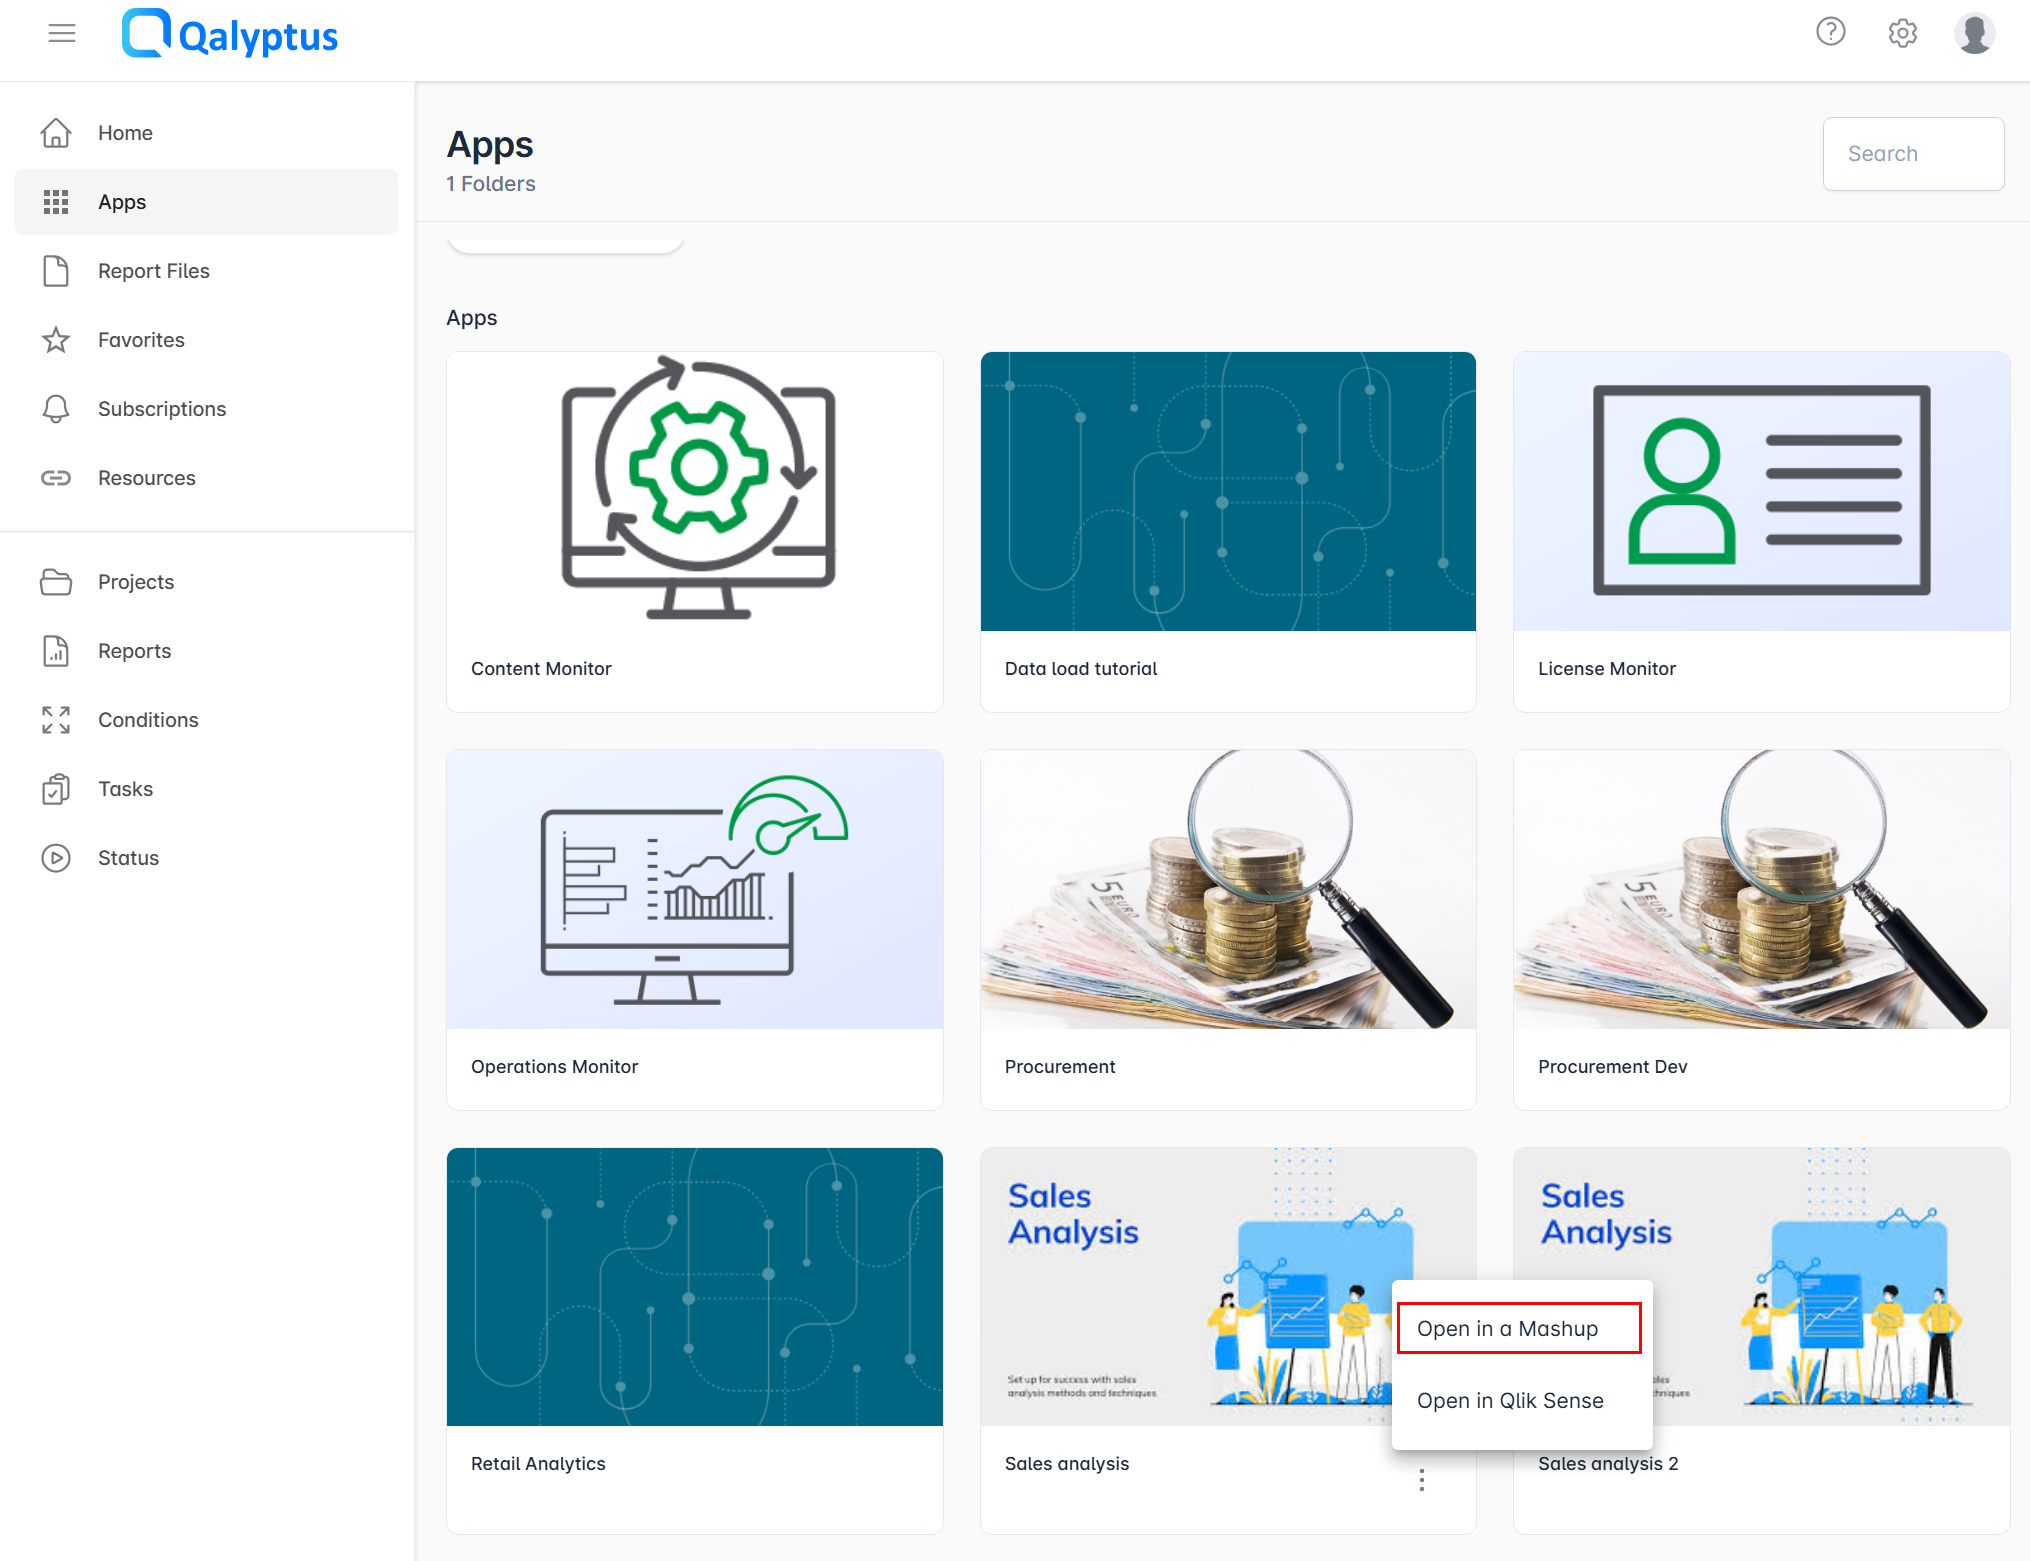
Application opened as a Mashup: