Storage Services Configuration
Qalyptus Server allows you to save generated reports in folders, in remote servers using FTP and SFTP, and in public Cloud storage services: SharePoint, OneDrive, Google Drive, and Dropbox.
This section will show how to create a storage service in Qalyptus Server.
Storage Services support is available exclusively in Qalyptus Server Enterprise edition.
1- Create an FTP or SFTP service
To create an FTP or SFTP service, follow the steps below:
- Connect to Qalyptus Server.
- Go to Administration> System> Storage Services
- Click Create service
- Enter the information in the following fields:
- Name: Enter the name of the service.
- Description: Enter a description for the service (optional).
- Default: Check this box to set this service as the default service.
- Type: Choose FTP or SFTP.
- Hostname: Hostname of your FTP server.
- Username: Username of the FTP user.
- Password: Password of the FTP user.
- Port (only for SFTP): Enter the SFTP port. The default port is 22.
- Test directory path: Enter the directory to upload a sample file to test the connection. Use '/' for the root path.
- Passive Mode (only for FTP): Check this box if you want to use passive mode.
- Click Test Connection to verify access to the service
- Click Save
2- Create a Google Drive service
Qalyptus allows reports to be stored in Google Drive folders and on Team Drives, which can only be created with a Google Workspace account.
Before creating a Google Drive service, you need to enable Google Drive API in your Google Cloud Console.
a- Enable Google Drive API
- Connect to Google Cloud Console: https://console.cloud.google.com.
- Select an existing project or create a new one.
- In the left menu, click APIs & Services.
- Click + ENABLE APIS AND SERVICES.
- Search for Google Drive API.
- In the search result, select Google Drive API.
- Click Enable.
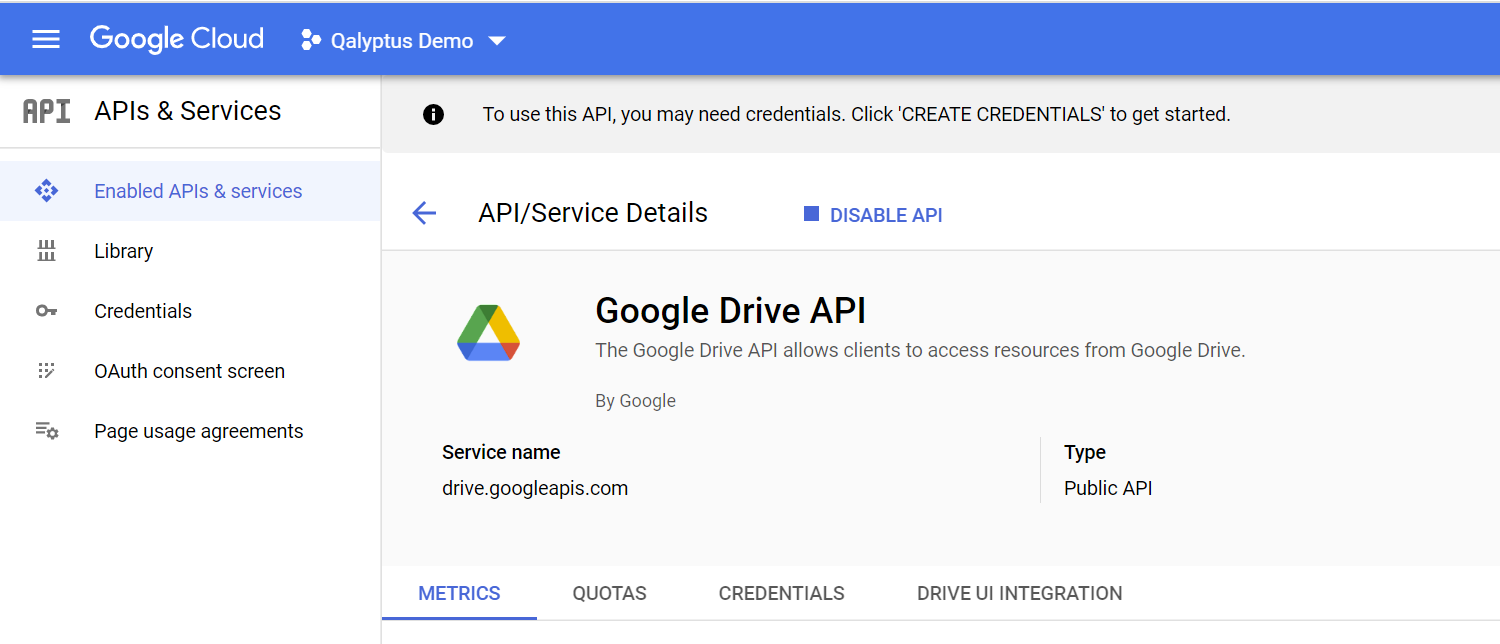
After enabling the Google Drive API, you will be redirected to the API details. Your screen will look like this:
b- Configure OAuth consent screen
- In the left menu, click OAuth consent screen.
- Choose External user type.
- Click Create.
- Give a Name to the application (Example: Qalyptus Server).
- Select a User support email.
- Add the Developer contact email address.
- Click Save and Continue.
- Add the following scope: ./auth/drive.
- Click Save and Continue.
- Add Test users. Before publishing the app, only the users added to this list can connect.
- Click Save and Continue.
c- Create Credentials
- In the left menu, click Credentials.
- Click + CREATE CREDENTIALS.
- Choose OAuth client ID.
- In application Type, select Web application.
- Enter a name for the Credential.
- In Authorized redirect URI, enter the OAuth 2 Redirect URI displayed when creating the service in Qalyptus
({public-hostname}/oauth2callback).
Tip: The Redirect URI can be found on the Create service page in Qalyptus Server. - Click Create.
- A client ID and secret keys are generated.
- Copy the two keys to use them to create the Google Drive service in Qalyptus Server.
The Authorized redirect URI must be the same in the Google Drive API and the Qalyptus Server service. Google Drive doesn't accept some URI formats, like a URI with a non-public extension (https://my-server.local:3994).
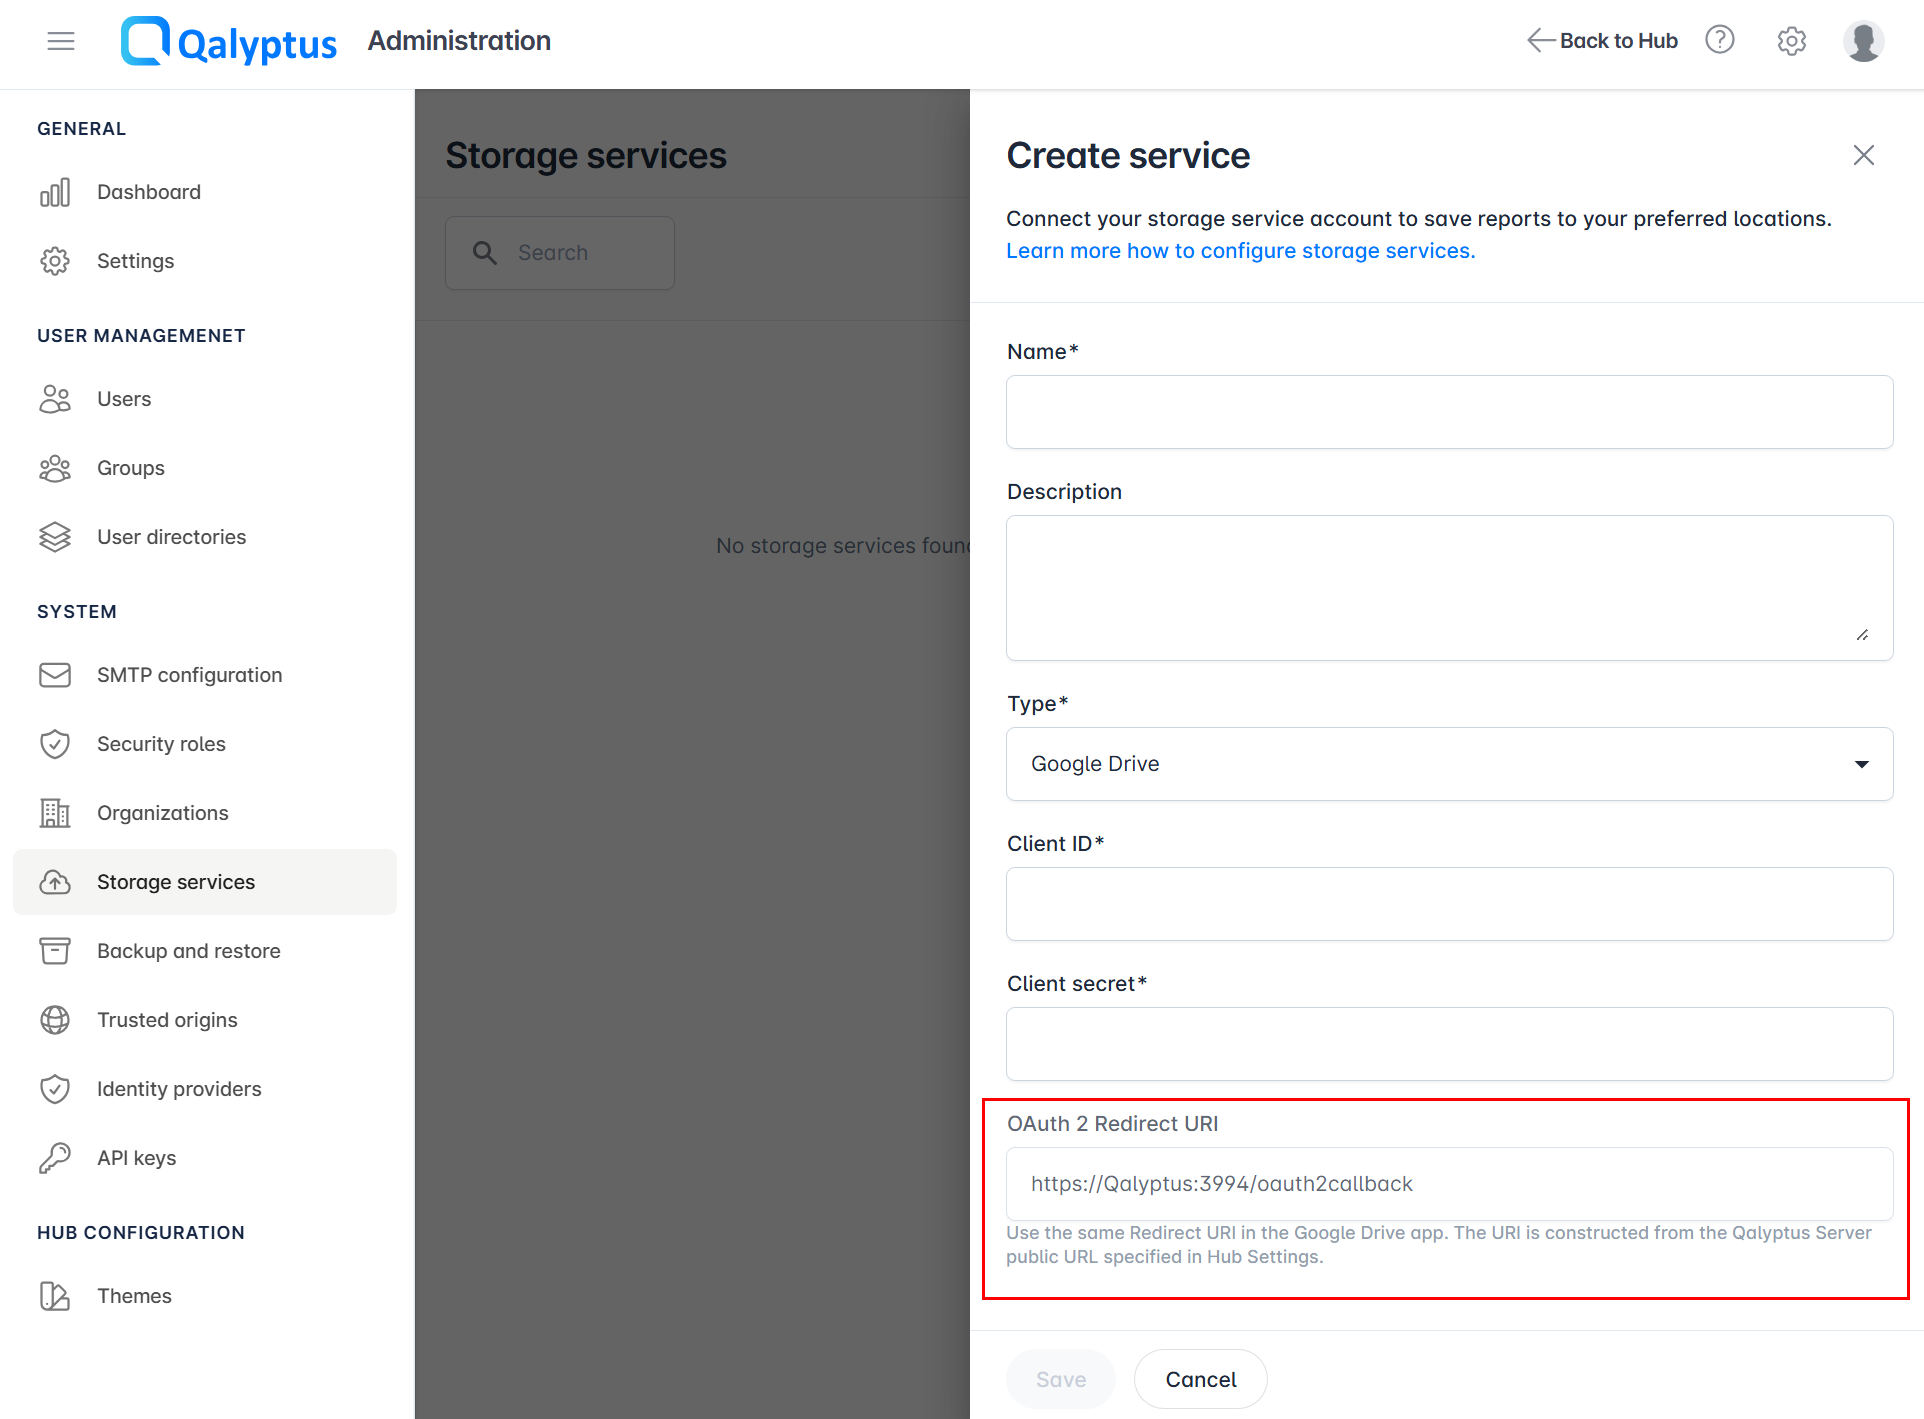
d- Create a Google Drive service in Qalyptus Server
- In Qalyptus Server, navigate to Administration > System > Storage services.
- Click Create service.
- Enter a name for the service.
- Add a description if you wish.
- Select the type Google Drive.
- Enter the Client ID and Client secret generated previously in the Google Cloud Console.
- Ensure that the URI matches the one entered in the Google Cloud Console.
- Click Save.
You will be redirected to the Google Authorizations screen. You must authenticate and accept the permissions to upload files to your Google Drive account.
The Google Drive API has limits for uploading files. Please check the Google documentation or contact Google support to know more about the limits and the potential additional pricing to upload many files.
The Google Drive API is in development mode. You can continue to use it in this mode with allowed users or publish the API to production. The second option requires Google validation and allows all of your users to create a connection.
Qalyptus Server will maintain its connection to Google Drive until you revoke it either within Qalyptus Server or through your Google account.
3- Create a SharePoint/OneDrive service
To configure the connection to OneDrive and SharePoint, you must register an application in Azure. You can create a single app for OneDrive and SharePoint or create an app for each. The only difference is in permissions. If you're creating a single app, you must add the necessary permissions for OneDrive and SharePoint.
a- Register an app in Azure
- Connect to your Azure portal (portal.azure.com).
- Navigate to Azure Active Directory.
- Select App registrations.
- Click New registration.
- Enter a name for the app (Example: Qalyptus Server).
- In Supported account, choose Accounts in this organizational directory only.
- In Redirect URI, select the platform Web, then enter a URI in the following format:
{public-hostname}/oauth2callback.
Tip: The Redirect URI can be found on the Create service page in Qalyptus Server. - Click Register.
- In the left menu, click API permissions.
- Click Add a permission.
- In the list of APIs, select Microsoft Graph.
- Then select Delegated permissions.
- Add the following permissions for OneDrive: Files.Read.All, Files.ReadWrite.All and these permissions for SharePoint: Sites.Read.All, Sites.ReadWrite.All.
- In the left menu, click Certificates & secrets.
- Click New client secret.
- Choose the expiration date and add a description if you wish.
- A secret key will be generated.
- Copy the value and save it in a secure place. The key will no longer be visible after refreshing the page.
- You will need the secret key to create the service in Qalyptus Server.
d- Create a SharePoint or OneDrive service in Qalyptus Server
- In Qalyptus Server, navigate to Administration > System > Storage Services.
- Click Add Service.
- Enter a name for the service (Example: Qalyptus Server).
- Add a description if you wish.
- Select the type SharePoint or OneDrive.
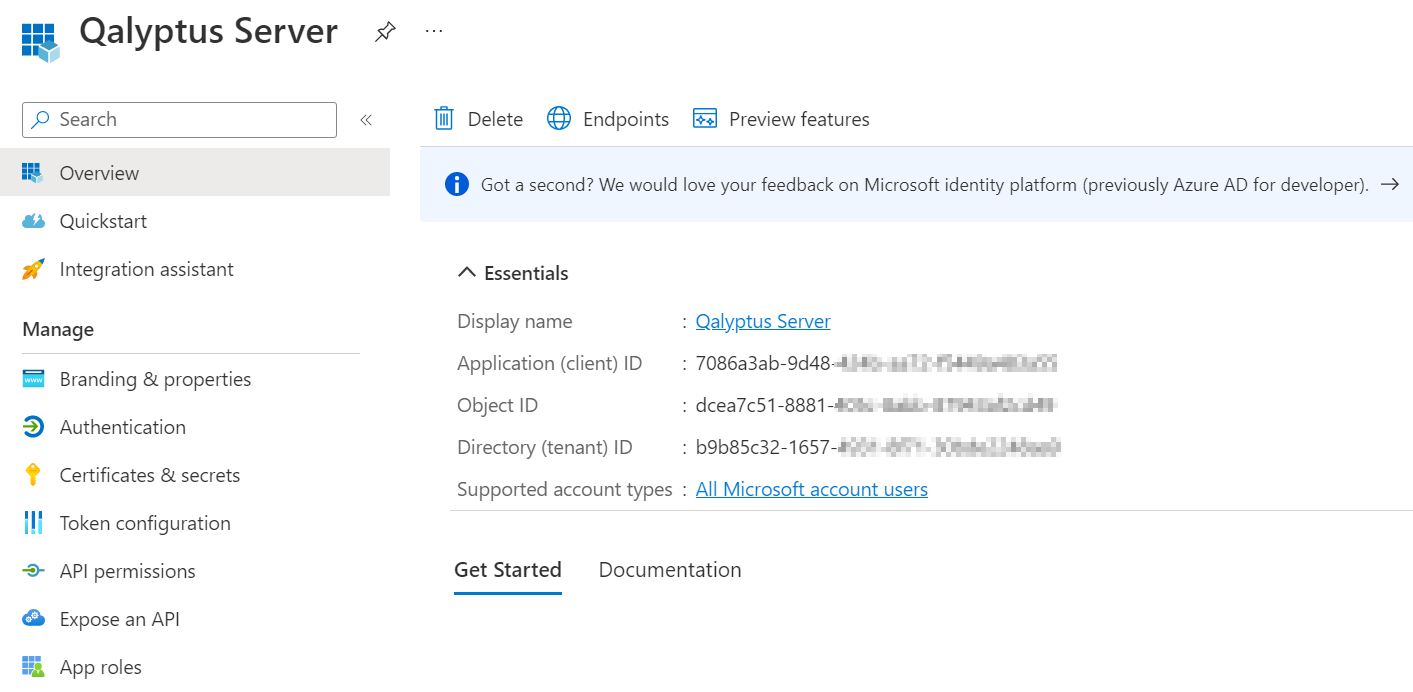
- Enter the Client ID, Tenant ID. You will find this information on the Overview page of the App.
- Enter the Client secret generated previously.
- Ensure that the URI matches the one entered in the Azure app.
- Click Save.
You will be redirected to the Microsoft Authorizations screen. You must authenticate and accept the permissions to upload files to your OneDrive/SharePoint account.
The Redirect URI must be the same in the Azure app and the Qalyptus Server service.
The SharePoint/OneDrive app in in development mode. You can continue to use it in this mode or publish it to production. The second option requires Microsoft validation.
Qalyptus Server will maintain its connection to SharePoint/OneDrive until you revoke it either within Qalyptus Server or through your Microsoft account.
4- Create a Dropbox service
Before creating a Dropbox service, you must create an app in the Dropbox developer portal.
a- Create a Dropbox app
- Connect to the Dropbox developers portal at this address: https://www.dropbox.com/developers/apps.
- Click Create app.
- Choose Scoped access.
- Choose the type of access Full Dropbox.
- Enter a name for the app.
- Click Create app.
- Allow additional users in Development users if you wish.
- In Permissions tab, select the permissions: files.content.read and files.content.write and confirm.
- In OAuth2 Redirect URIs, enter an URI in this format:
{public-hostname}/oauth2callback.
Tip: The Redirect URI can be found on the Create service page in Qalyptus Server.
An App key and an App secret key are created. You will need those two keys to create the Dropbox service in Qalyptus Server.
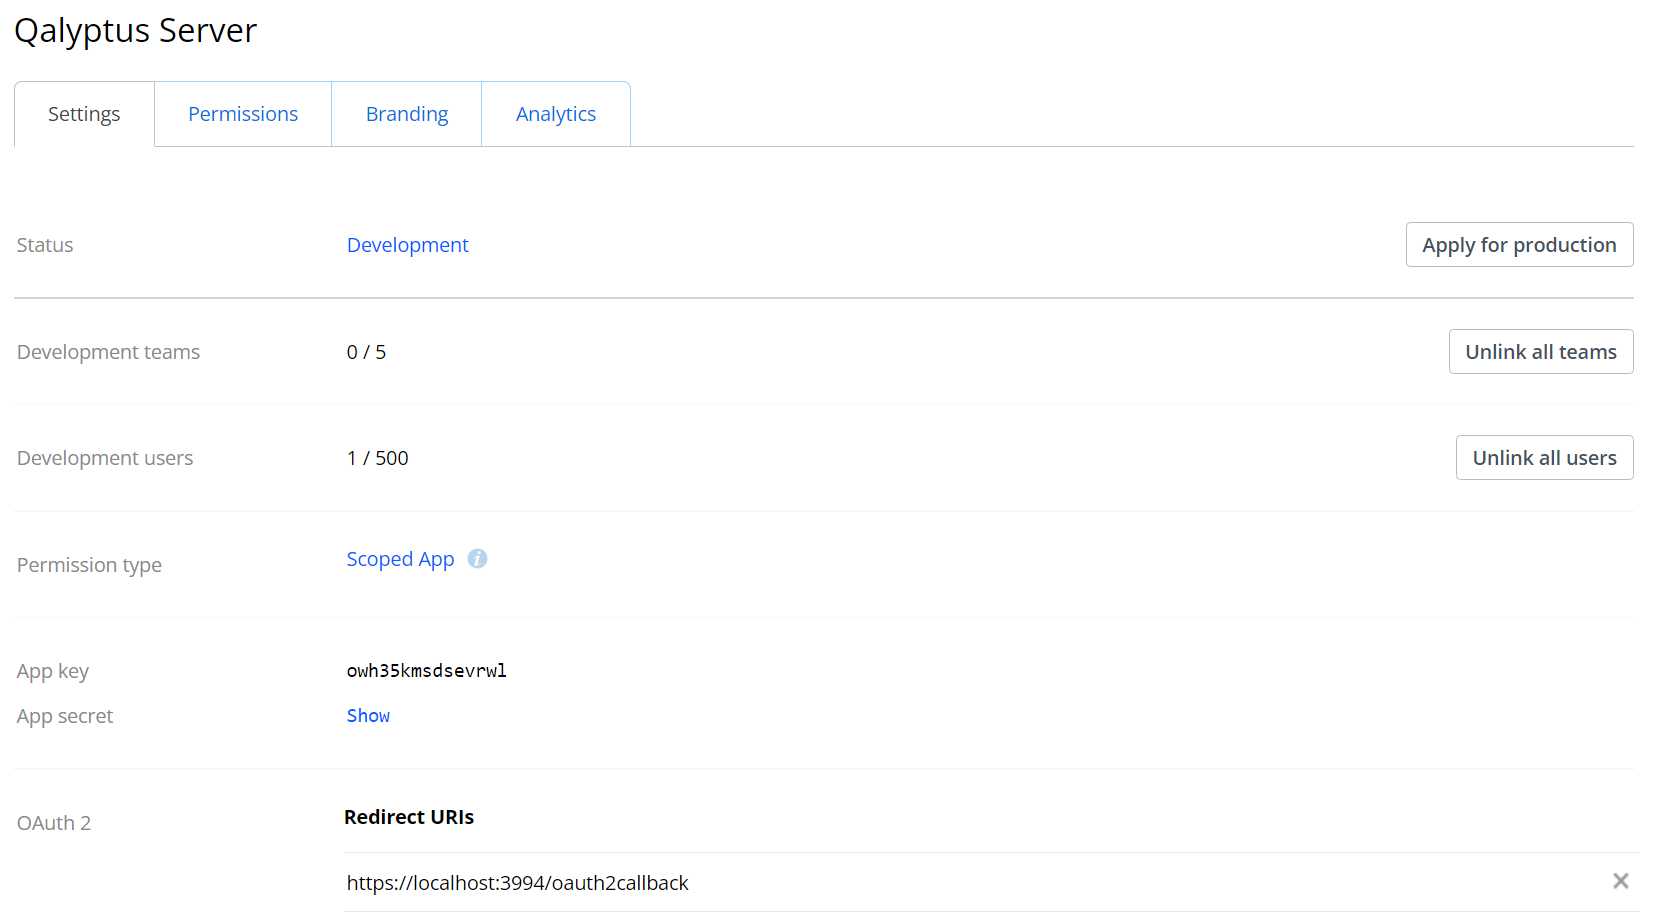
The OAuth2 Redirect URI must be the same in the Dropbox app and the Qalyptus Server service.
d- Create a Dropbox service in Qalyptus Server
- In Qalyptus Server, navigate to Administration > System > Storage Services.
- Click Add Service.
- Enter a name for the service (Example: Qalyptus Server).
- Add a description if you wish.
- Select the type Dropbox.
- Enter the App key and App secret generated previously in the Dropbox developer portal.
- Ensure that the URI matches the one entered in the Dropbox Console.
- Click Save.
You will be redirected to the Dropbox Authorizations screen. You must authenticate and accept the permissions to upload files to your Dropbox account.
The Dropbox API has limits for uploading files. Please check Dropbox documentation or contact the Dropbox support to know more about the limits and the potential additional pricing to upload many files.
The Dropbox app is in development mode. You can continue to use it in this mode with allowed users or publish the app to production. The second option requires Dropbox validation and allows all of your users to create a connection.
Qalyptus Server will maintain its connection to Dropbox until you revoke it either within Qalyptus Server or through your Dropbox account.