Qalyptus Users
Anyone who needs to access Qalyptus Server, whether to browse, publish, modify content, or administer the site, must be added as a user. Administrators and users with the necessary rights have the following options to add users:
- Add local users.
- Add users from Active Directory.
- Add users from Azure AD.
By default, only users with the Administrator role can create, edit, and delete users. It is possible to allow user management for certain users by assigning them a role with permissions to create, modify or delete users.
Add local users
- Log in to Qalyptus Server as an administrator.
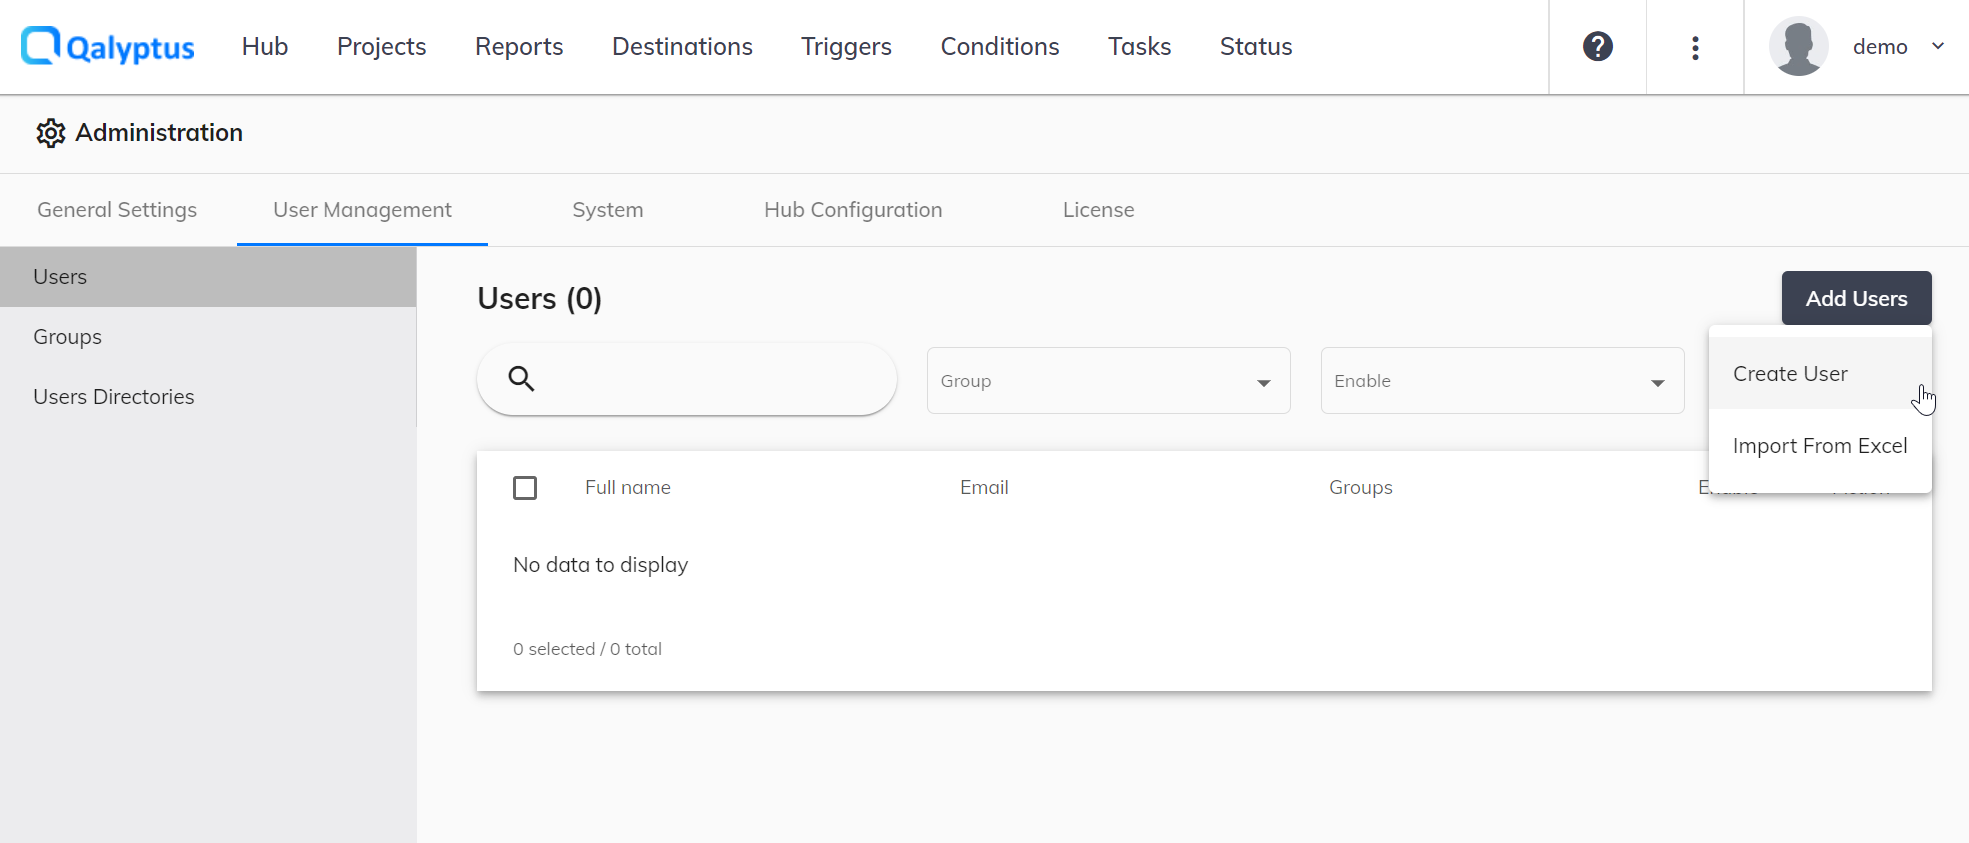
- Go to Administration> User Management.
- Select the Users tab and click Add Users, then Create User.
- Enter the information in the following fields:
- Enable: Choose to enable or disable the user's account.
- Display name: Type the display name of the user (Example: David Page).
- Username: Type a unique name for the user.
- Email: User's email. It must be unique.
- Domain Account (optional and must be unique if not empty): The domain account is used to authenticate the user with Windows authentication and to link the Qalyptus Server user to the Qlik Sense user. This is necessary when you use Qalyptus Desktop without installing a certificate (using the Qalyptus Server engine) when users use Qalyptus extensions in Qlik Sense; Qalyptus uses the Qlik Sense profile to generate the report (Section access and other restrictions are considered).
- Language: Choose the language of the user. This option can be changed later in the user profile settings.
- Ask the user to create his password: Check this checkbox to send an e-mail to the user with a link allowing him to create his password to have his Qalyptus credentials. If you do not check this box, the user can create his password in the Qalyptus Server login interface by clicking on the “Forgotten password” link.
- Add roles for the user (optional). If you do not assign a role to the user, he will be considered as a recipient who can receive task reports and who cannot connect to the Qalyptus server.
- Add at least one organization for the user.
- Click Save
Import Users from Excel
To automate adding users to Qalyptus, you can create an Excel file that contains user's information and then import the file.
To import Users from Excel:
- Log in to Qalyptus Server as an administrator.
- Go to Administration> User Management.
- Select the Users tab and click Add Users, then Import from Excel.
- Select Browse.
- Select your Excel File.
- Click Import Users.
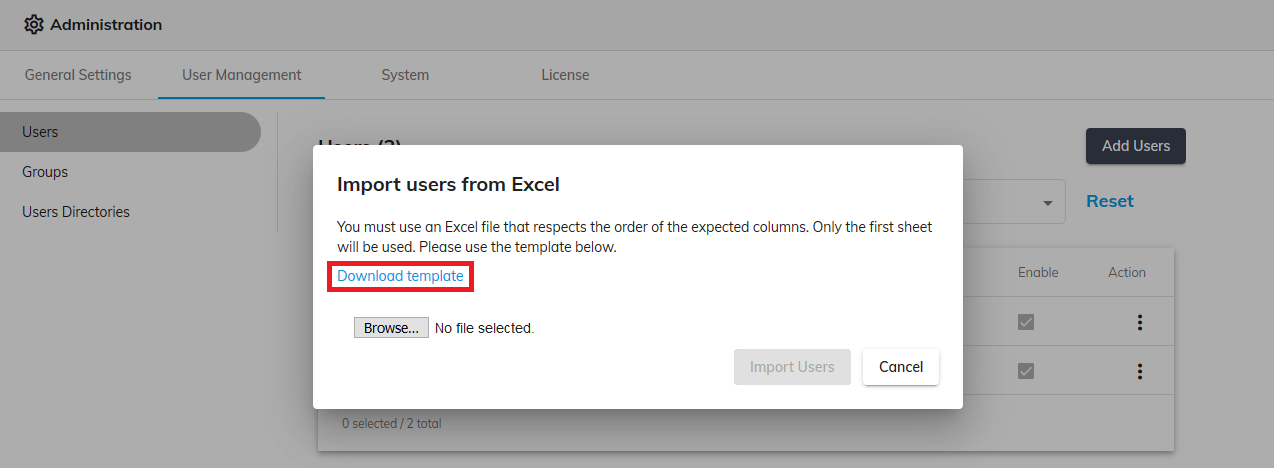
You must use an Excel file that respects the order of the expected columns. Only the first sheet will be used. Please download and use the template and follow the instructions available in each column.
Add users from Active Directory
To add users from Active Directory, do the following:
- Log in to Qalyptus Server as an administrator.
- Go to Administration> User Management.
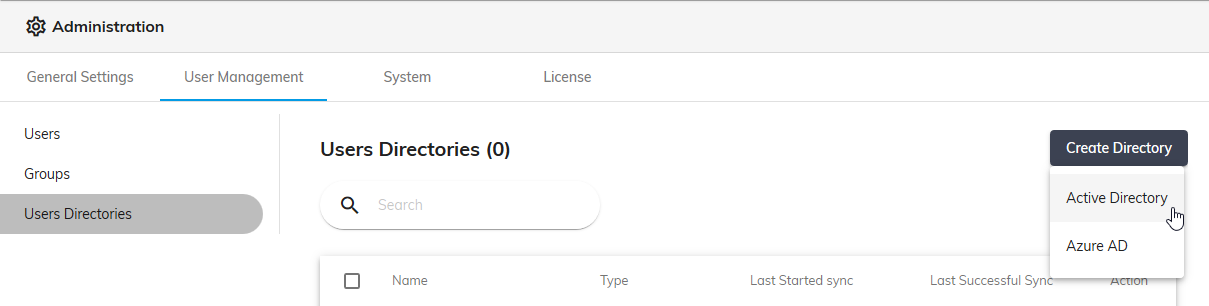
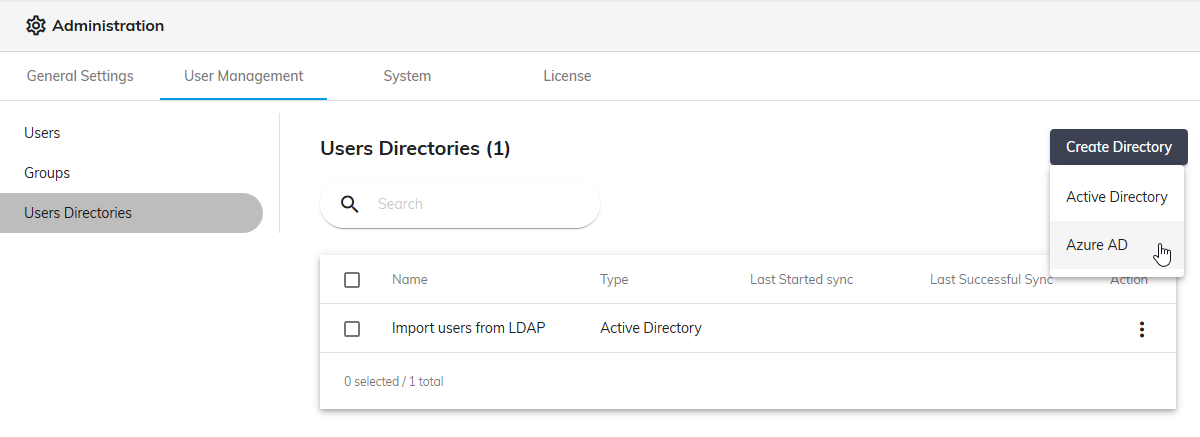
- Select the Users Directories tab, click Create Directory, and choose Active Directory.
 4. Enter the information in the following fields:
- Name: Type the name of the directory.
- Path: Type the LDAP path in the format:
LDAP://{your-ldap-server}. for a secure LDAP (LDAPS), add the port 636:LDAP://{your-ldap-server}:636. - Username: This field is optional. If necessary, type the user name of the Active Directory.
- Password: This field is optional. If necessary, type the name of the Active Directory password.
- LDAP filter: This field is optional. If needed, you can apply a filter on the users to import.
- Organization: To which organization will users be assigned.
- Default role: You can assign a role to users who will be imported from Active Directory.
- Ask new users to create their password: Check this checkbox to send an email to each new user with a link allowing them to create their password to have their Qalyptus credentials. If you do not check this box, the user can create his password in the Qalyptus Server login interface by clicking on the "Forgotten password" link.
- Synchronization: You can either manually start importing users or schedule the import. Choose the Automatically option to schedule the import of users.
- Click Save.
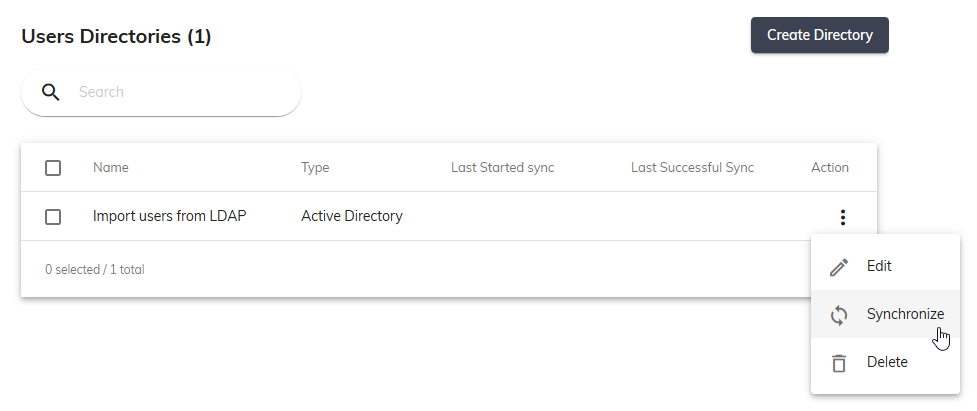
- To import and synchronize users, return to the Administration> User Management> User Directories page.
- Click the button to the right of the Active Directory to synchronize, then click Synchronize.
Active Directory groups are also created if they contain at least one user.
Add users from Azure AD
Before creating Azure AD importation, you need to register an app on your Azure AD. See here how to do it.
To add users from Azure AD, do the following:
- Log in to Qalyptus Server as an administrator.
- Go to Administration> User Management.
- Select the Users Directory tab, click Create Directory, and choose Azure AD.
- Enter the information in the following fields:
- Name: Type the name of the directory.
- Application ID: Type the app ID (client).
- Directory ID: Type the ID of the directory (tenant).
- Client Secret key: Type Client Secret key to be authenticated by Azure AD.
- Organization: To which organization will users be assigned.
- Default role: You can assign a role to users who will be imported from Azure AD.
- Synchronization: You can either manually start importing users or schedule the import. Choose the Automatically option to schedule the import of users.
- Ask new users to create their password: Check this checkbox to send an email to each new user with a link allowing them to create their password to have their Qalyptus credentials. If you do not check this box, the user can create his password in the Qalyptus Server login interface by clicking on the “Forgotten password” link.
- Click Save
- To import and synchronize users, return to the Administration> User Management> User Directories page
- Click the button to the right of the Azure AD to synchronize, then click Synchronize.
Azure AD groups are also created if they contain at least one user.
Synchronization allows you to import new users and groups and remove users and groups that no longer exist in Active Directory or Azure AD.