Publish a Project
When your Qalyptus project is ready, you can publish it on Qalyptus Server to automate the generation and distribution of reports and make them available to other users.
Publish from Qalyptus Desktop
To publish your project from Qalyptus Desktop to Qalyptus Server, follow the steps below.
- Open Qalyptus Desktop.
- If you are not already connected to Qalyptus Server, login:
- Click on the Settings button.
- Go to the My Account tab.
- Enter the address of your Qalyptus Server and click Connect.
- You will be redirected to Qalyptus Server for authentication.
- After successful authentication, you will see a confirmation message.
- Close the browser tab and go back to Qalyptus Desktop.
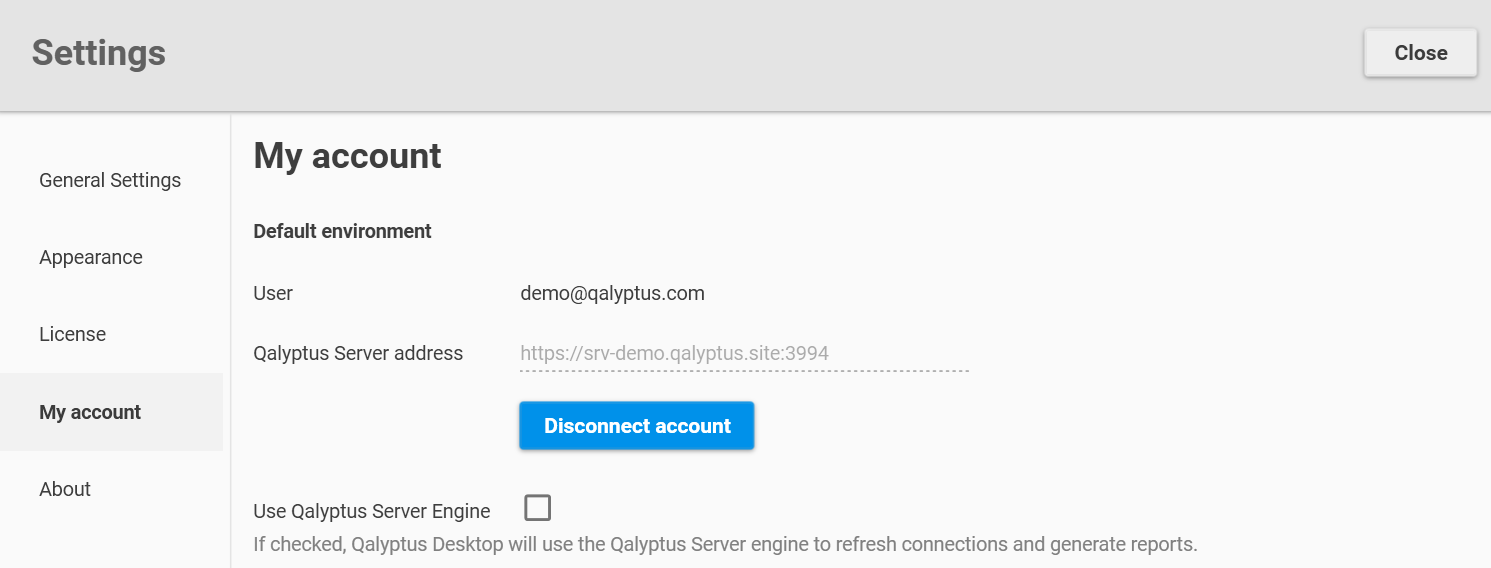
- Close the Settings page.
- Click on the button Publish to the server.
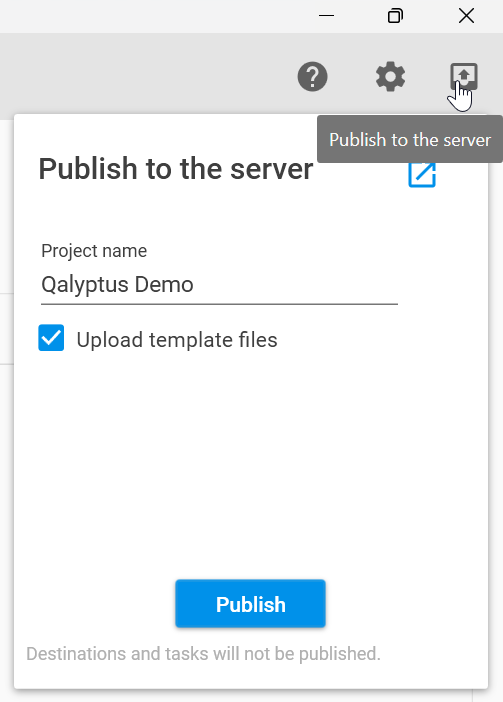
- A window opens. If you want to publish the template files as well, check the Publish template files check box.
- If you are a member of more than one organization, choose the organization to which you want to publish the project.
- Click the Publish button.
- A confirmation message appears if your project is successfully published.
Once published, your project is available on Qalyptus Server in the Project tab with all its information.
At any time, you can publish the project again to update it on Qalyptus Server.
Publish project to multiple environments
You can publish a Qalyptus Desktop project to multiple Qalyptus Server environments seamlessly. By using "Linked Connections," you can assign the corresponding connection for each Qalyptus Server environment. A linked connection includes the Qlik Sense server URL, the Qlik Sense App ID, and the Qlik Sense user's domain account, which will be replaced automatically when publishing to the selected environment.
For example, all Qalyptus Desktop connections are configured for Qlik Sense apps in your development environment, and you publish the project to Qalyptus Server in a development environment.
Once everything is validated, you want to publish the same project to Qalyptus Server in your production environment and replace the App IDs in the connections with those of your Qlik Sense production environment.
1- Configure a Qalyptus Server environment
Do the following to configure an aditional Qalyptus Server environment.
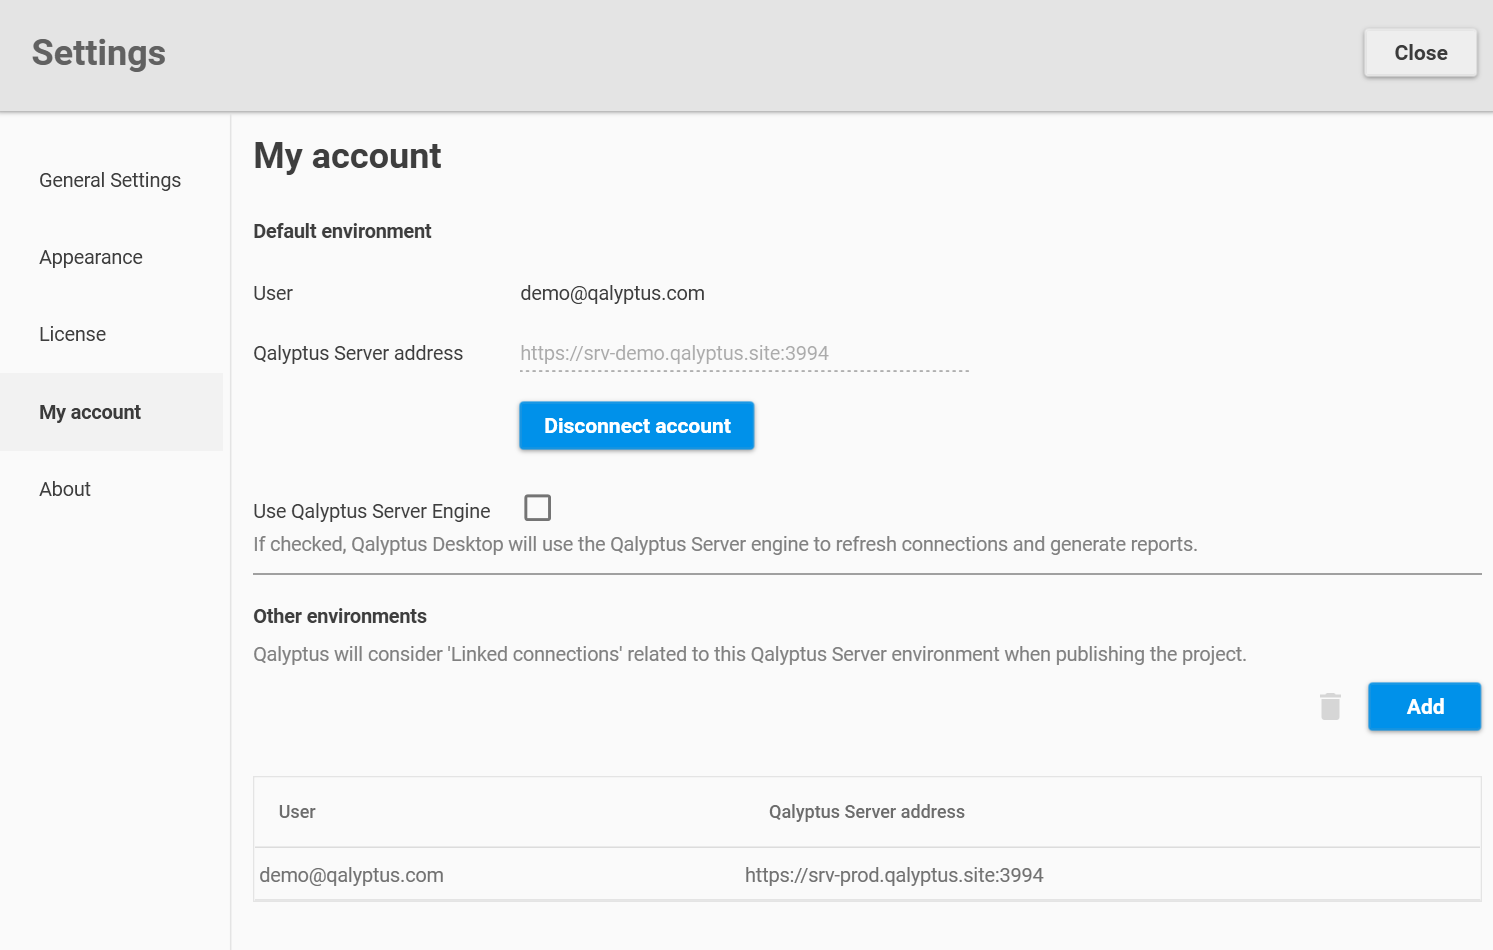
- In Qalyptus Desktop, go to Settings > My account.
- In the Other environments, click Add.
- A new window will open, enter the Qalyptus Server address
- Click Connect.
- You will be redirected to Qalyptus Server for authentication.
- After successful authentication, you will see a confirmation message.
- You will see the new Qalyptus Server environment in the table.
2- Create a Linked connection
A Linked connection allows the replacement of the corresponding connection settings when publishing to a specific Qalyptus Server environment.
To create a Linked Connection, follow these steps:
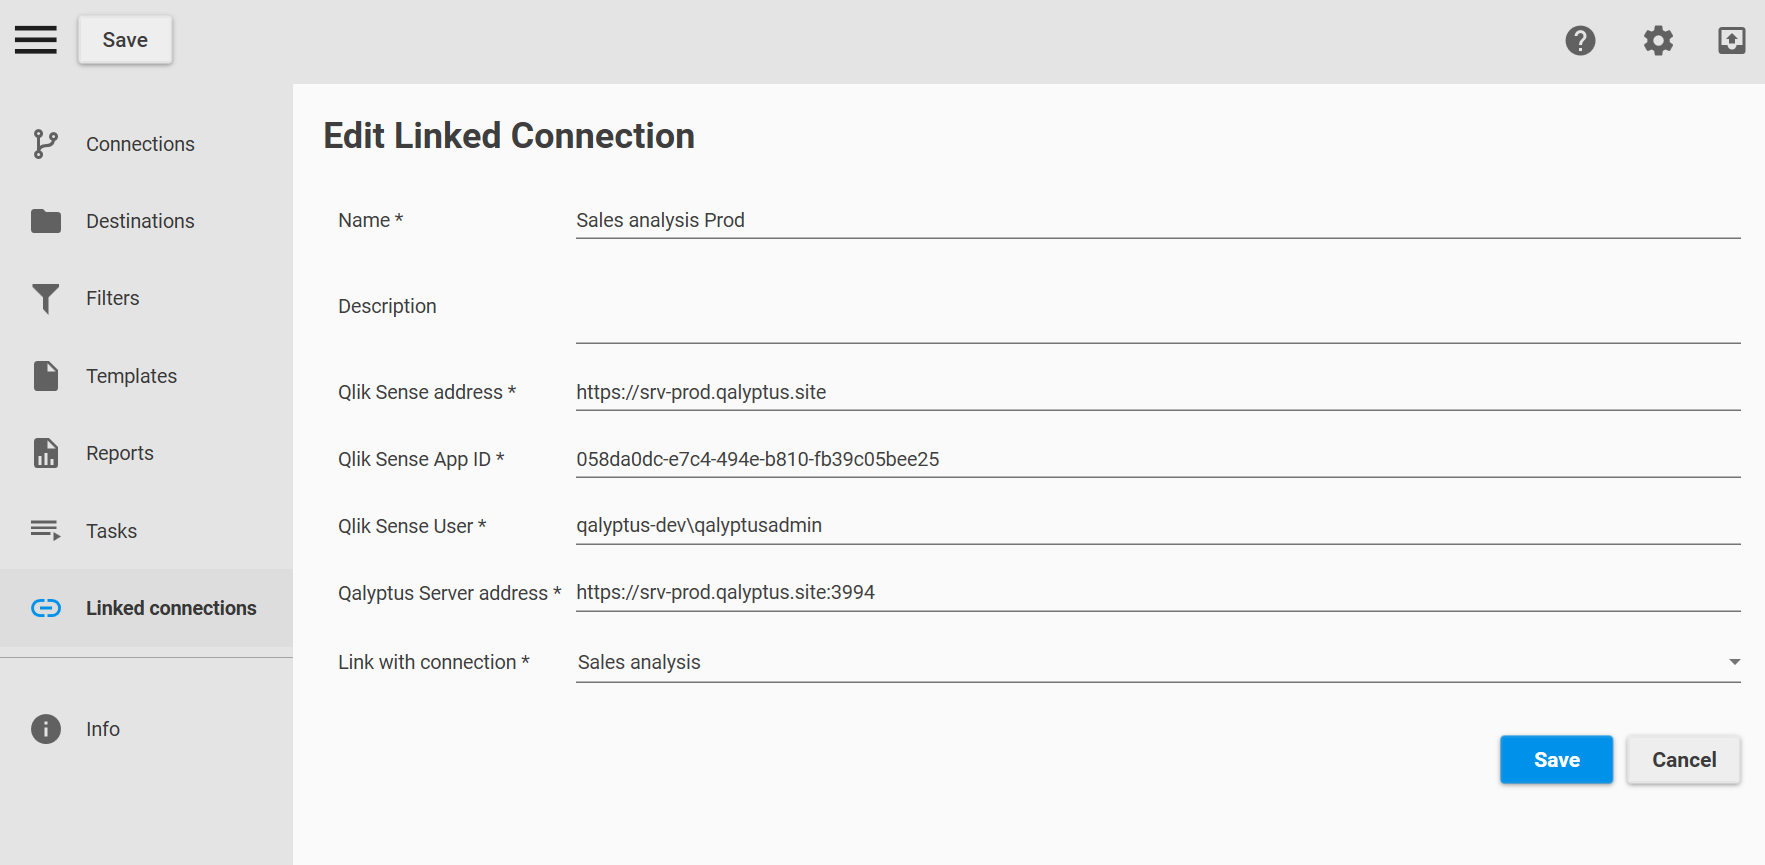
- In Qalyptus Desktop, navigate to Linked Connections.
- Click Create.
- Enter a name.
- Optionally, add a description.
- Enter the Qalyptus Server address for the configured environment (refer to the section above for details).
- Enter the Qlik Sense Server address.
- Enter the Qlik Sense App ID.
- Enter the Qlik Sense user in the format Domain\user.
- Select the Connection you want to link to.
- Click Save.
A connection can only be linked to one Qlik Sense application within the same Qalyptus Server environment.
3- Publish the project
After configuring an additional environment and Linked Connections, you can publish the project.
- Click on the button Publish to the server.
- Choose the target Qalyptus Server environment.
- Keep the option Publish template files selected.
- If you belong to multiple organizations, select the organization where you want to publish the project.
- Click Publish.
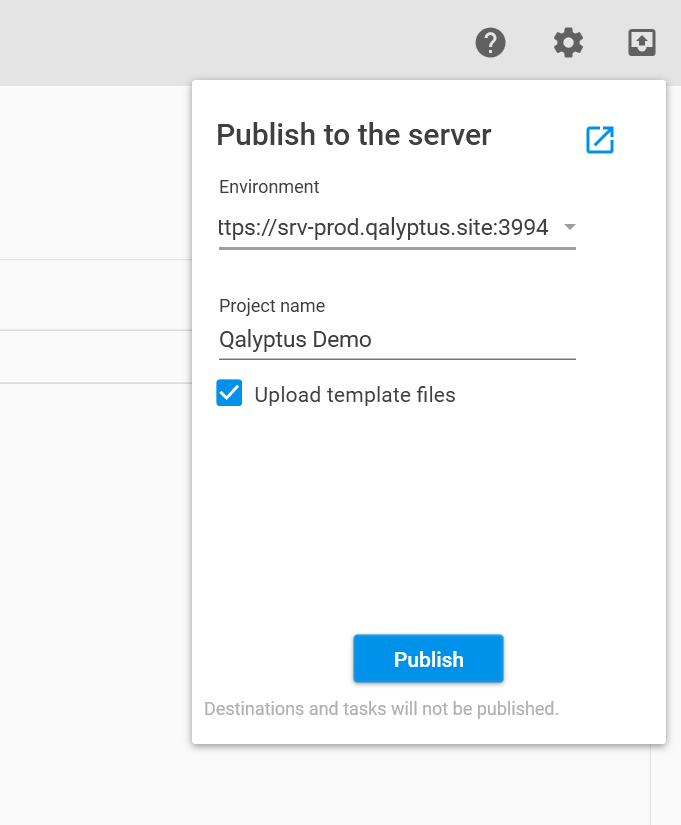
When publishing a project to an environment other than the default one, all connections must have a Linked Connection in the target environment.
Use Qalyptus Server Engine
This feature allows using the Qalyptus Server Engine to refresh the connections and generate the reports. This means that Qlyptus Desktop will not communicate directly with Qlik Sense and will not use the resources (RAM and CPU) of the machine where it is installed.
When using this option?
- When you do not want to install the Qlik Sense certificates on the PC where Qalyptus Desktop is installed, the communication with Qlik Sense is done only through Qalyptus Server.
- When you work with a voluminous Qlik Sense application, Qalyptus Desktop is 32 bits program. A program that uses 32-bits of RAM can only ever address 4 GB. Qalyptus Server is a 64-bits program.
Template files are stored on Qalyptus Server machine at this location: \ProgramData\Qalyptus\QalyptusServer\Templates\<projet name>. During the publication, check Publish template files to automatically save template files to Qalyptus Server.
Common issue
The connection will fail when you use the wrong Qalyptus Server address to connect the Qalyptus Desktop to the Qalyptus Server. If you retry using a valid Qalyptus Server address, you will see an error message.
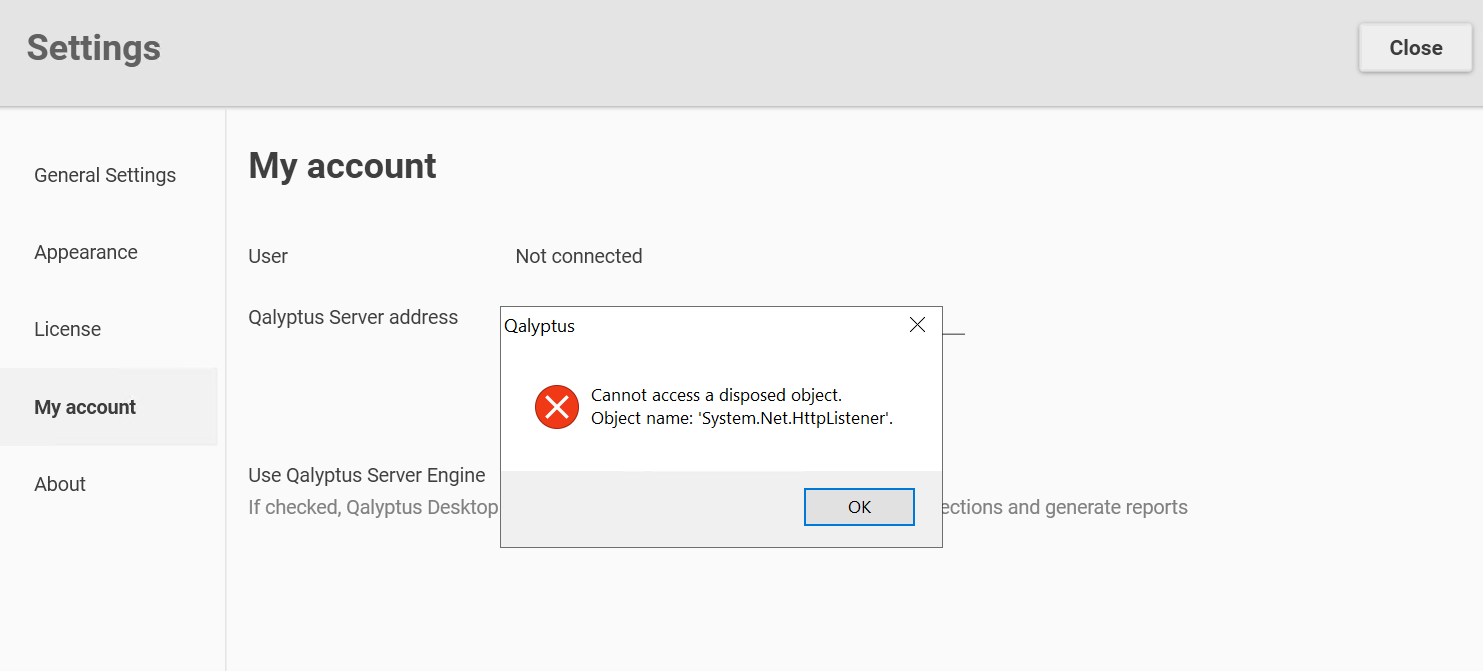
To fix this issue, do the following:
- Close Qalyptus Desktop.
- Log out from your Windows session or restart the PC.
- Log in again.
- Open Qalyptus Desktop and go to Settings > My account.
- Ensure that you entered a valid Qalyptus Server URL.
- Click Connect.
- You should be redirected to Qalyptus Server to authenticate with your default browser.
- After a successful login, you should see a confirmation message (in some cases, the confirmation message is not visible).
- Return to Qalyptus Desktop; you should see that you are connected.