Install Qalyptus Server
This guide walks you through the complete installation and initial configuration of Qalyptus Server, including the setup required to connect it to Qlik Sense.
You can install Qalyptus Server on the same machine as Qlik Sense, or on a separate dedicated server. Both scenarios are covered below where they differ.
Prerequisites
Before you begin, verify that your environment meets the Qalyptus Server system requirements.
Overview
The installation process consists of the following steps:
- Open the required Qlik Sense ports
- Export Qlik Sense certificates
- Run the Qalyptus Server installer
- Complete the configuration wizard
- Activate your license and create the admin account
- Open the Qalyptus service ports
Step 1 – Open Qlik Sense Ports
Qalyptus Server communicates with Qlik Sense over several ports. Open the following inbound ports on the machine(s) where the corresponding Qlik Sense services are installed:
| Port | Qlik Sense Service |
|---|---|
| 4747 | Engine service |
| 4242 | Repository service |
| 4243 | Proxy service |
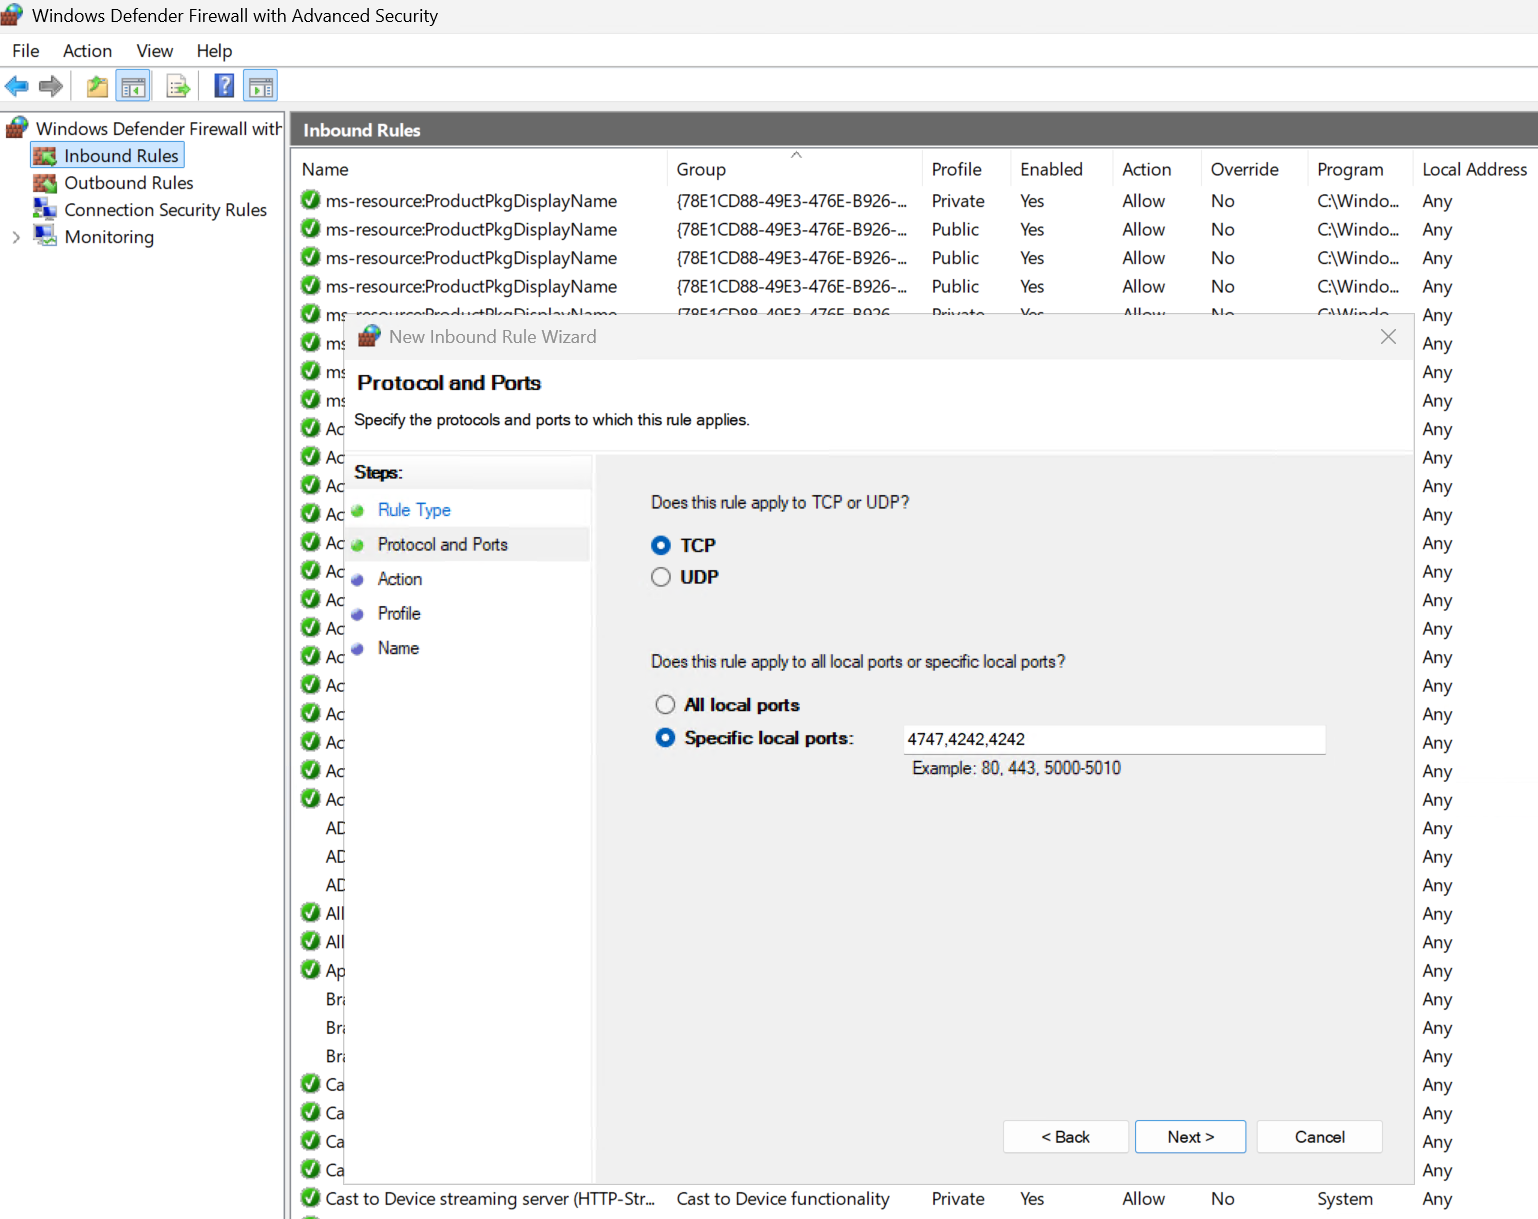
Opening Inbound Ports on Windows Firewall
- Press Win + R, type wf.msc, and press Enter to open Windows Defender Firewall with Advanced Security.
- In the left panel, click Inbound Rules.
- In the right panel, click New Rule…
- Select Port and click Next.
- Select TCP, enter the port numbers separated by a coma (4747,4242,4343), and click Next.
- Select Allow the connection and click Next.
- Check all profiles that apply (Domain, Private, Public) and click Next.
- Give the rule a meaningful name (e.g. Qlik Sense Ports) and click Finish.
Same-machine installs: If Qalyptus Server and Qlik Sense are installed on the same machine, these ports do not need to be opened for Qalyptus Server itself. However, they are required for Qalyptus Desktop, which runs on end-user machines.
Cloud-hosted Qlik Sense (AWS, Azure, etc.): In addition to the Windows Firewall rules, you must also open these ports in your cloud provider's network security console.
To check if the necessary ports are open, you can use one of the following solutions:
1- Open the CMD as an administrator with the user that runs Qalyptus and tape the following command line:
telnet [domain name or ip] [port]
Example: telnet fr-srvqs-01.qalyptus.com 4242
If telnet is not recognized, you can easily enable it if your IT policy allows it. Otherwise, use the second method.
2- Open the PowerShell as an administrator with the user that runs Qalyptus and tape the following command line:
Test-NetConnection -ComputerName "your-server-address.com" -Port 4242-InformationLevel "Detailed"
Example: Test-NetConnection -ComputerName "fr-srvqs-01.qalyptus.com" -Port 4242 -InformationLevel "Detailed"
Step 2 – Export Qlik Sense Certificates
Qalyptus Server requires Qlik Sense certificates to authenticate and generate reports. Follow the steps below to export them from the Qlik Management Console (QMC).
Same-machine installs: If both products are on the same machine, Qalyptus will use the existing Qlik Sense certificate automatically. You can skip this step.
To export the certificates:
- Open the QMC and navigate to Certificates.
- Enter a memorable name in the machine name field. Qlik Sense will create a folder with this name to store the exported files.
- Leave the Certificate Password and Retype Password fields blank.
- Check the Include secret key checkbox.
- Click Export certificates.
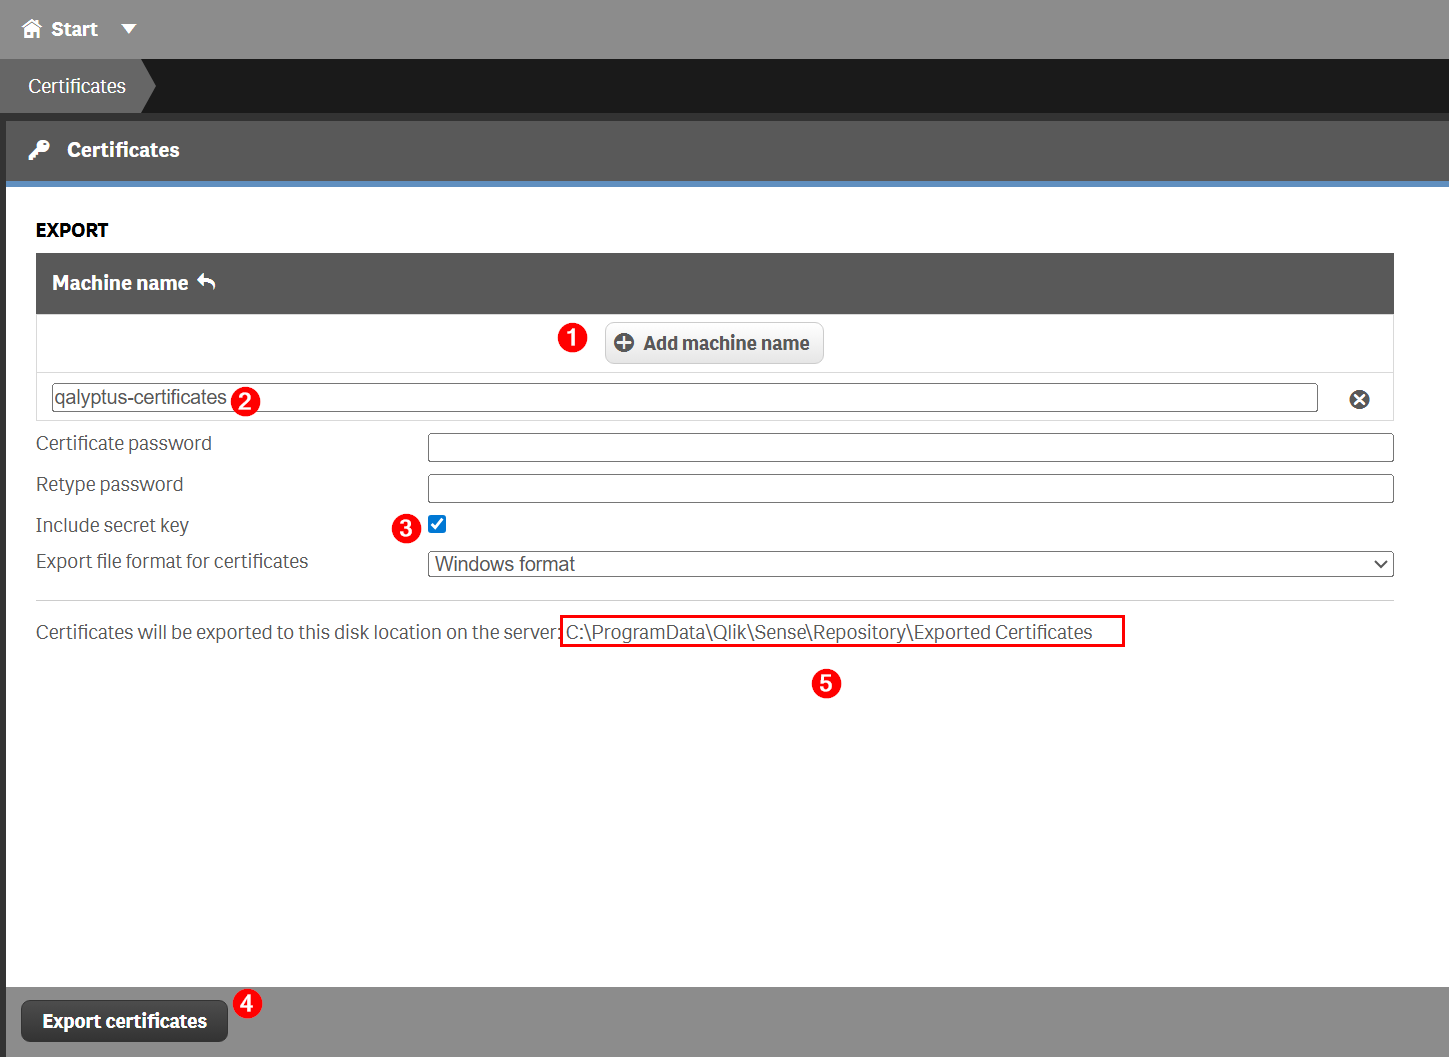
Once the export is complete, locate the client.pfx file in the export folder and copy it to the machine where you plan to install Qalyptus Server. You will need this file during the configuration step.
QlikView users: To use Qalyptus with QlikView, you must have QlikView Desktop installed on the same machine as Qalyptus Server, with either an active local license or a Named User CAL from QlikView Server.
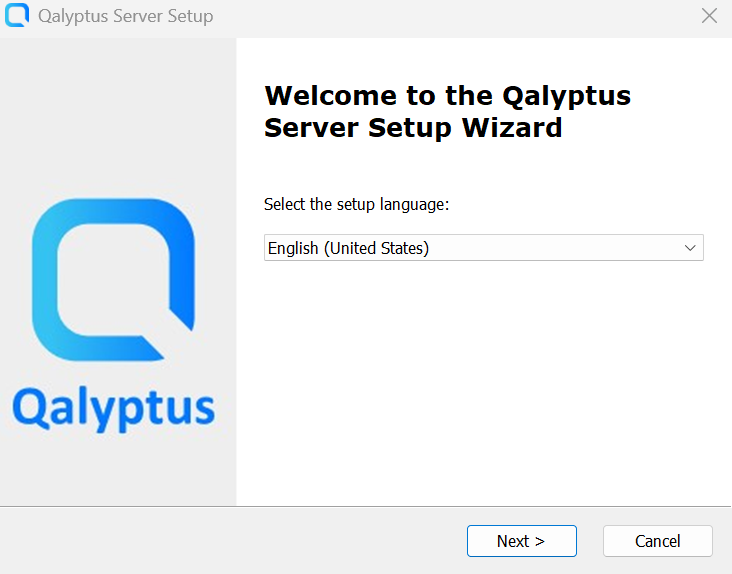
Step 3 – Install Qalyptus Server
- Download the Qalyptus Server installer from the Qalyptus website of from the [Qalyptus Customer Portal] (https://my.qalyptus.com/download).
- Double-click the installer file to launch it.
- Accept the End-User License Agreement.
- Select your preferred installation folder.
- Click Install.
The installer will complete in a few moments. Click Finish to launch the Qalyptus Server Configuration wizard.
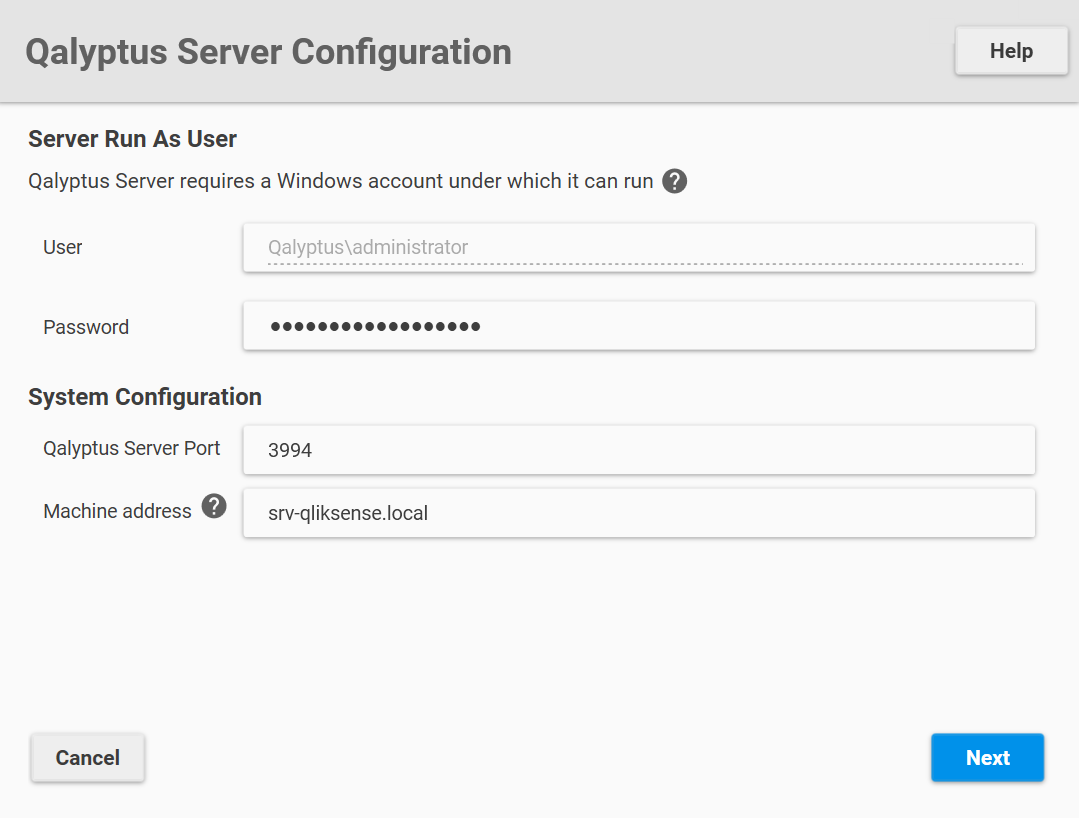
Step 4 – Configure Qalyptus Server
The configuration wizard guides you through three setup sections: service account, database, and certificate installation.
4.1 Service Account
Enter the credentials of the Windows user account that will run Qalyptus Server. This account must:
- Have local administrator privileges
- Have permission to run Windows services
You may also change the default hostname and port for Qalyptus Server at this stage. Click Next to continue.
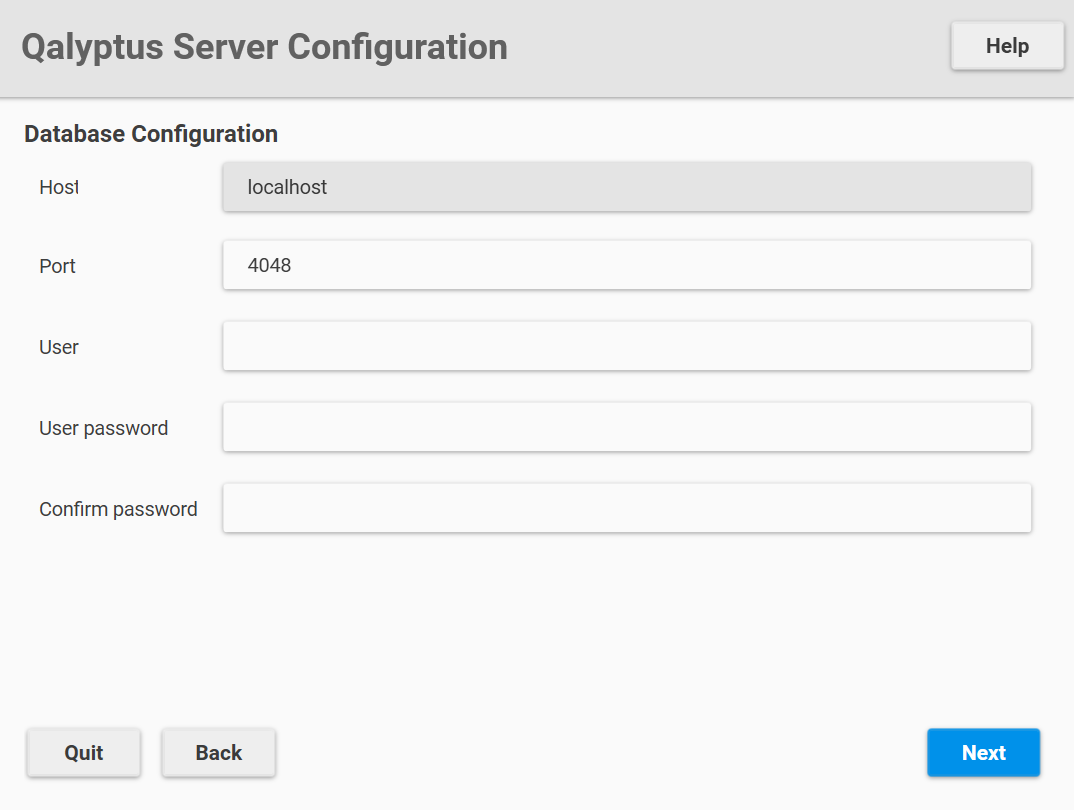
4.2 Database Setup
Enter a database username and password for the Qalyptus Server database, then click Next.
Important: Save these credentials in a secure location. You will need them if you reinstall Qalyptus Server on another machine or require direct database access.
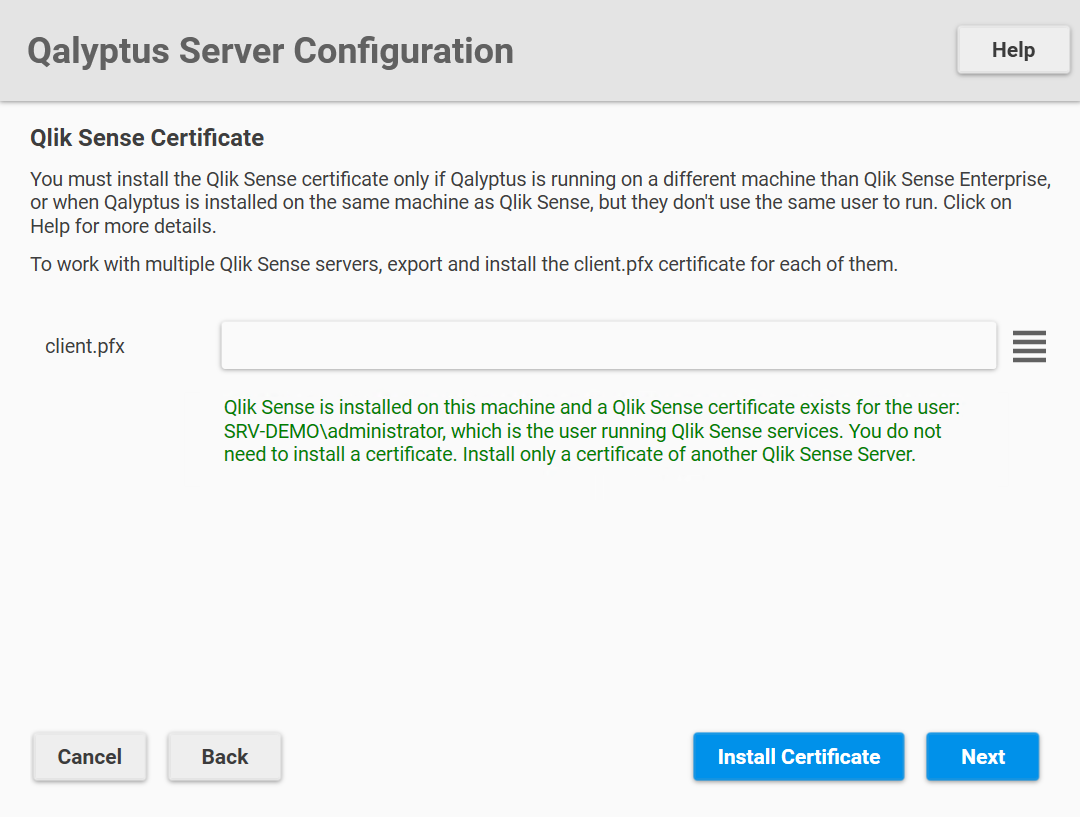
4.3 Certificate Installation
Select the client.pfx file you exported in Step 2 and click Install Certificates, then click Next.
Same-machine installs: Skip this step. Qalyptus Server will automatically use the Qlik Sense certificate already present on the system.
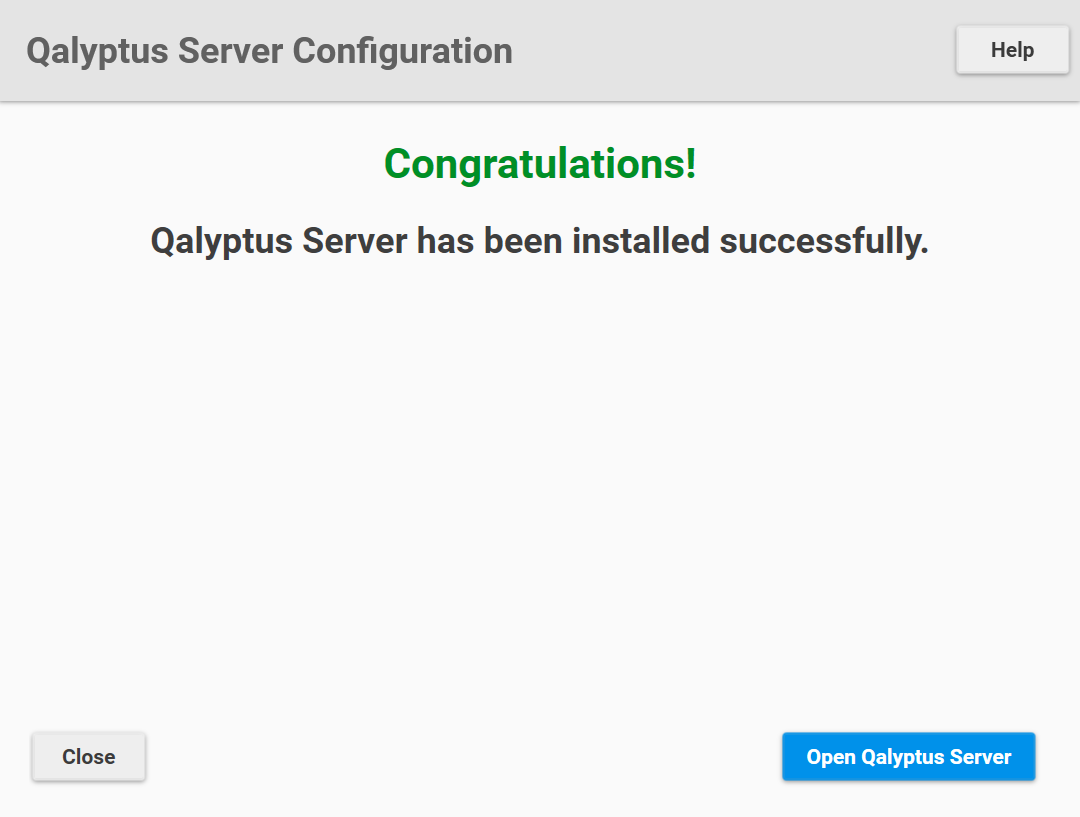
Click Install to complete the installation.
Step 5 – License Activation & First Login
Once the installation finishes, click Open Qalyptus Server to launch the web interface.
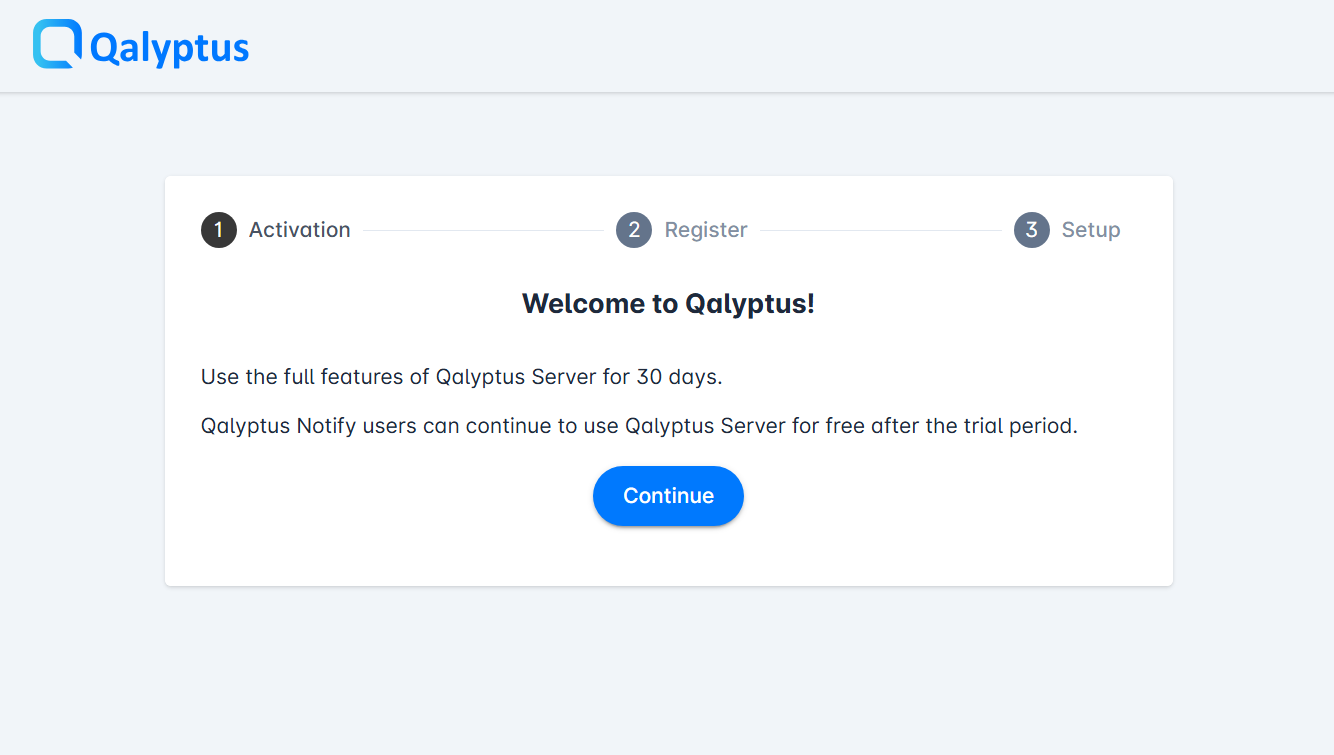
Before you can use Qalyptus Server, you must complete the initial setup:
- Activate a 30-day free trial license
- Register the administrator account; enter the admin user details (First name, Last name, email address and password), click Next, then click Setup.
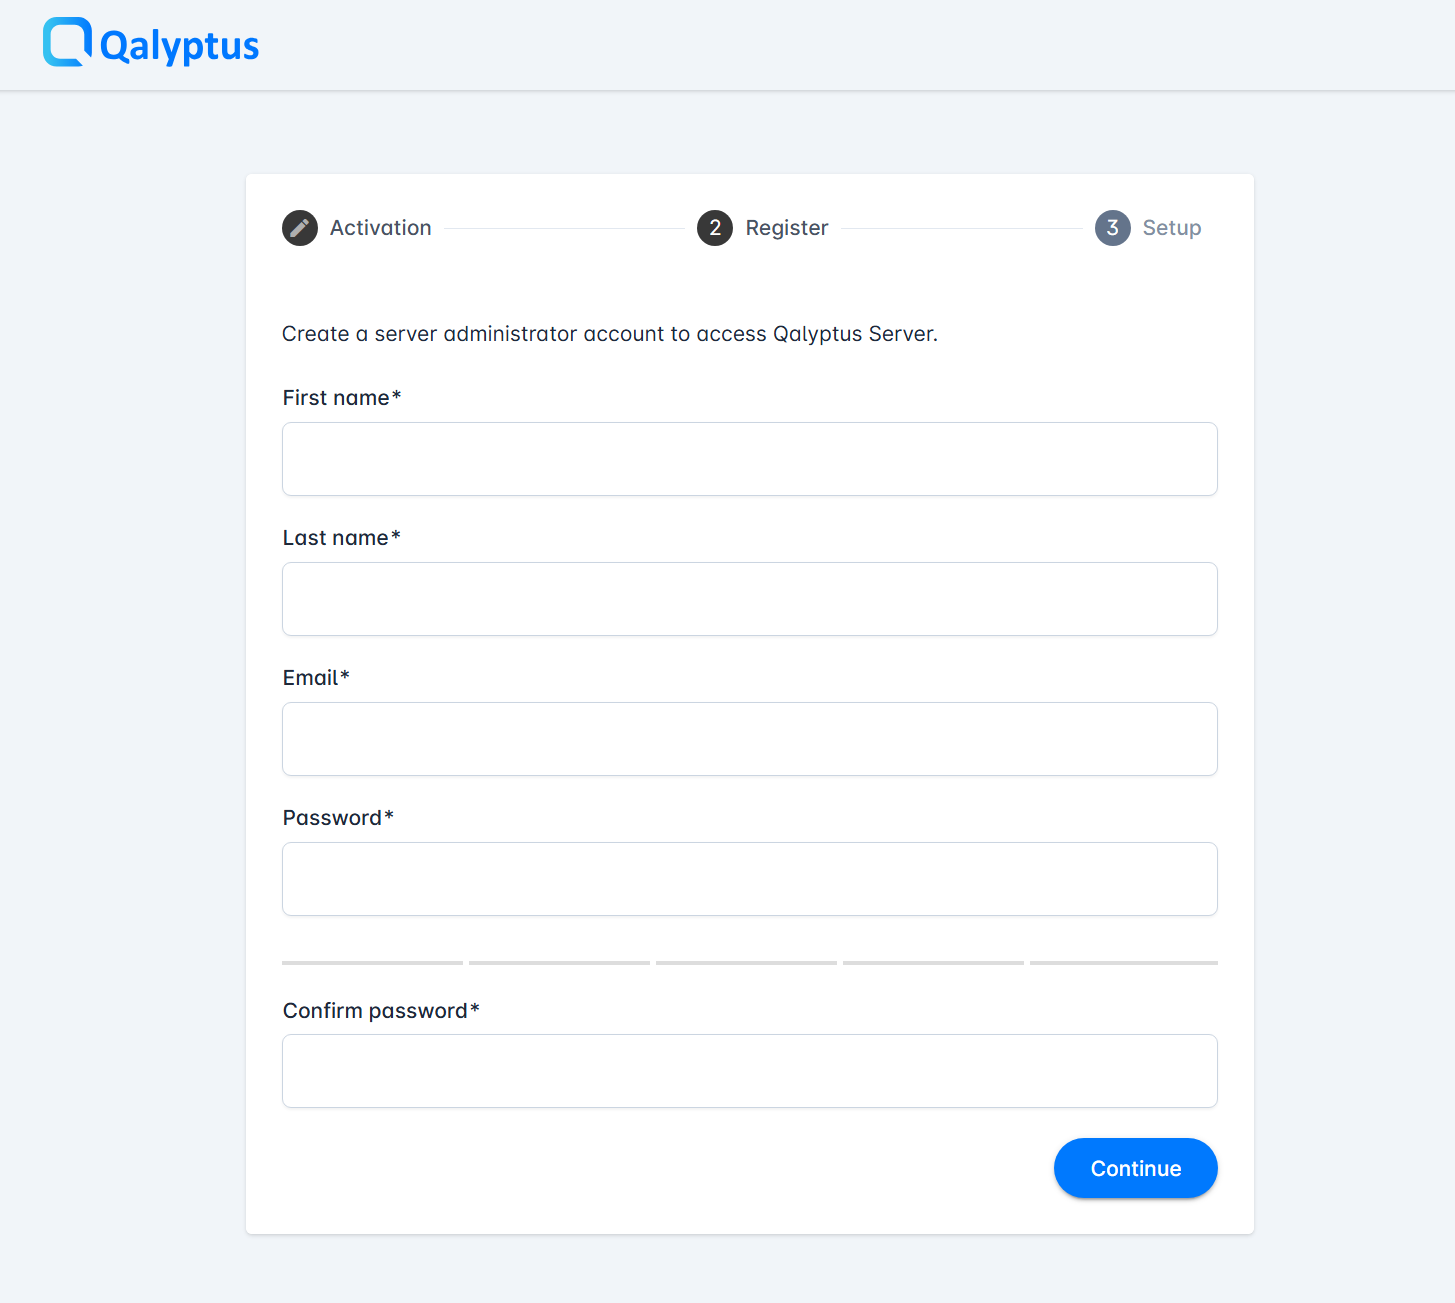
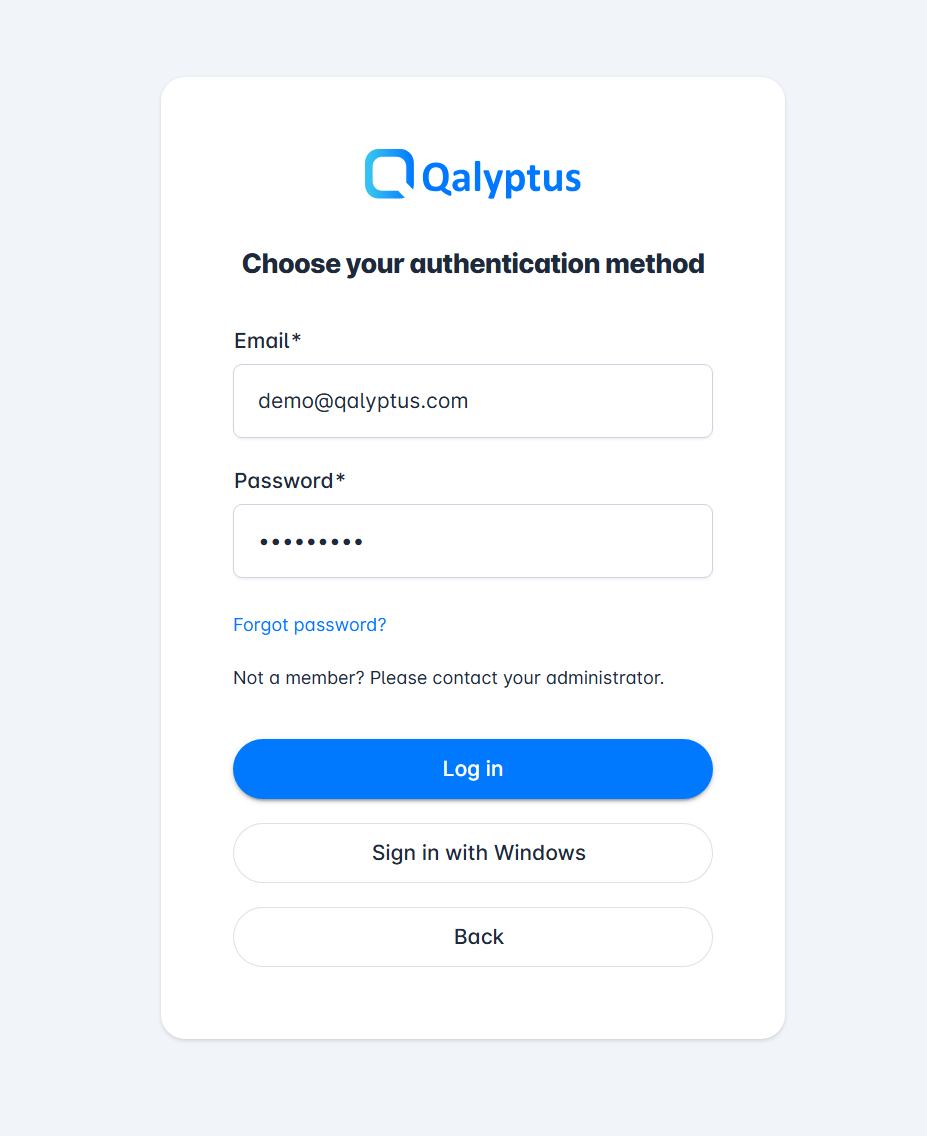
Once setup is complete, log in using the administrator credentials you just created.
Step 6 – Open Qalyptus Ports
To allow users to access Qalyptus Server, open the following inbound port on the server:
| Port | Service |
|---|---|
| 3994 | Qalyptus Server |
If you changed the default port during the configuration wizard, open this port instead.
Next Steps
Qalyptus Server is now installed and ready to generate reports from Qlik Sense.
The next step would be Qalyptus server administration..