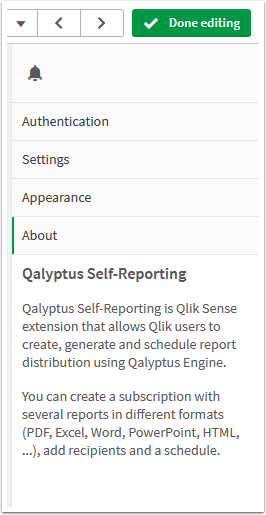
Qalyptus Self-Reporting
Qalyptus Self-Reporting is an extension that integrates seamlessly with Qlik Sense. It allows users to create tasks with unlimited reports in different formats (PDF, Excel, PowerPoint, ..), add different filters for each report (current selections or a bookmark), add unlimited recipients, customize the email message, embed charts and tables in the email message, and the frequency of execution.
Qalyptus Self-Reporting Overview
Configure Qalyptus Self-Reporting
Qalyptus Self-Reporting needs Qalyptus Server to generate the reports. Before using Qalyptus Self-Reporting, you need to download, install and configure Qalyptus Server. Se how to install Qalyptus Server.
1- Allow using Qalyptus Self-Reporting
Qalyptus Self-Reporting is a Qlik Sense extension that uses the Qalyptus API to communicate with Qalyptus Server. For security reasons, you must add the Qlik Sense address as a trusted origin, choose the users who will be allowed to use Qalyptus Self-Reporting, and choose which reports you want to be visible to users on Qalyptus Self-Reporting.
1-1 Add Qlik Sense address as a trusted origin
Every time you want to communicate with Qalyptus Server from another web application, you need to add the address of this application in the list of the trusted origins.
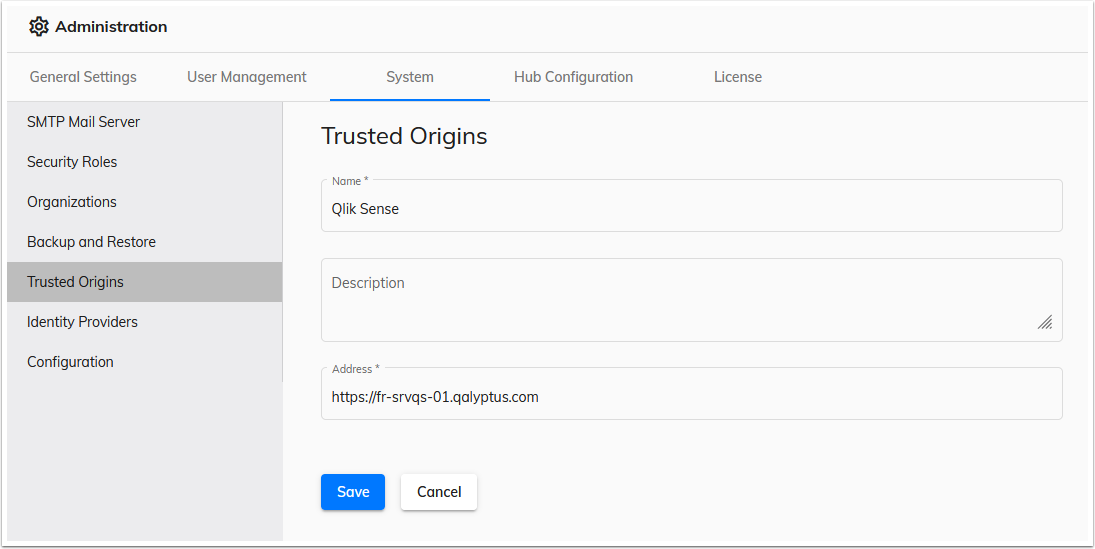
To add the Qlik Sense address as a trusted origin in Qalyptus Server, do the following:
- Connect to Qalyptus Server
- Go Qalyptus Administration> System> Trusted Origins
- Click Add Origin
- Enter a name for the origin
- Enter a description (optional)
- Enter the address of your Qlik Sense. Example:
https://qlik-sense-url.com - Click Save
1-2 Attribute permissions to the users
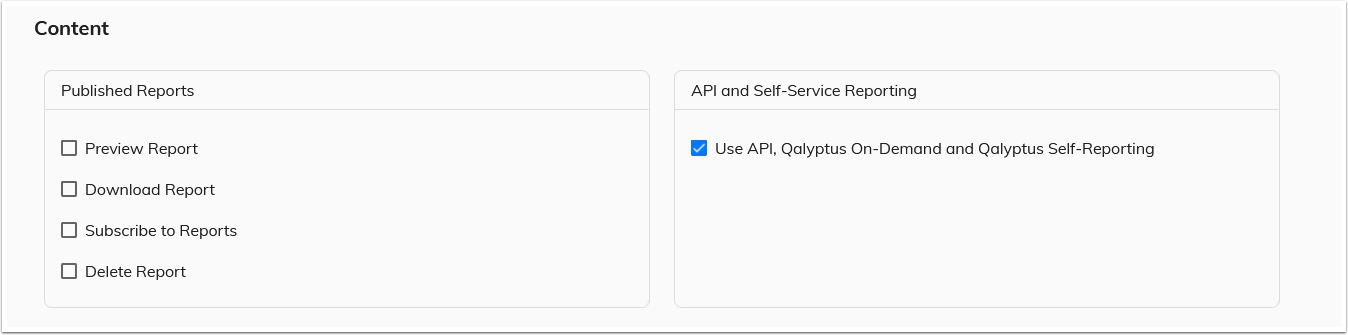
For users who you want to allow to use Qalyptus Self-Reporting, you need to attribute them a Role that contains the permission “Use API, Qalyptus On-Demand and Qalyptus Self-Reporting.”
For more details on creating and attributing a role to users, see the section: Security Roles.
1-3 Make reports available for Qalyptus Self-Reporting
By default, reports are not visible in Qalyptus Self-Reporting. For each report, you need to choose the users that can view it and generate it in Qalyptus Self-Reporting.
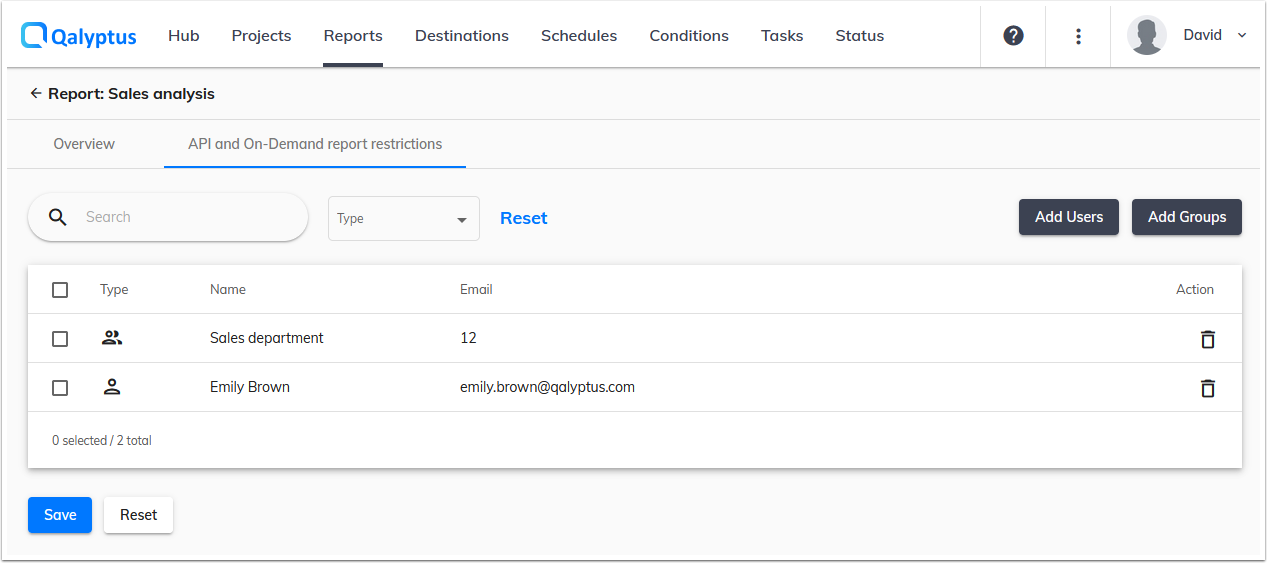
To choose the users that can view and generate a report in Qalyptus Self-Reporting, do the following:
- Connect to Qalyptus Server
- Go to the Reports page
- Edit the report you want to make visible for the users. Example: Sales analysis
- Select the tab API and On-Demand report restrictions
- Click Add Users or Add Groups
- Add users and/or groups. If you want to allow all users, choose the default group “All users.”
- Click Save
1-4 Assign a license for a user
A user needs to have a license to use Qalyptus Self-Reporting. To assign a license for a user, add the user to the group “Qalyptus Self-Reporting“.
The number of users that you can add to the group Qalyptus Self-Reporting cannot exceed the number of users provided for in your Qalyotus Self-reporting license. You can change the members of the group at any time if, for example, you want to deallocate the license of a user and assign it to another.
2- Import Qalyptus Self-Reporting in Qlik Sense QMC
To use the extension Qalyptus Self-Reporting in Qlik Sense, you need to import it in the Qlik Sense QMC. Qalyptus Self-Reporting is a zip file that you can find in the machine where Qalyptus Server is installed at this location: C:\ProgramData\Qalyptus\Server\Extensions or in your Qalyptus account on the Download page.
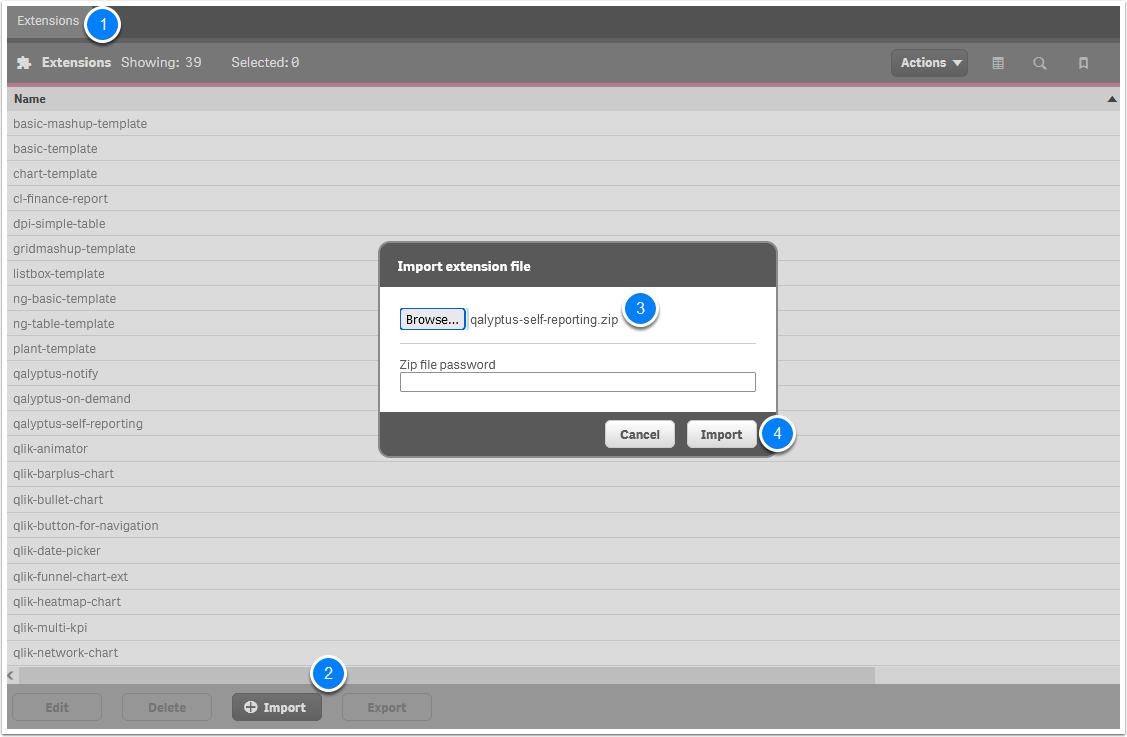
To import Qalyptus Self-Reporting in the QMC, do the following:
- Connect to the Qlik Sense QMC as administrator
- Go to the page Extensions
- Click Import
- Browse to the Qalyptus Self-Reporting zip file
- Click Import
Now Qalyptus Self-Reporting is ready to be used in Qlik Sense sheets.
3- Add Qalyptus Self-Reporting to a Qlik Sense sheet
To use Qalyptus Self-Reporting, you must add it to a Qlik Sense sheet. Qalyptus Self-Reporting appears in a sheet as a button.
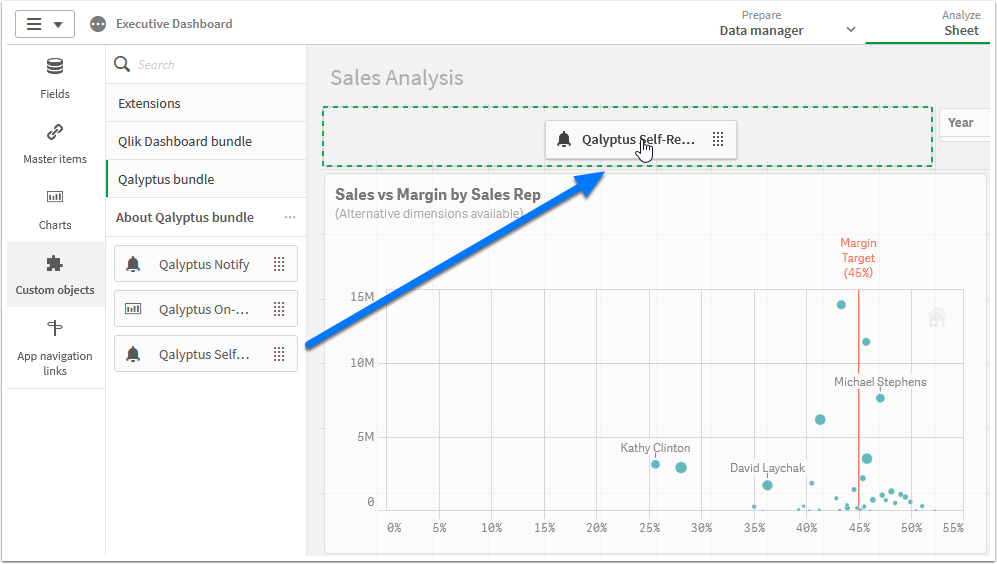
To add Qalyptus Self-Reporting to a sheet, do the following:
- Open a Qlik Sense sheet for which you have edit rights
- Click Edit sheet, top right
- In the left area, go to Custom objects> Qalyptus bundle
- Drag-and-drop Qalyptus Self-Reporting
Now we need to configure Qalyptus Self-Reporting to communicate with Qalyptus Server.
In the edit mode of the Qlik Sense sheet, select the Qalyptus Self-Reporting button to start the configuration.
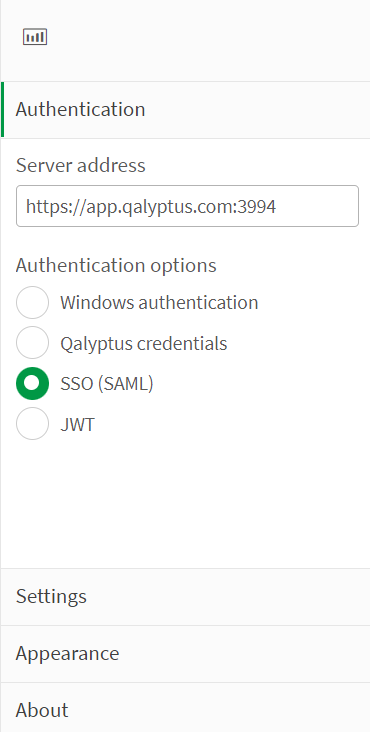
Authentication section
- Add your Qalyptyus Server address. Enter an address as a text or use a Qlik Sense expression that starts with the equal symbol (=). Example :
https://qalyptus-server-url.com:3994or='https://' & MaxString([my field]) - Choose the authentication method from the available methods:
- Windows authentication: Windows username and password of the user: available with Qalyptus Server Enterprise
- Qalyptus credentials: Eemail and password of a user created in Qalyptus Server: available with Qalyptus Server Business and Qalyptus Server Enterprise
- SSO with SAML: The user is authenticate using a Configured Identity Provider: available with Qalyptus Server Enterprise
- JWT: Authenticate a user with a JWT token. You must configure a JWT Identity Provider in Qalyptus Server: available with Qalyptus Server Enterprise
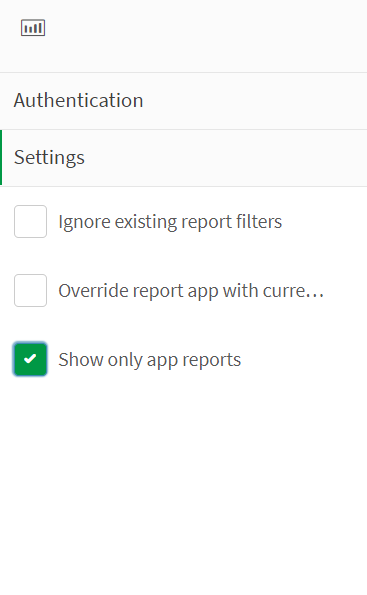
Settings section
This section has three options.
1 - Ignore existing report filters: If you check this option, if a user runs a report that contains a filter, Qalyptus will not apply the filter defined in the report. Qalyptus will only apply the current selections if there is. If the option is not checked and the user makes selections, Qalyptus will add the Selections as filters to the existing report filters. Because the order of the filters is important, the selections will be added after the existing report filters.
2- Override report app with current app: For the current selections to be taken into account when generating a report, the report must be created with a Qlik Sense app whose ID is the same as the ID of the current app. Check this option if you want Qalyptus to replace the application ID used in the reports with the current app ID. Use this option only if the current application contains the same objects as the application used to create the report.
-
Examples:
Example 1: You created a report using the app1 (ID=xxx) published in stream S1. This same app exists in stream S2 with an ID=yyy, and you want to generate a report with the current selections from the app with ID=yyy.
Example 2: You created a report using app1 (ID=xxx); you want to generate a report with the current selections from an app generate with ODAG (On-Demand App Generation) method. The new app generated with ODAG will have a different ID.
3- Show only app reports: A user could filter to see only the reports created with the current app. Using this option, you can force to show only the reports or that are created using the current Qlik Sense app. This will hide the filter for the user.
Appearance section
In this section, you can customize the Qalyptus Self-Reporting button label and the button design.
4- Use Qalyptus Self-Reporting
Authentication
In the Qlik Sense sheet, click the button Qalyptus Self-Reporting. The first time, the user must authenticate with the authentication method chosen.
1- Windows authentication, the user must enter his Windows credentials: username in this format DOMAIN\username and his Windows password.
2- Qalyptus credentials, the user must exist in Qalyptus Server and create a password. The user must use his email and the created password. If the user exists in Qalyptus Server and has not yet created a password, he can generate a password on the login page of the Qalyptus Server by clicking the link Forgotten password?
3- SSO with SAML, if you have configured one Identity Provider in Qalyptus Server, the user will be automatically redirected to the Identity Provider Login page. If you have configured more than one Identity Provider, the user will see a Login button for each Identity Provider.
4- JWT, when you choose this option, you can enter the certificate private key (created with the public key used in the Identity provider confoguration) to allow Qalyptus Self-reporting generate the jwt token for authentication.
Otherwise, you can use any programming language to sign a jwt token and use the Qalyptus API to authenticate the user. Learn more in Configure a JWT Identity Provider in Qalyptus Server
When you receive the token and refreshToken from Qalyptus Server, store them in the browser's local storage. The user is now authenticated!
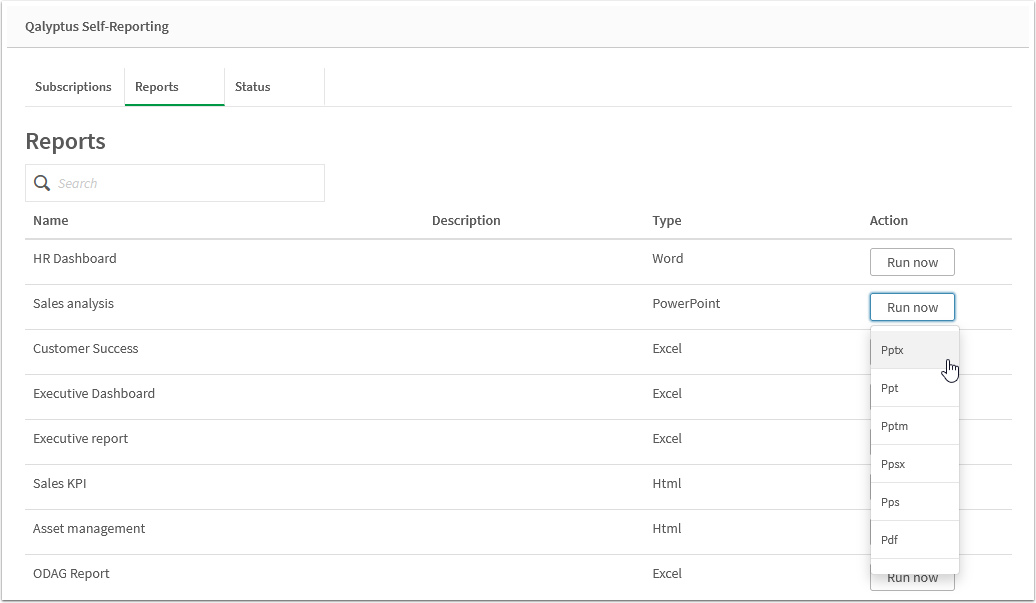
Generate a report
After authentication, the user can subscribe to receive reports by email or generate a report on the fly from a list of reports to which he is entitled.
To generate a report, go to the Reports tab, choose a report in the report list, click Run now, and choose the output format.
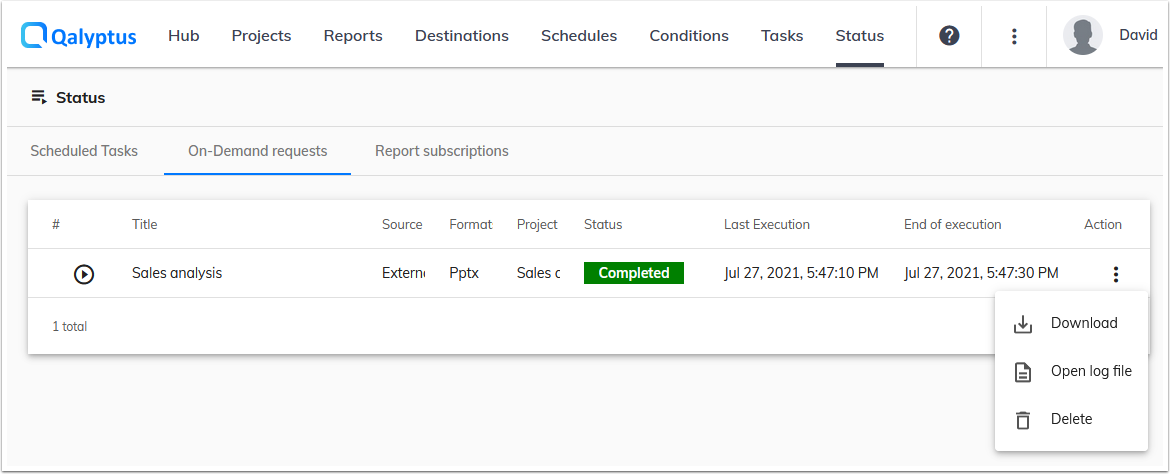
Follow the execution status in the Status tab. At the end of the execution, you can download the report, delete the execution entry or run the report again.
When a user runs a report, Qalyptus will consider the current selections to filter the report data. The selections are considered only if the report uses the current Qlik Sense app (same app ID).
Qalyptus administrators can manage the report executions in Qalyptus Server. If the execution failed, you could access the log file to learn more about the error.
To access the execution status in Qalyptus Server, go to the Status page> On-Demand requests.
Subscribe to receive reports by email
As you can see in the overview video, a user can create a subscription to send different reports to different recipients at a regular interval.
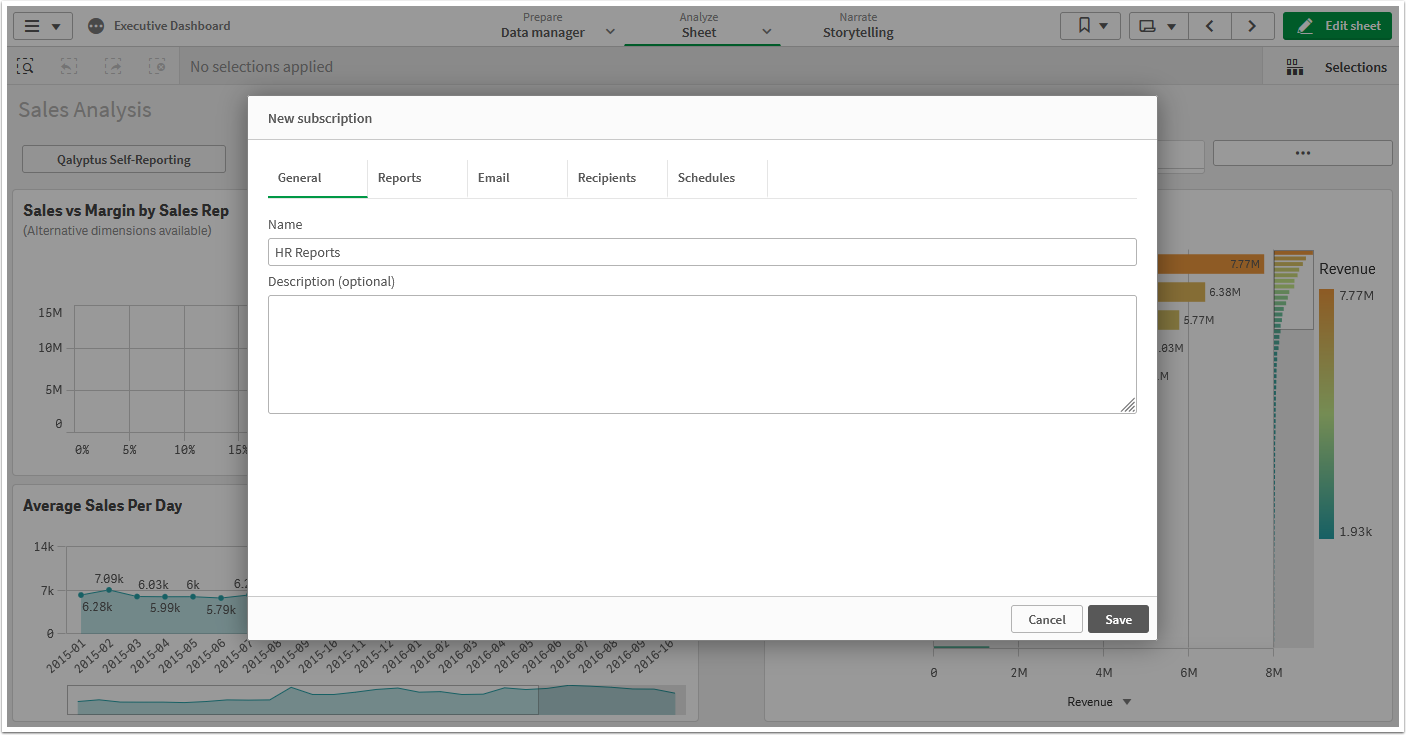
To create a subscription, do the following:
- Open Qalyptus Self-Reporting
- Select Subscriptions tab
- Click Subscribe
- Give a name to the subscription
- Enter a description (optional)
- Go to the Reports tab
- Click Add Report
- Select a report
- Choose the output formats
- For HTML reports, check “Attach the report in email” to attach the report check “Embed the report in email” to have the possibility to embed the report in the email message
- Select a bookmark if you want to apply it before generating the report
- Check “Use current selection” if you want to apply the current selections before generating the report
- Click Add
- Go to the Email tab
- Enter the email subject
- Add the email message
- If you want, you can embed an HTML report. In the text editor, click Embed report then select a report from the list
- Go to the Recipients tab
- Click Add Users
- Select the recipients of the email from the user list. If the user does not exist, click Create user to create a new user. The new user will only be visible to his creator
- Click Add
- Go to the Schedules tab
- Select a Frequency and the Time zone
- Click Save
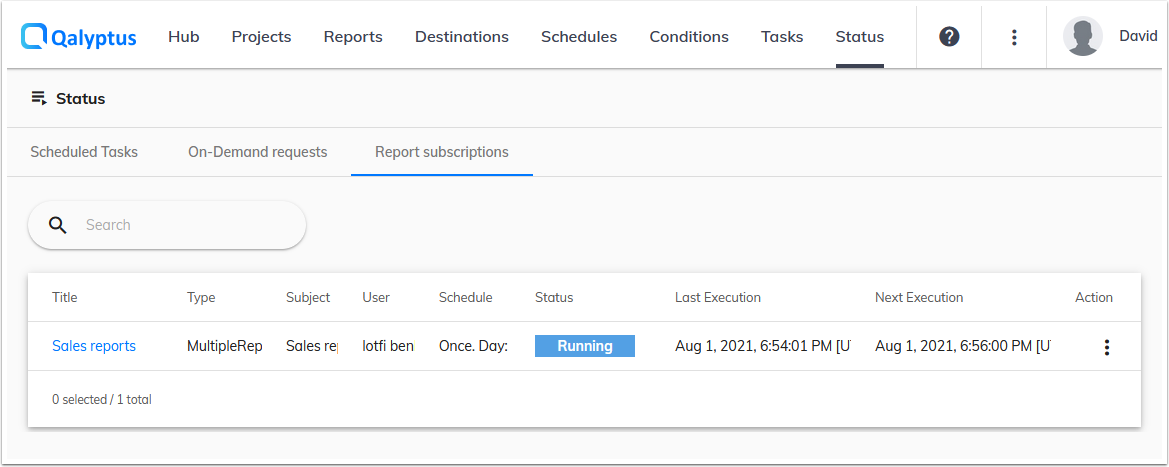
The subscription has been created and the recipients will receive by email the reports at the chosen frequency. You can edit or delete the subscription at any time. You can also run the subscription manually, the details of the execution are on the Status page.
To access the subscription status in Qalyptus Server, go to the Status page> Report subscriptions.